This Dubai Chocolate Milkshake is rich, creamy, and just a little over-the-top—in the best possible way. It starts with a thick chocolate slushie base, then gets layered with pistachio spread, chocolate syrup, and crushed waffle cones for that sweet, nutty crunch inspired by Dubai chocolate.
It looks like a specialty dessert-shop drink, but the Ninja Slushi does most of the work. This one is perfect when an ordinary chocolate milkshake simply isn’t feeling dramatic enough.
Why You’ll Love This Recipe
Rich and creamy chocolate flavor
Sweet pistachio topping
Crunch from crushed waffle cones
Easy to make in the Ninja Slushi
Fun enough for parties or dessert night
Ingredients
Chocolate Slushie Base
4 cups chocolate milk
1 cup regular milk
2–3 tablespoons instant chocolate pudding mix
Toppings
Bettergoods Pistachio Nut Butter
Chocolate syrup
Crushed waffle cones
Whipped cream, optional
Mini chocolate chips or M&M’s, optional
Instructions
Make the Chocolate Base
Add the chocolate milk, regular milk, and instant chocolate pudding mix to a large bowl or pitcher.
Whisk until the pudding mix is completely dissolved and the mixture is smooth.
Pour the chocolate mixture into the Ninja Slushi.
Process according to the machine’s instructions until thick and slushy.
Assemble the Milkshakes
Warm the pistachio nut butter in the microwave for about 10–15 seconds, just until it is easy to drizzle.
Fill each glass with the chocolate slushie.
Drizzle the warmed pistachio spread over the top.
Add a generous drizzle of chocolate syrup.
Sprinkle with crushed waffle cone pieces.
Add whipped cream, mini chocolate chips, or M&M’s if desired.
Serve immediately.
Tips for the Best Milkshake
Whisk the pudding mix thoroughly so there are no dry clumps.
Start with cold milk so the Ninja Slushi can thicken the mixture more easily.
Warm the pistachio spread only long enough to make it pourable.
Crush the waffle cones into a mixture of fine crumbs and larger pieces for the best texture.
Drizzle pistachio spread and chocolate syrup inside the glass before filling for an extra dessert-shop look.
This Dubai Chocolate Milkshake is thick, chocolatey, nutty, and crunchy all at once. It is definitely not a quiet little milkshake—and that is exactly why it is so good.
Lasagna is one of those meals that immediately makes the house feel cozy. It is warm, cheesy, filling, and perfect for feeding a hungry family without needing a table full of complicated side dishes.
This version keeps things simple with a hearty meat sauce, creamy ricotta filling, and plenty of melted mozzarella. It tastes like a classic homemade lasagna should, but it is straightforward enough to make on an ordinary weeknight.
Why You’ll Love This Recipe
Simple, familiar ingredients
Rich, cheesy, and filling
Easy to assemble
Great for feeding a family
Leftovers taste even better the next day
Ingredients
Lasagna noodles
1 pound ground beef
1 onion, chopped
2–3 cloves garlic, minced
1 jar marinara or spaghetti sauce
15 ounces ricotta cheese
2–3 cups shredded mozzarella cheese
½ cup grated Parmesan cheese
1 egg
Italian seasoning, to taste
Dried basil, to taste
Dried oregano, to taste
Salt and pepper, to taste
Instructions
Make the Meat Sauce
Brown the ground beef in a large skillet over medium heat.
Add the chopped onion and cook until softened.
Stir in the minced garlic and cook briefly, just until fragrant.
Drain any excess grease.
Add the marinara sauce, Italian seasoning, basil, oregano, salt, and pepper.
Let the sauce simmer for 10–15 minutes.
Make the Ricotta Filling
Add the ricotta cheese, egg, Parmesan, salt, and pepper to a bowl.
Stir until the mixture is smooth and evenly combined.
Cook the Noodles
Bring a large pot of salted water to a boil.
Cook the lasagna noodles until al dente according to the package directions.
Drain the noodles and set them aside.
Assemble the Lasagna
Preheat the oven to 375°F.
Spread a thin layer of meat sauce across the bottom of a baking dish.
Add a layer of lasagna noodles.
Spread some of the ricotta mixture over the noodles.
Add another layer of meat sauce.
Sprinkle with shredded mozzarella.
Repeat the layers until all the ingredients have been used.
Finish with sauce and a generous layer of mozzarella on top.
Bake
Cover the baking dish with aluminum foil.
Bake for 25 minutes.
Remove the foil and bake for another 15–20 minutes, or until the cheese is melted, golden, and bubbling around the edges.
Let the lasagna rest for 15–20 minutes before slicing.
Serving Suggestions
Serve this lasagna with:
Garlic bread
A simple garden salad
Roasted broccoli
Green beans
Caesar salad
Tips for the Best Lasagna
Let the meat sauce simmer so the flavors have time to come together.
Do not overcook the noodles before assembling the lasagna.
Cover the lasagna during the first part of baking so the cheese does not brown too quickly.
Let it rest before cutting. This helps the layers stay together instead of sliding all over the plate.
Add extra mozzarella on top if your family believes there is no such thing as too much cheese. They are correct.
This easy homemade lasagna is warm, hearty, and exactly the kind of meal everyone is happy to see on the table. It is simple enough for family dinner but comforting enough to feel a little special.
If you’ve never cooked pork chops sous vide before, you’re in for a treat. This method takes all the guesswork out of cooking and gives you juicy, tender pork chops every single time. No more dry, overcooked meat—just perfectly cooked pork with a beautiful golden crust from a quick sear.
Whether you’re making a weeknight dinner or cooking for guests, this recipe is simple enough for beginners but tastes like something from a nice steakhouse.
Why You’ll Love This Recipe
Foolproof and incredibly juicy
Tender from edge to edge
Full of garlic and herb flavor
Finished with a rich butter baste
Perfect for weeknight dinners or special occasions
Ingredients
2–4 thick-cut pork chops (1–1½ inches thick, boneless or bone-in)
1½ teaspoons kosher salt
1 teaspoon black pepper
1 teaspoon garlic powder
2 sprigs fresh thyme or rosemary
2 cloves garlic, smashed
2 tablespoons butter, divided
1 tablespoon neutral oil (avocado or canola)
Optional Flavor Boost
½ teaspoon smoked paprika
Pinch of red pepper flakes
Sous Vide Temperature
For juicy pork with a slight blush in the center:
140°F (60°C)
For fully white pork:
145°F
Instructions
Step 1: Season the Pork
Pat the pork chops dry with paper towels.
Season both sides with the salt, pepper, garlic powder, and optional smoked paprika.
Place the pork chops into a vacuum-seal or zip-top freezer bag along with the smashed garlic, fresh herbs, and 1 tablespoon of butter.
Seal the bag using a vacuum sealer or the water displacement method.
Step 2: Sous Vide
Preheat your sous vide water bath.
Cook according to thickness:
1-inch pork chops: 1½ hours
1½-inch pork chops: 2 hours
Once finished, remove the pork chops from the bag and pat them completely dry. This is the secret to getting a beautiful crust.
Step 3: Sear
Heat a cast-iron skillet over high heat until it’s just beginning to smoke.
Add the neutral oil.
Sear each pork chop for 45–60 seconds per side until golden brown.
Reduce the heat slightly, then add the remaining tablespoon of butter along with the herbs.
Tilt the skillet and spoon the melted butter over the pork chops for about 15–20 seconds.
If your pork chops have a thick fat cap, stand them on their sides for a few seconds to render and crisp the fat.
Optional Garlic Butter Pan Sauce
Don’t waste all those flavorful browned bits!
After removing the pork chops, add:
A splash of chicken broth or white wine
Scrape the bottom of the skillet
Simmer for about 30 seconds
Stir in a small pat of butter
Finish with a squeeze of fresh lemon juice
Spoon the sauce over the pork chops before serving.
Serving Suggestions
These pork chops pair wonderfully with:
Roasted baby potatoes
Garlic green beans
Creamy mashed potatoes
A fresh garden salad with vinaigrette
Roasted asparagus
Tips for Perfect Sous Vide Pork Chops
Choose pork chops that are at least 1 inch thick for the best results.
Dry the pork thoroughly before searing to achieve a deep golden crust.
Fresh herbs add incredible flavor while cooking in the bag.
Don’t skip the final butter baste—it adds richness and helps develop a beautiful finish.
Frequently Asked Questions
Can I use bone-in pork chops? Absolutely! Bone-in and boneless both work beautifully. Just use chops that are at least an inch thick.
Do I need a vacuum sealer? No. A freezer-safe zip-top bag and the water displacement method work just as well.
Can I cook them longer? Yes. Sous vide is very forgiving, and an extra 30–60 minutes won’t hurt the texture.
Can I make these ahead of time? Yes! After the sous vide bath, refrigerate the sealed bag. When you’re ready to eat, simply reheat in the water bath for about 30 minutes and finish with a quick sear.
Once you try pork chops cooked sous vide, it’s hard to go back. They’re consistently juicy, incredibly tender, and packed with flavor thanks to the garlic, herbs, and buttery finish. Pair them with your favorite sides, and you’ve got an easy dinner that feels like a restaurant-quality meal right at home.
If you’re anything like me, coffee isn’t just about the caffeine—it’s about the experience. This homemade Caramel Crunch Frappuccino has quickly become one of my favorite afternoon treats because it tastes like something you’d grab from your favorite coffee shop, but it’s made right at home with the Ninja Creami.
It’s rich, creamy, packed with caramel flavor, and finished with the perfect buttery crunch on top. Best of all, you can customize the sweetness exactly how you like it.
Why You’ll Love This Recipe
Creamy coffeehouse texture
Rich caramel flavor in every sip
Much less expensive than buying one at a café
Easy to customize with your favorite milk or toppings
Perfect for hot summer afternoons
Ingredients
Frappuccino Base
1 cup strong brewed coffee, cooled
½ cup whole milk (or 2%)
¼ cup heavy cream
3–4 tablespoons thick caramel sauce
2 tablespoons sugar or simple syrup
¼ teaspoon vanilla extract
Tiny pinch of salt
Caramel Crunch Topping
1 tablespoon toffee bits
1 tablespoon crushed vanilla wafers or shortbread cookies
Pinch of salt
For Serving
Caramel sauce
Whipped cream
Instructions
Freeze the Base
Whisk together the coffee, milk, heavy cream, caramel sauce, sugar, vanilla, and salt until completely smooth.
Pour the mixture into a Ninja Creami pint container.
Freeze on a level surface for 24 hours.
Spin
Insert the frozen pint into the Ninja Creami.
Select Lite Ice Cream.
After the first spin, create a small hole in the center.
Add about 3 tablespoons of milk or half-and-half.
Press Respin until the mixture becomes smooth and creamy.
Assemble
Drizzle caramel sauce around the inside of your glass.
Fill the glass halfway with the Frappuccino.
Add another drizzle of caramel.
Fill the rest of the glass.
Top generously with whipped cream.
Finish with more caramel sauce and the caramel crunch topping.
Serve immediately and enjoy!
Tips for the Best Frappuccino
Use freshly brewed strong coffee for the richest flavor.
A thick caramel sauce works much better than a thin syrup.
If your Creami mixture looks crumbly after the first spin, don’t worry—that’s completely normal. One or two respins usually creates the perfect texture.
Freeze your serving glass for 10–15 minutes before pouring for an extra frosty coffeehouse feel.
Frequently Asked Questions
Can I make it decaf? Absolutely! Just substitute your favorite decaf coffee.
Can I use dairy-free milk? Yes. Whole milk gives the creamiest texture, but oat milk and almond milk both work well.
Can I make it sweeter? Of course. Add an extra tablespoon of caramel sauce or simple syrup to taste.
There’s something satisfying about recreating your favorite coffee shop drinks at home, and this Caramel Crunch Frappuccino definitely delivers. It’s creamy, sweet, and has just the right amount of crunch on top. Whether you’re relaxing by the pool, tackling a DIY project, or simply treating yourself after a long day, this is one recipe you’ll want to make again and again.
There are some desserts that instantly feel like home, and peach cobbler is one of them. Warm peaches bubbling beneath a buttery, golden crust with a scoop of vanilla ice cream melting over the top… it doesn’t get much better.
This recipe is incredibly simple to make, but it tastes like it took all afternoon. Whether you’re using fresh peaches from the farmer’s market, frozen peaches from the freezer, or canned peaches from the pantry, it turns out delicious every single time. It’s one of those desserts that’s perfect for family dinners, summer cookouts, or holiday gatherings.
Ingredients
For the Peach Filling
4 cups peaches (fresh, frozen, or canned—drained if canned)
¾ cup granulated sugar
1 tablespoon lemon juice
1 teaspoon vanilla extract
1 teaspoon ground cinnamon
1 tablespoon cornstarch (optional, for a thicker filling)
For the Batter
½ cup (1 stick) butter
1 cup all-purpose flour
1 cup granulated sugar
1 cup milk
1½ teaspoons baking powder
¼ teaspoon salt
Instructions
Preheat your oven to 350°F.
Place the butter in a 9×13-inch baking dish and let it melt while the oven preheats.
In a large bowl, combine the peaches, sugar, lemon juice, vanilla, cinnamon, and cornstarch if using. Stir until well mixed.
In another bowl, whisk together the flour, sugar, milk, baking powder, and salt until smooth.
Carefully pour the batter over the melted butter. Do not stir.
Spoon the peach mixture evenly over the batter. Again, do not stir. As it bakes, the batter will rise around the peaches and create a beautiful crust.
Bake for 40–45 minutes, or until the top is golden brown and the filling is bubbling around the edges.
Allow the cobbler to cool for about 10 minutes before serving.
Tips for the Best Peach Cobbler
Fresh peaches provide the best flavor during peach season, but frozen peaches work beautifully year-round.
If using canned peaches, be sure to drain them well so the cobbler doesn’t become watery.
Sprinkle a little brown sugar over the top before baking for an extra caramelized crust.
Fresh raspberries make a delicious addition if you’re looking for a little tartness.
Serve warm with a generous scoop of vanilla ice cream or fresh whipped cream.
Frequently Asked Questions
Can I make this ahead of time? Yes! Bake it earlier in the day and simply warm individual servings before serving.
Can I freeze peach cobbler? Absolutely. Allow it to cool completely, cover tightly, and freeze for up to three months. Thaw overnight in the refrigerator and reheat in the oven until warmed through.
Can I use other fruit? Definitely! This recipe is also wonderful with blackberries, blueberries, apples, cherries, or a combination of your favorite fruits.
Some mornings just call for something simple that everyone will actually eat. This breakfast casserole has become one of our favorites because it’s hearty, filling, and easy enough to throw together without making a huge mess in the kitchen.
I love that it can be prepped ahead of time if needed, and it’s also a great way to use ingredients I usually already have in the freezer. Whether we’re feeding family for the holidays or just making a lazy Saturday breakfast, this recipe never lasts long.
Ingredients
1 pound breakfast sausage
1–2 cups frozen shredded hash browns
1–2 cups frozen peppers
6–8 eggs
½ cup milk
1–2 cups shredded Colby Jack and Cheddar cheese
1 teaspoon garlic powder
1–2 teaspoons minced garlic (optional)
Salt and pepper to taste
Instructions
Preheat your oven to 375°F.
Brown the breakfast sausage in a skillet and drain any excess grease.
Add the frozen peppers and hash browns to the skillet and cook until softened.
Stir in the garlic powder and minced garlic if using.
In a separate bowl, whisk together the eggs, milk, salt, and pepper.
Grease a baking dish and spread the sausage mixture evenly across the bottom.
Sprinkle cheese throughout the casserole and on top.
Pour the egg mixture evenly over everything.
Bake for 30–40 minutes, or until the eggs are completely set.
Let the casserole rest for about 5–10 minutes before slicing.
Tips
Add cooked bacon or diced ham for even more flavor.
Pepper Jack cheese gives it a little kick.
Leftovers reheat really well the next morning.
Serve with fresh fruit and biscuits for a complete breakfast.
There are some recipes that quietly become part of your regular routine, and this is one of ours.
It has everything I love in a weeknight dinner. It’s quick enough for a busy evening, tastes better than takeout, and doesn’t leave the kitchen looking like a disaster afterward. The beef stays tender, the broccoli still has a little bite, and the sauce is rich enough that everyone ends up spooning a little extra over the rice.
If you’re looking for one of those meals that earns a permanent place in your dinner rotation, this one is worth keeping.
Beef & Broccoli Stir-Fry
Ingredients
For the Beef
1–1½ pounds flank steak, thinly sliced against the grain
Quick Marinade
1 tablespoon soy sauce
1 teaspoon cornstarch
1 teaspoon cooking oil
For the Stir Fry
2 large crowns broccoli, cut into florets
3 cloves garlic, minced
1 tablespoon fresh ginger, minced
3 green onions, sliced (optional)
2 tablespoons soy sauce
2 tablespoons oyster sauce
1 tablespoon brown sugar
1 cup beef broth
1 tablespoon cornstarch
1 teaspoon sesame oil
2–3 tablespoons cooking oil
Serve over jasmine or white rice.
Instructions
Toss the sliced beef with the marinade ingredients and let it rest for about 15 minutes.
Cook the rice according to package directions.
In a bowl, whisk together the broth, soy sauce, oyster sauce, brown sugar, cornstarch, and sesame oil.
Heat one tablespoon of oil in a hot skillet or wok.
Sear the beef for 1–2 minutes per side, then remove it from the pan.
Add another tablespoon of oil if needed and stir-fry the broccoli for 2–3 minutes.
Add the garlic and ginger and cook for another 30 seconds.
Return the beef to the skillet.
Pour in the sauce and stir until everything is coated and the sauce thickens.
Garnish with green onions and serve over hot rice.
A Few Notes
Slice the steak against the grain for the most tender bites.
Today, I wake up with great pride in my husband and children.
Robert and I spent one of our first dates climbing up Pinnacle Mountain with Subway in our backpacks. I had no idea then that he would be my husband, and those hikes we continued to take together were a foreshadowing of the future we were building in tandem.
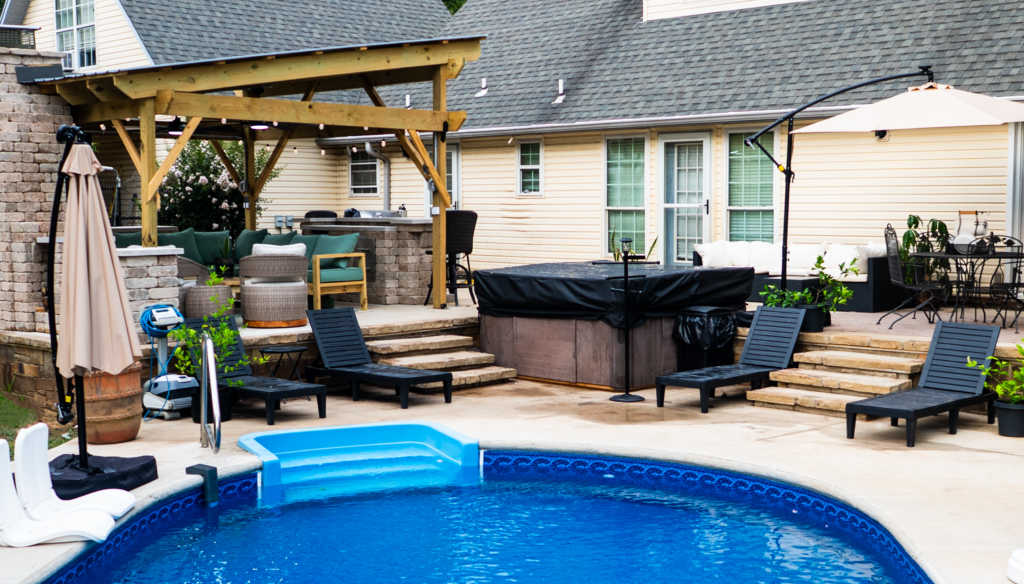
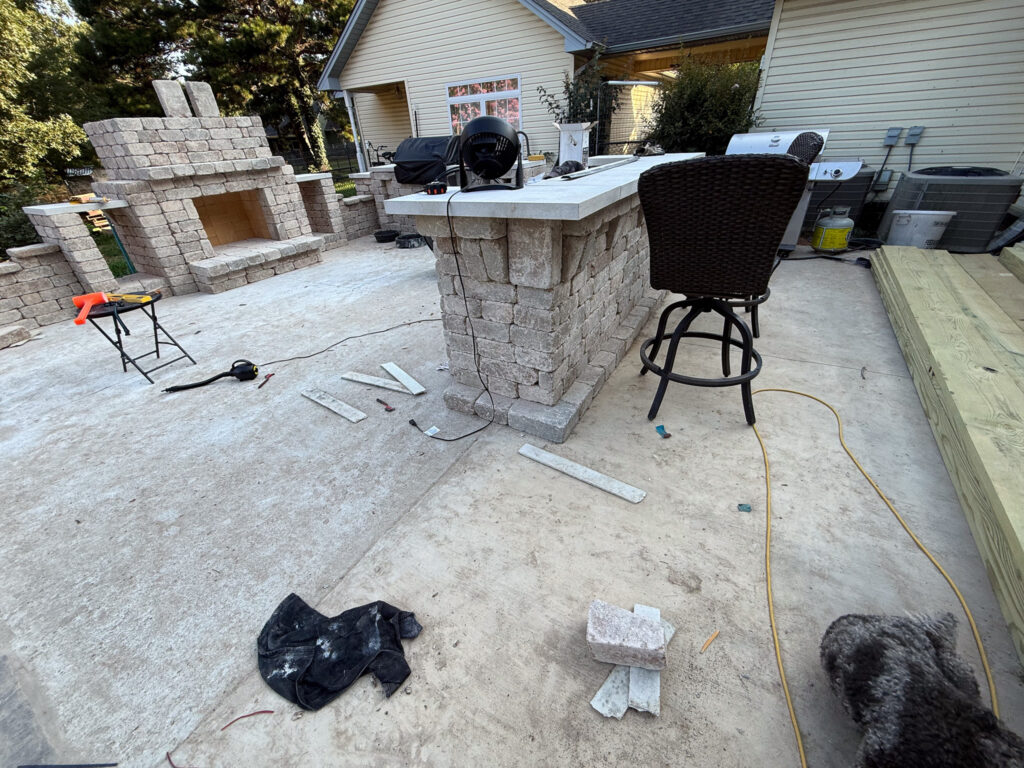
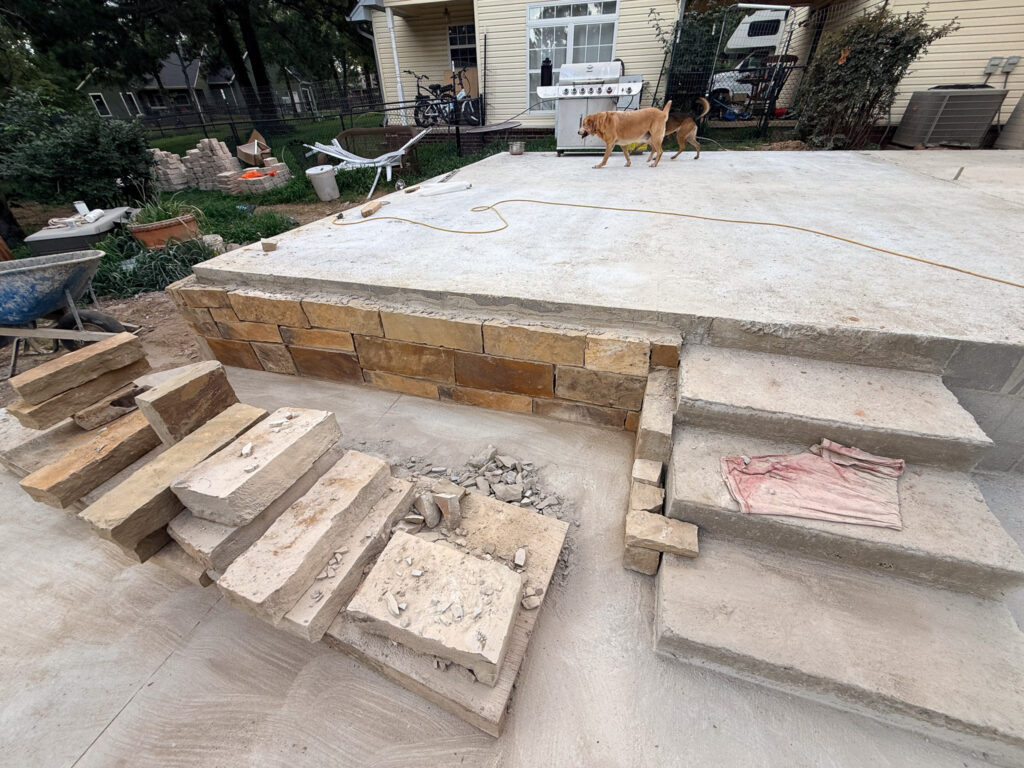
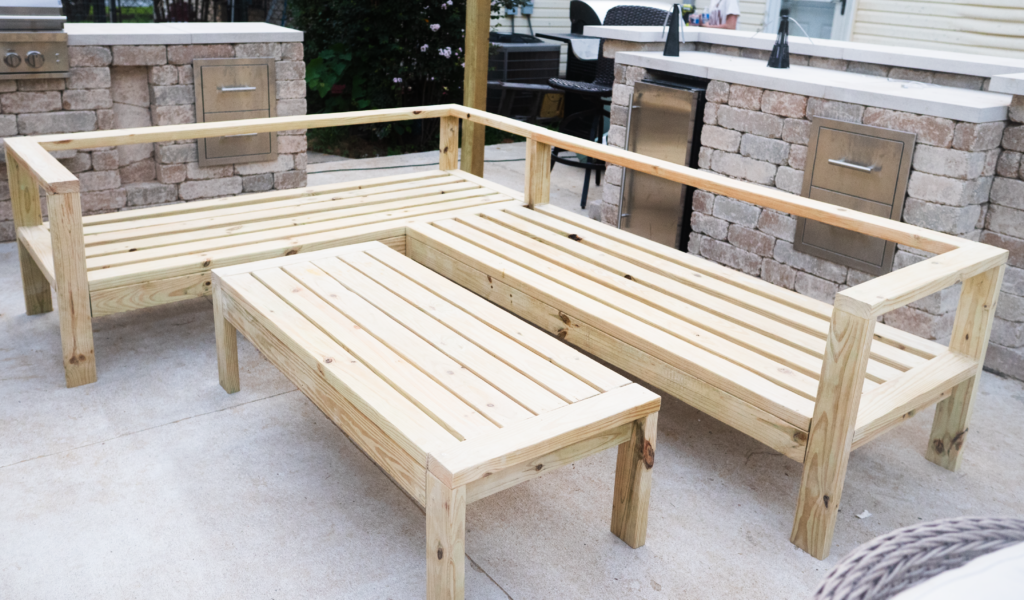
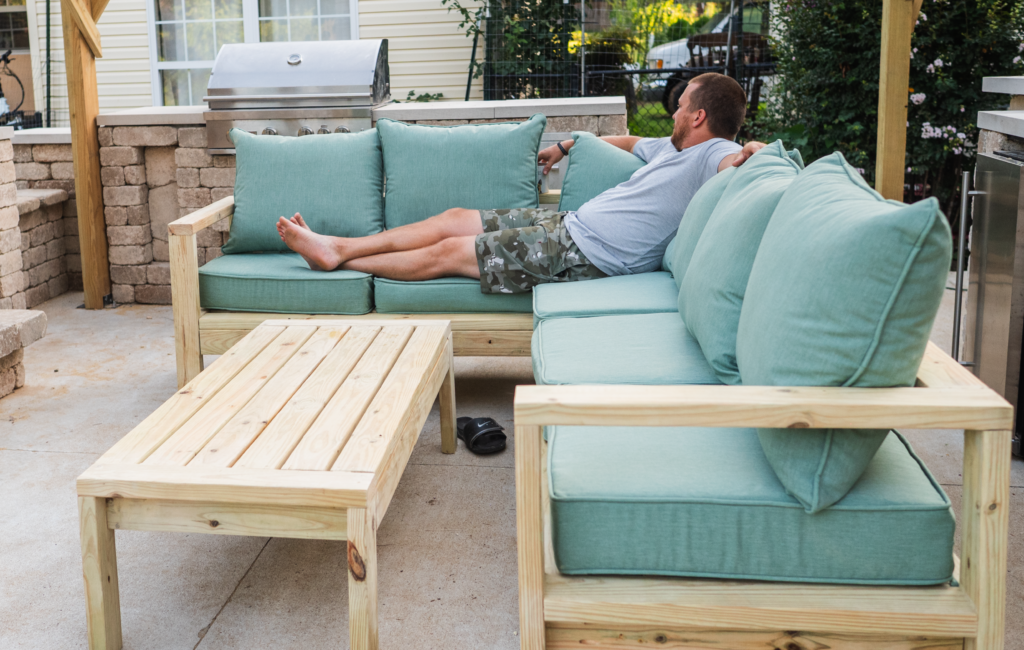
Recently, we decided to gut our entire backyard deck and pool area.
Before picture
It started because Robert said we needed a new pool liner. And if we were going to replace the liner, we needed to replace the skimmer. And if we were going to replace the skimmer, he would like to add another one to make maintaining the pool easier.
That led to tearing out the gravel around the pool and putting in concrete.
The pool before the make over.
Then that idea expanded to the wooden deck.
Eventually, we had a whole new slab of concrete designed.
We got numerous quotes for an outdoor kitchen, but they were ridiculously high. Then we finally got one reasonable quote, and the contractor sent us a picture of what we would get for that price.
It was so small that Robert and I laughed.
We clearly could not afford what we were looking for.
Eventually, Robert and I ran across a company called Cornerstone that sold backyard kitchen kits.
I was immediately thinking, This is going to be so easy. We can do this.
Robert was immediately thinking, This is crazy. I don’t know if we should do this.
We kind of have this thing in our marriage.
When I first met Robert, as smart and skilled as he is, he wouldn’t even do little things for me, like build a recipe box or make small wooden projects. It wasn’t because he didn’t love me or because he didn’t feel like doing them.
It was because he simply lacked the confidence to think he could do them.
And do them well.
But I was looking at these plans thinking, This looks just like sewing plans. We just stack these little bricks like they tell us.
We can do this.
Turns out, we were both wrong.
It was not easy.
But we could do it.
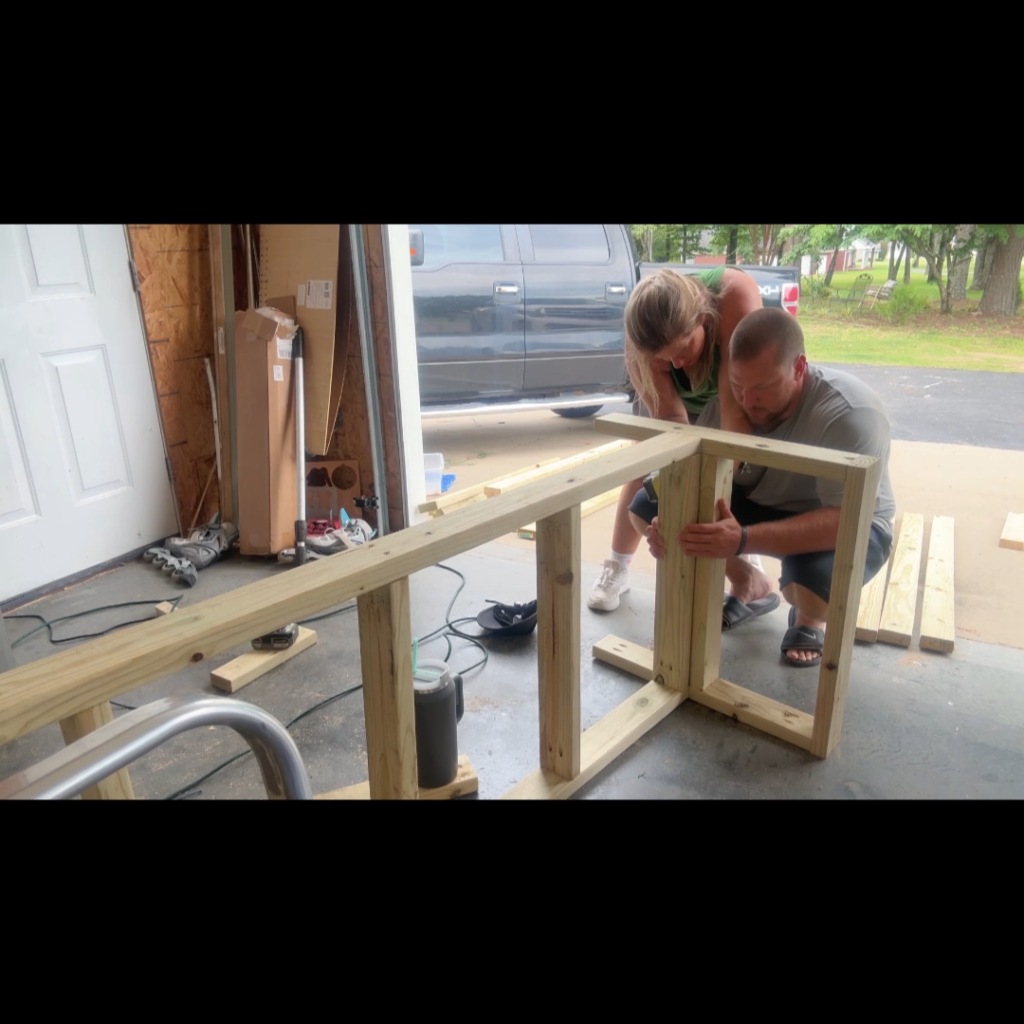
The first surprise came when the owner of the company called and told us that the first of our two shipments was coming.
Nine pallets of block.
I think Robert’s anxiety immediately spiked because he was thinking, How am I going to fit all of those in the garage?
I am pretty practical, and I also look for ways to cut corners, so I was immediately like, “These bricks are going toward an outdoor kitchen. They can literally live outdoors.”
Problem solved.
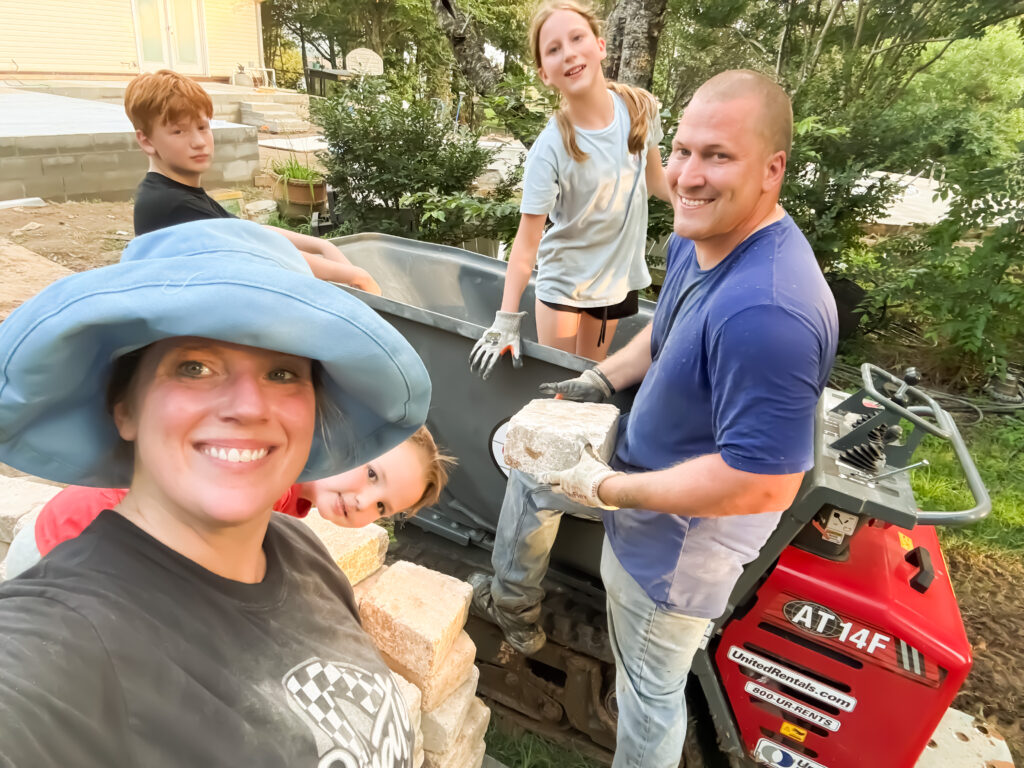
Except then the delivery people offered to use a forklift to take the pallets up to the garage. It took everything Robert—who is very strong—the delivery man, and our son had just to help get the forklift up our driveway.
And that was when we began to understand exactly what we had gotten ourselves into.
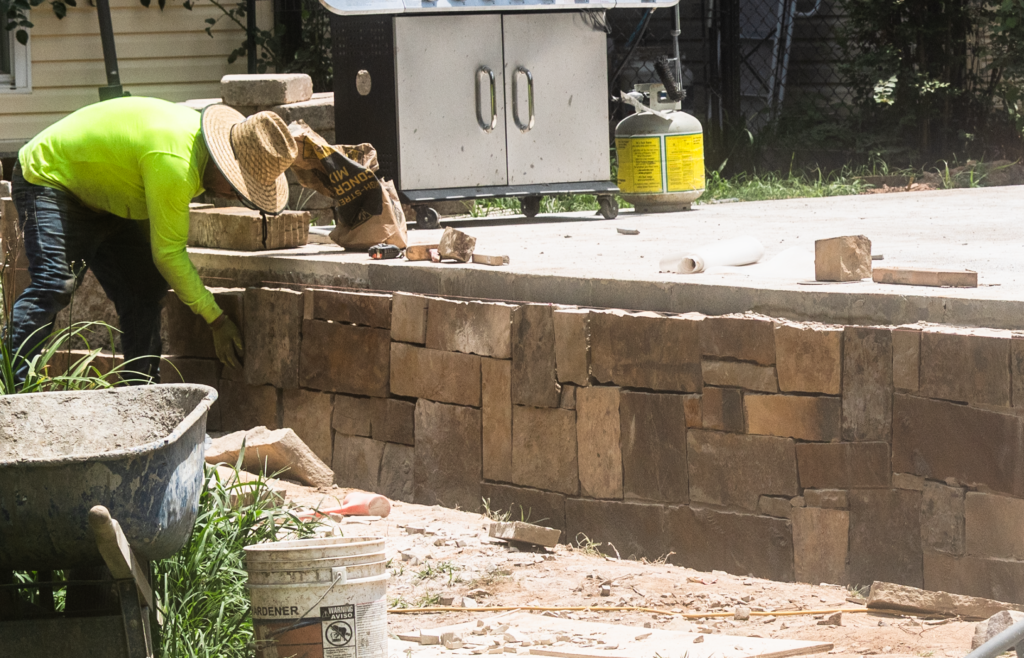
Those blocks now had to make it completely around our property and into the backyard, where the construction was going to take place. They also needed to get close enough to the concrete pad that building with them wouldn’t be entirely impossible.
We wanted the whole kitchen finished by the Fourth of July, but we had a problem: our concrete needed time to cure.
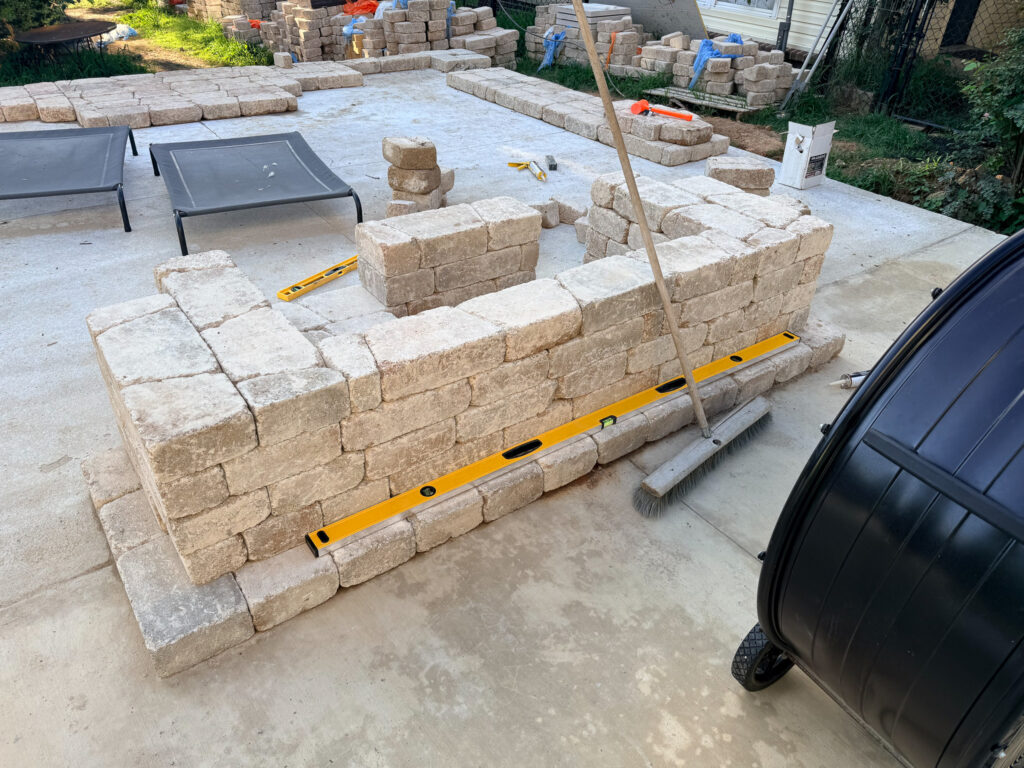
So on day 14, I suggested that we start with one row.
Then another layer.
Then another.
Once we finished that, we moved on to the next thing.
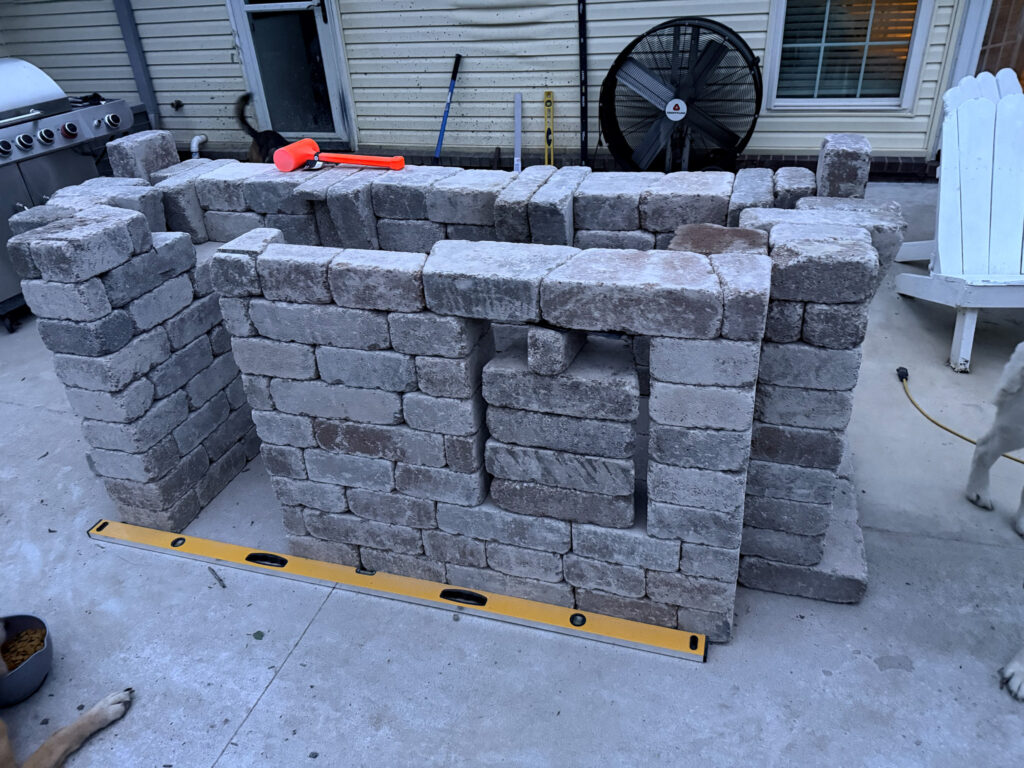
Robert did a lot of the first and second structures by himself, but then we got to the fireplace.
It was much bigger.
And I knew I needed to jump in.
So we did it together.
And we worked.
Night after night, we would start when Robert got home from work and keep going until 10:00 or 11:00 at night. Then we would feed our family whatever restaurant was still open.
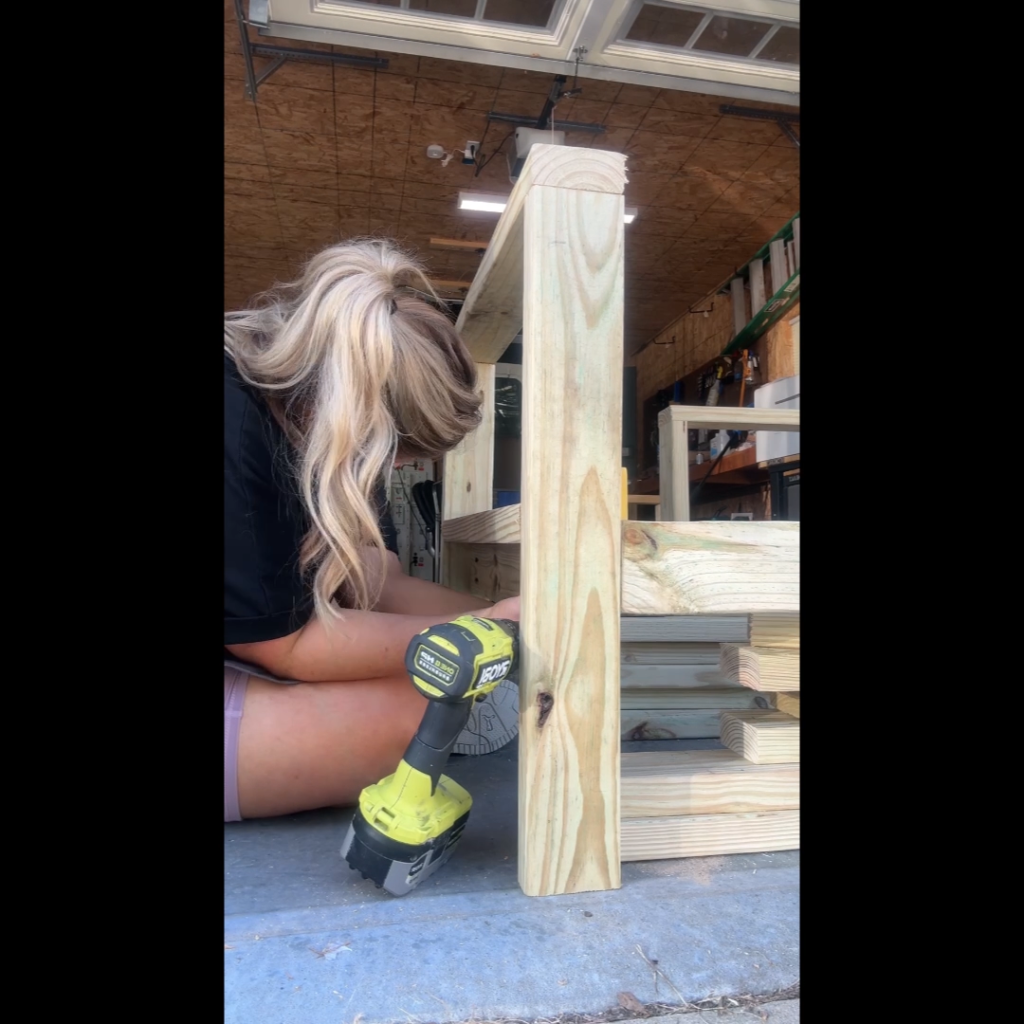
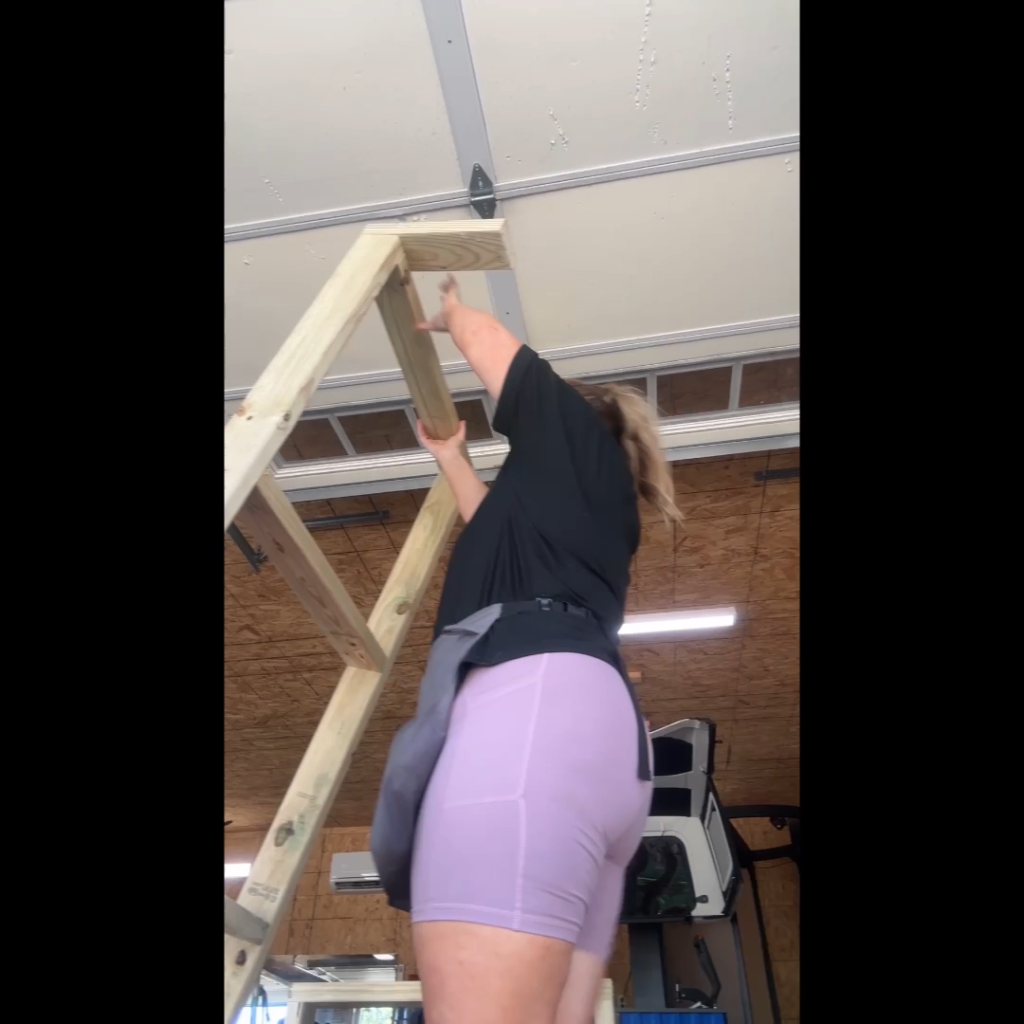
And then we would get up and do it again.
We were exhausted.
We were sore.
We were working in 100-degree heat.
We both lost weight during the process.
Then one night, I woke up around 3:00 in the morning and realized Robert wasn’t beside me.
I thought for sure he had gone to check on the pool. He had been having anxiety about it, so I figured he had gone to check the liner and would be right back.
I waited for him to come back.
I tried to fall asleep, but I couldn’t.
Before I knew it, it was 5:00 in the morning, and Robert came through our bedroom door to get ready for work.
He had been on the couch the whole time.
He was in so much muscle pain that his arms were going numb.
Mine were too.
We did eventually discover that if you prop yourself up on a cushion instead of lying flat, it helps with some of the numbness. A helpful tip, I suppose, if you ever decide to move and stack 25,000 pounds of concrete blocks.
Anyway, Robert crawled into bed just to sit with me.
We were both thinking about how much work we had already done.
How much work we still had left.
How sore we were.
Then Robert pulled up his fitness ring app.
He had slept for 29 minutes.
Twenty-nine minutes.
And I just started sobbing.
How much could we put on each other?
How much could we put on him?
He still had to go to work.
I’ve learned recently that I have an anxious attachment, and I don’t like rupture. I don’t like unpredictability. And this felt unpredictable to me because my husband was about to go to work on 29 minutes of sleep.
I immediately started feeling all the things I knew he was going to feel—the queasiness I get when I don’t sleep, the irritability, the exhaustion.
I think that is just the empath in me. I hurt deeply when I love somebody, and I can feel almost anyone’s pain.
It’s the weirdest thing.
Robert told me not to cry.
He told me he was going to be fine.
And then he went to work.
I cried for about 30 minutes after he left until I finally cried myself back to sleep.
When I woke up, I felt okay.
But I was determined to get us to bed early that night.
Those were some of the hard moments we went through to make this happen.
But through the whole thing, I learned how ridiculously strong Robert is.
I don’t think I ever fully realized his strength.
He continues to amaze me every day, and one thing is for sure: I will never again be surprised when he surprises me with something new he can do.
We worked.
We stacked block after block after block.
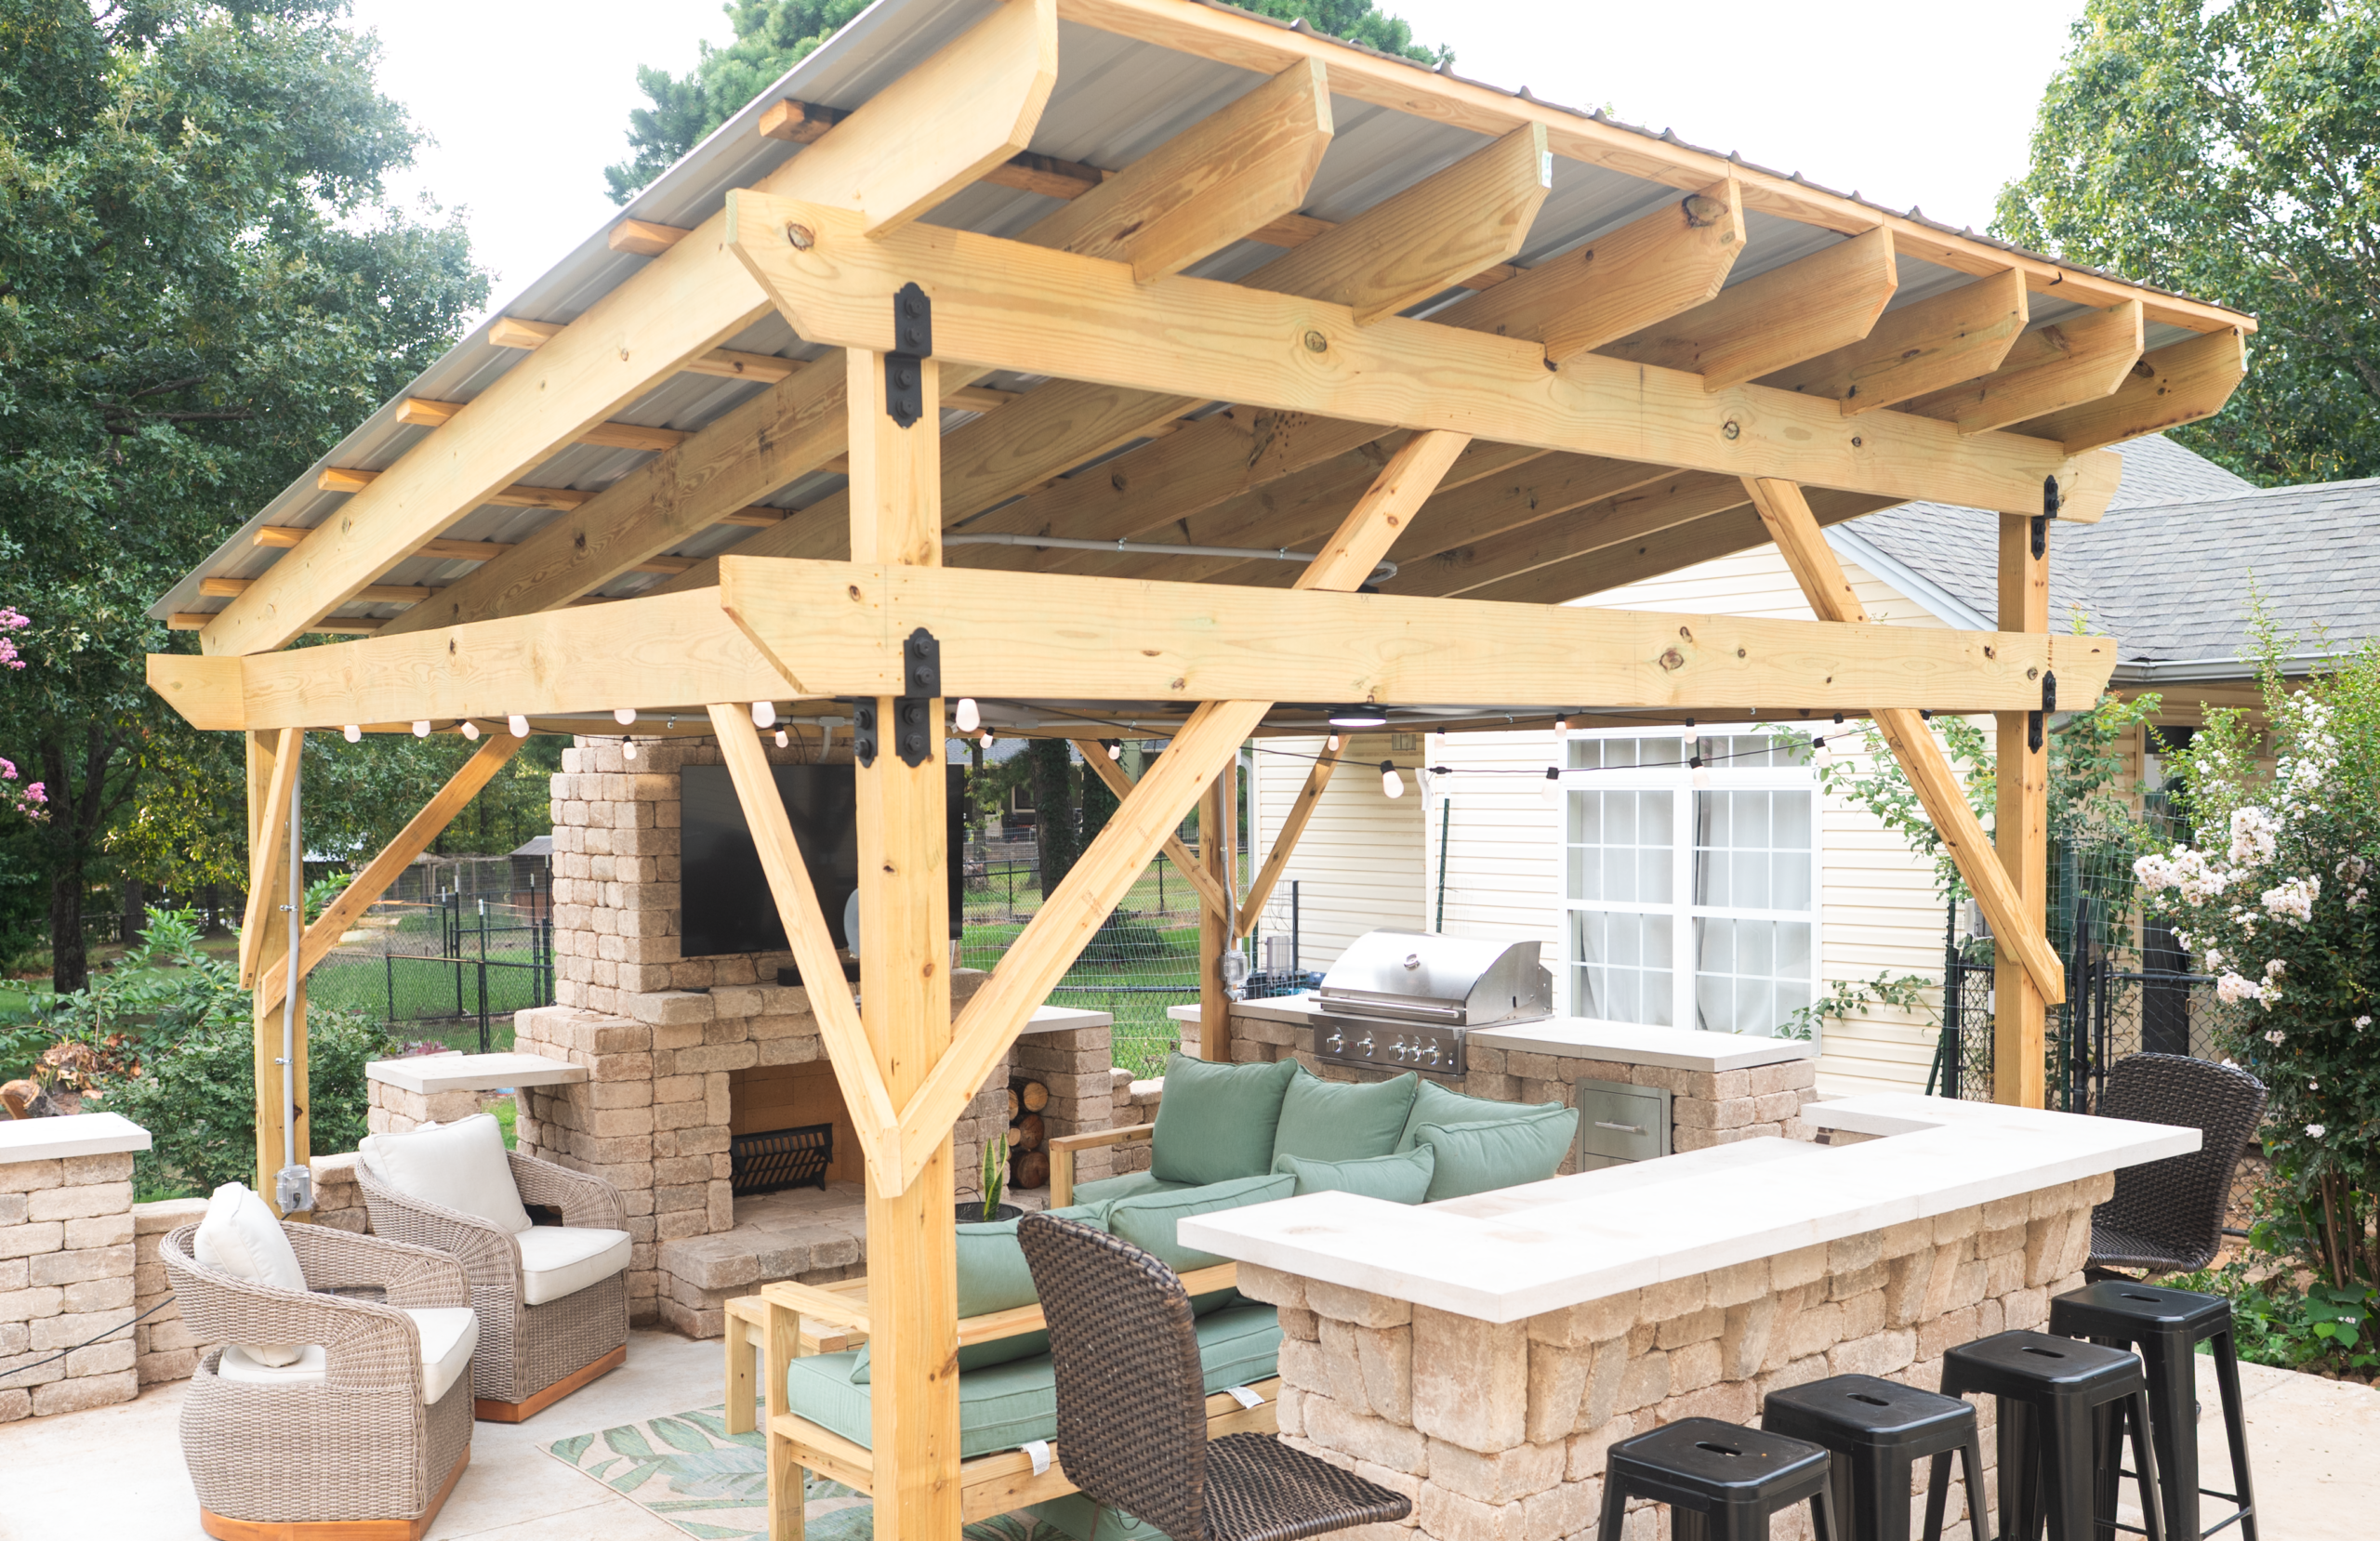
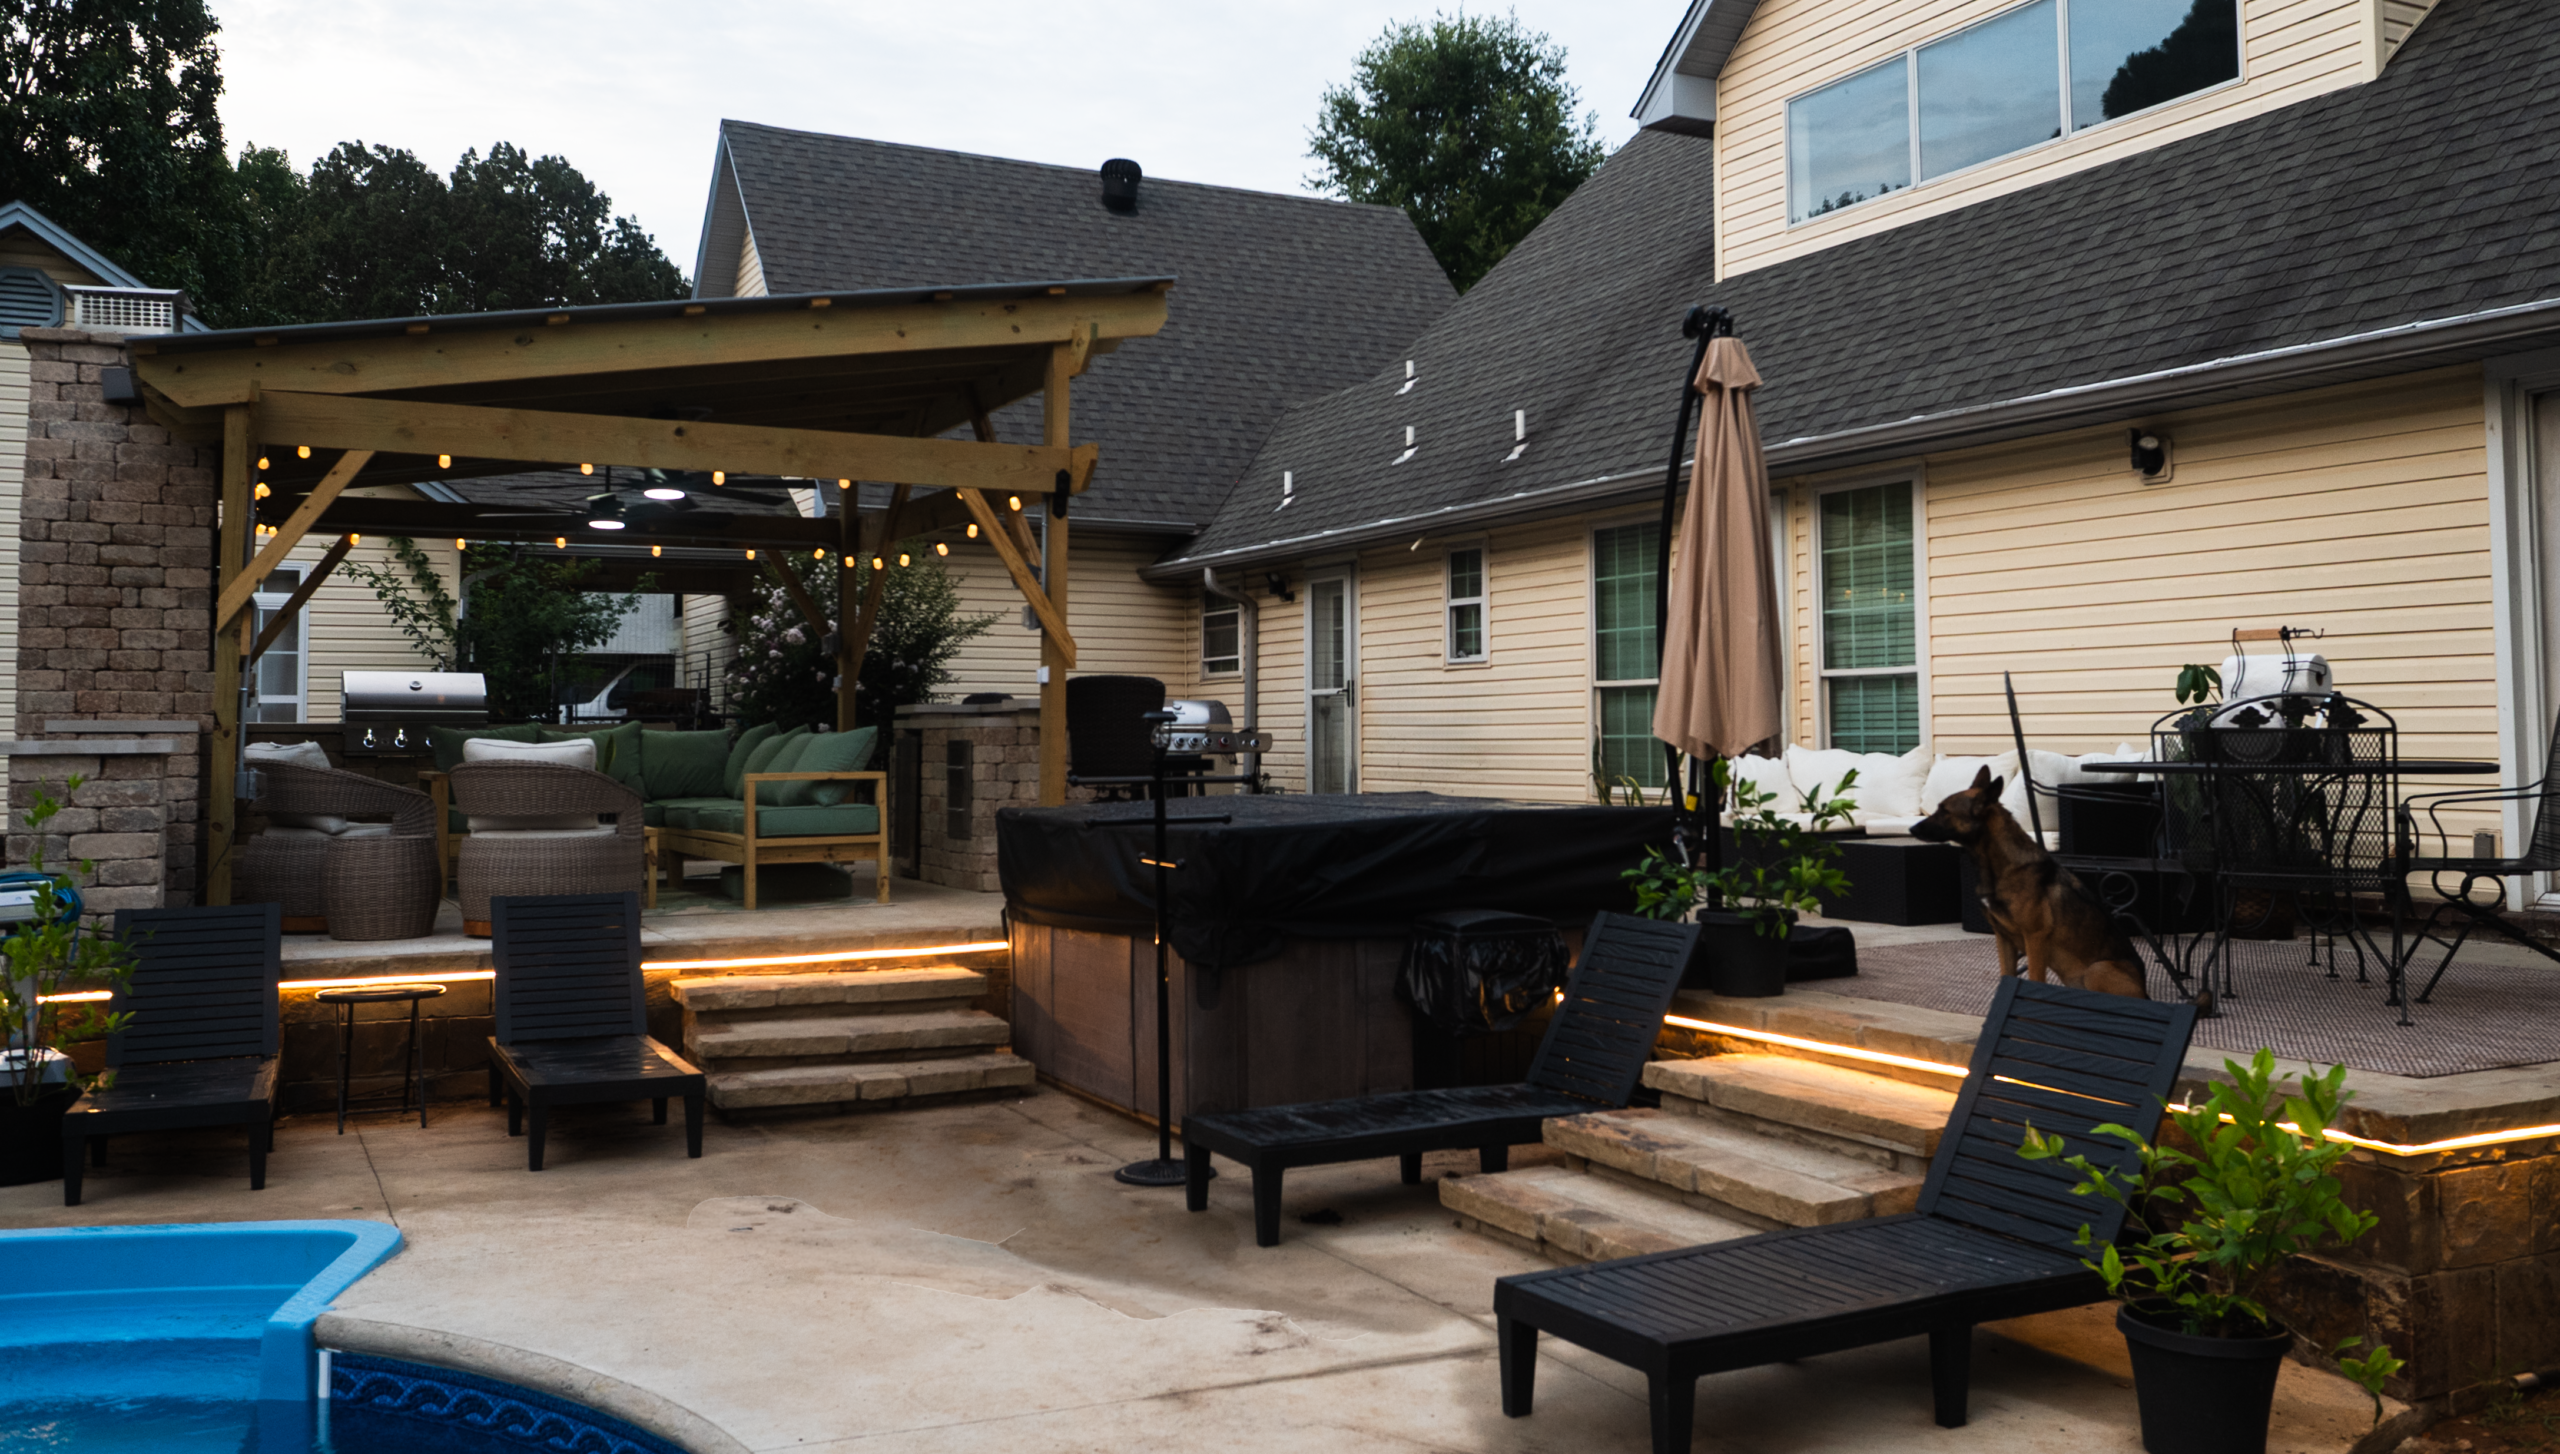
We built a ten-foot-tall fireplace.
An island.
A kitchen and grill area.
It was one of the hardest and most rewarding things I have ever done.
And while we built it together, Robert was the backbone of the whole thing.
He made sure everything was level. He had to learn how to use mortar because the adhesive that came with the kit was only useful if you already had a level surface.
Our concrete, as concrete almost always is, was slightly unlevel.
So Robert had to mortar it.
He was nervous about that because, like I said, he doesn’t like to do anything unless he can do it with perfection and precision.
Then he learned that he was skilled at that too.
And we just kept working.
Night after night.
Round after round.
Block after block.
And it reminded me of the first time we climbed Pinnacle Mountain together.
We climbed because we wanted to get to the top.
That is what this was too.
We were climbing because we wanted an outdoor kitchen that was affordable to us.
We climbed through 25,000 pounds of blocks.
Through 100-degree heat.
Through sore muscles and numb arms.
Through 29 minutes of sleep.
Through mortar and measurements and making sure everything was level.
We kept climbing.
And somewhere along the way, our children started climbing with us.
They carried blocks.
They worked beside us.
They watched their dad learn how to do something he had never done before.
They watched their mom look at something enormous and say, We can do this.
And then they watched us do it.
Robert and I spent one of our first dates climbing a mountain together with Subway in our backpacks.
I had no idea then that I would marry him.
I had no idea that we would build a life together.
I had no idea that, years later, we would stand in our backyard with four children, surrounded by thousands of pounds of concrete blocks, building something that once seemed completely beyond us.
But I think those early hikes were a foreshadowing of the future we were building in tandem.
Because we like doing hard things together.
And I think that is what marriage is.
Every day, doing hard things.
Sometimes carrying more than you think you can carry.
Sometimes looking at the person beside you and realizing you never fully understood how strong they were.
Sometimes climbing when you are tired.
Sometimes climbing when you are sore.
Sometimes climbing when you have no idea how much farther you have to go.
Robert is putting the final cap on the fireplace.
But continuing to climb because you want to see what is waiting at the top.
And today, when I look at what we built, I am ridiculously proud.
Not just of the fireplace.
Not just of the kitchen.
Not just of the 25,000 pounds of concrete blocks that somehow made their way from our driveway, around our property, and into something that will probably outlive us.
I am proud of my husband.
I am proud of my children.
I am proud of us.
All these years later, we still climb.
And now our children climb with us.
And probably the most daunting idea is that what we’ve built in our backyard will outlive us, just like what we built in marriage.
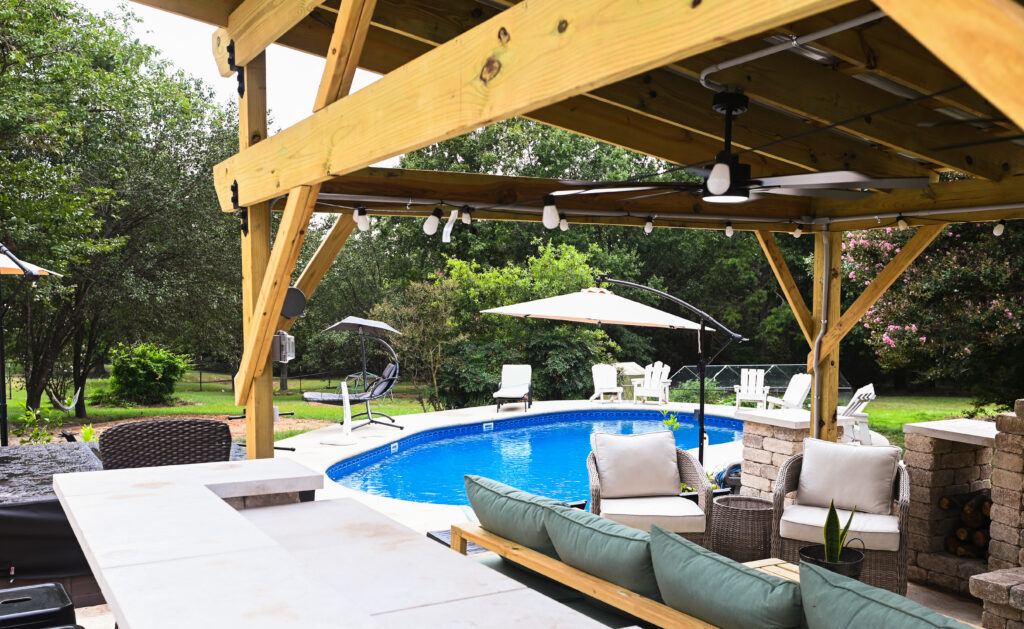
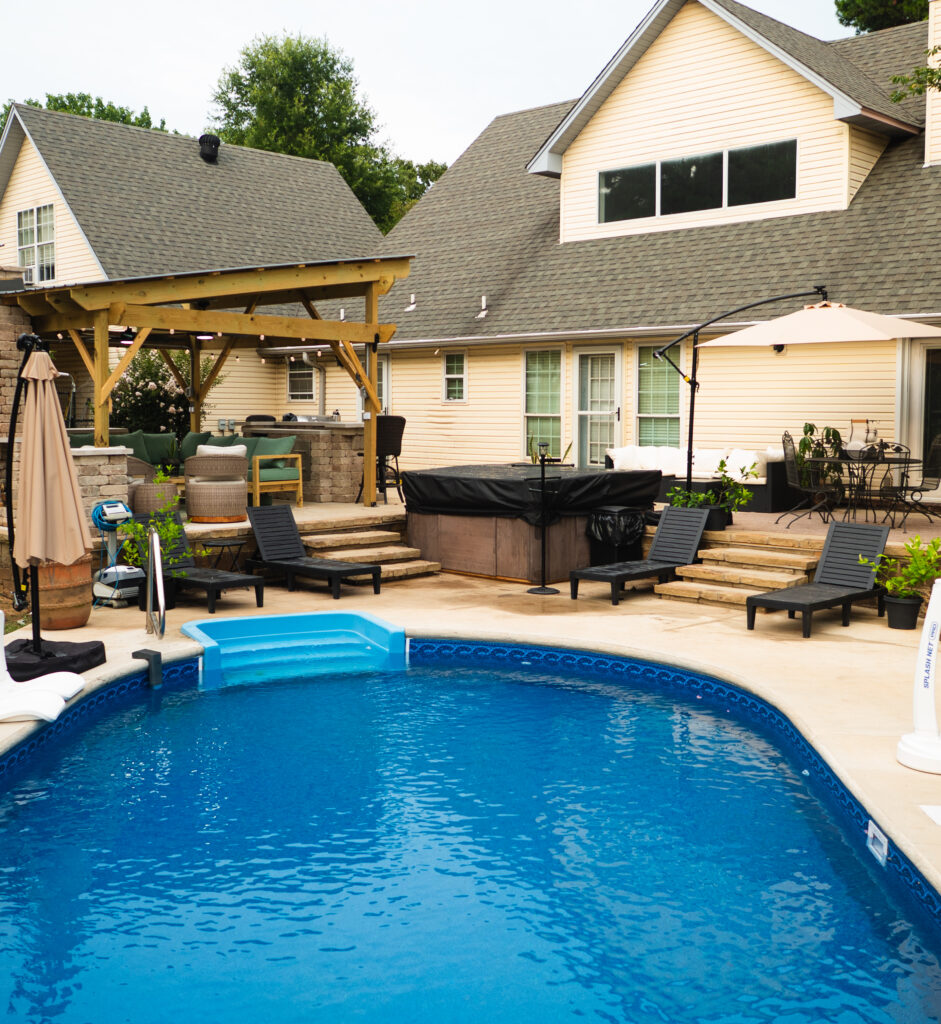
Today, we had the pool liner installed, and with it came the end of a stressful renovation… at least I hope so.
Mostly for Robert.
I say that with a smile because my husband thinks… a lot. His brain is always solving problems, asking questions, and trying to think five steps ahead. Sometimes I wonder if it ever gives him a break.
Which might be why Jonah reminds me so much of him.
Today, while Robert handled the contractors, Jonah and I climbed into the hammock outside with Chronicles of Narnia: The Lion, the Witch and the Wardrobe. Before I knew it, we’d read four chapters.
Well… sort of.
Every couple of minutes I’d get interrupted.
Not because he was bored.
Because he had questions.
“What happened to the wardrobe door?”
“Why can’t Edmund find it?”
“If the door disappeared, then how did Lucy get back in Chapter 2?”
I kept trying to explain that it was dark where the wardrobe door was, so the children were following the light farther into Narnia. But that answer wasn’t good enough.
He just couldn’t make it make sense.
When we finished reading, we walked inside to eat the watermelon we’d cut together earlier that day. Well… the watermelon I’d cut after Jonah insisted I practice first because he wanted perfect squares.
As we were eating, he was still talking about the wardrobe.
“I just don’t understand it,” he said again.
His brain simply wouldn’t let it go.
Watching him smile, think, and wrestle with that question reminded me of something that had happened just a few days earlier.
According to my Oura ring, I’d gotten two hours and twenty minutes of sleep that night.
I stumbled out of my bedroom into the living room, which is completely unlike me because I usually head straight for the coffee pot. I looked around, sighed, and wondered how I was supposed to function through the day.
Then I noticed Jonah had slept on the couch.
I hate when they do that.
I’m not particular about much, but every time one of the kids sleeps on the couch, all I can think about is them wearing it out. Maybe it’s because a couch practically has to be falling apart before Robert agrees it’s time to buy another one.
Still half asleep, I yawned and said, “Buddy, I am so tired.”
He looked at me.
“Can I ask you a question?”
I sighed.
“Yes, Jonah.”
“Never mind.”
The little disappointment in his voice immediately made my mom guilt kick in.
“Just ask.”
“No. It’s okay.”
“Jonah,” I said, “please don’t do this. I’m too tired. Just tell me.”
Finally, he blurted out,
“I just don’t understand why they made white chocolate. It’s pointless.”
I stared at him for a second.
Then I laughed.
Because honestly… I had absolutely no answer.
Later that morning, Robert finally woke up.
He’d been quiet for days, and I knew something was bothering him.
“You care to tell me what’s stressing you?” I asked.
“The renovation.”
“I just can’t stop my brain.”
Then it all started coming out.
“I wonder if they put concrete under the pool stairs.”
“I wonder if the scratches on the pool steps could cause a leak.”
“I forgot to see how thick the concrete is where we’re putting the fireplace.”
“What if it won’t hold it?”
Question after question after question.
I reminded him that we’d hired contractors because this is what they do every day.
Then I couldn’t help but laugh.
“What?” he asked.
“You know who you sound like?”
He looked at me.
“Jonah.”
Then I told him about my two hours of sleep, stumbling into the living room before coffee, and Jonah’s urgent question that absolutely could not wait.
“I just don’t understand why they made white chocolate.”
Robert burst out laughing.
Today, lying in that hammock, listening to Jonah work through every possible explanation for the wardrobe door, I found myself smiling again.
I’d already realized it a few days ago.
Jonah thinks just like his dad.
One wonders whether there’s enough concrete under the pool stairs.
The other wonders why Edmund couldn’t find the wardrobe door.
Both of them will chase a question until they’ve exhausted every possibility.
When I read “Attached,” I thought it would help me understand relationship dynamics, which I find fascinating. As I shared in my previous post about my own mixture of secure attachment with anxious traits, I wasn’t expecting one book to answer questions for both Robert and me.
For years, Robert believed he was avoidant.
It made sense to him.
He doesn’t enjoy conflict.
He’s not reactive.
He’s calm.
He’s slow to assume the worst.
People at work have even described him as lacking emotion.
My family teased him about it, too.
I used to joke that he would have made a wonderful oncologist because he could gently deliver terrible news by simply saying, “This isn’t good news.”
Not in a cold way.
Actually, in the warmest way possible.
That’s always been Robert.
Even when we were dating, he didn’t always choose to spend every free moment with me. But when he told me, he did it with so much kindness and warmth that I couldn’t quite reach the conclusion my friends reached, that we should break up.
Then I read about avoidant attachment.
The more I learned, the less Robert sounded avoidant.
Avoidantly attached people often fiercely protect their independence.
They tend to value autonomy over interdependence.
Deep dependence can feel uncomfortable.
That wasn’t Robert.
Robert was the one who asked me to leave my career and stay home with our children.
He wanted to build a life where we depended on each other.
We share finances.
We built a home.
We’re raising four children.
Our lives are deeply intertwined.
That isn’t someone avoiding attachment.
That’s someone deeply attached.
The more I read, the more I realized Robert wasn’t avoidant at all.
Actually, he’s often the most emotionally steady person in the room.
He wasn’t avoidant.
He was secure.
What I found most interesting was how far from the truth both of our assumptions were.
As we sat on the porch talking about everything I had learned, Robert told me he had always assumed he was avoidant because he had once heard a fitness podcast briefly mention attachment styles. They described avoidant people as calm and independent, but they never explained what secure attachment actually looked like.
As I explained what I had learned, I accidentally answered a question I had been asking about him for years.
Why wasn’t he jealous?
For years, I thought those were two separate questions.
They weren’t.
They had the same answer.
Robert wasn’t calm because he loved me less or because he wasn’t attracted to me.
Or that he didn’t think it would be the worst thing to lose me.
He was calm because his mind wasn’t organized around the expectation of losing me.
His mind wasn’t set at a negative outcome default.
That realization changed everything.
The very thing that convinced Robert he was avoidant was actually evidence of his secure attachment.
And the very thing I interpreted as a lack of passion was, in many ways, evidence of the same thing.
He isn’t what people expect.
A few nights ago, Robert and I were sitting at a bar when something happened that made me laugh.
A man Robert had greeted earlier noticed him walk away to pay our tab. He came over and asked, “Are you Robert’s wife?”
When I said yes, he smiled.
“When Robert turns around, I want you to hug me. Let’s see his face.”
I laughed.
“I’ll hug you,” I said, “but you’re not going to get the reaction you’re hoping for.”
He looked confused.
“Really?”
“No,” I said. “First, Robert is going to know it’s a joke because I don’t hug random people. And second, he’s probably just going to roll his eyes because that’s simply not who he is.”
The man couldn’t believe it.
When Robert came back, I told him what had happened, and we all laughed.
Driving home, I realized something.
For years, I thought I was the only one trying to explain Robert.
I wasn’t.
My friends had explanations.
My family had explanations.
Strangers had explanations.
I had explanations.
Everyone was observing the same man.
Everyone was assigning a different meaning to his behavior.
Attachment theory didn’t change Robert.
It changed the story I believed about him.
While his behavior remains the same.
My perspective and interpretation of it have definitely changed.