Category: Recipes

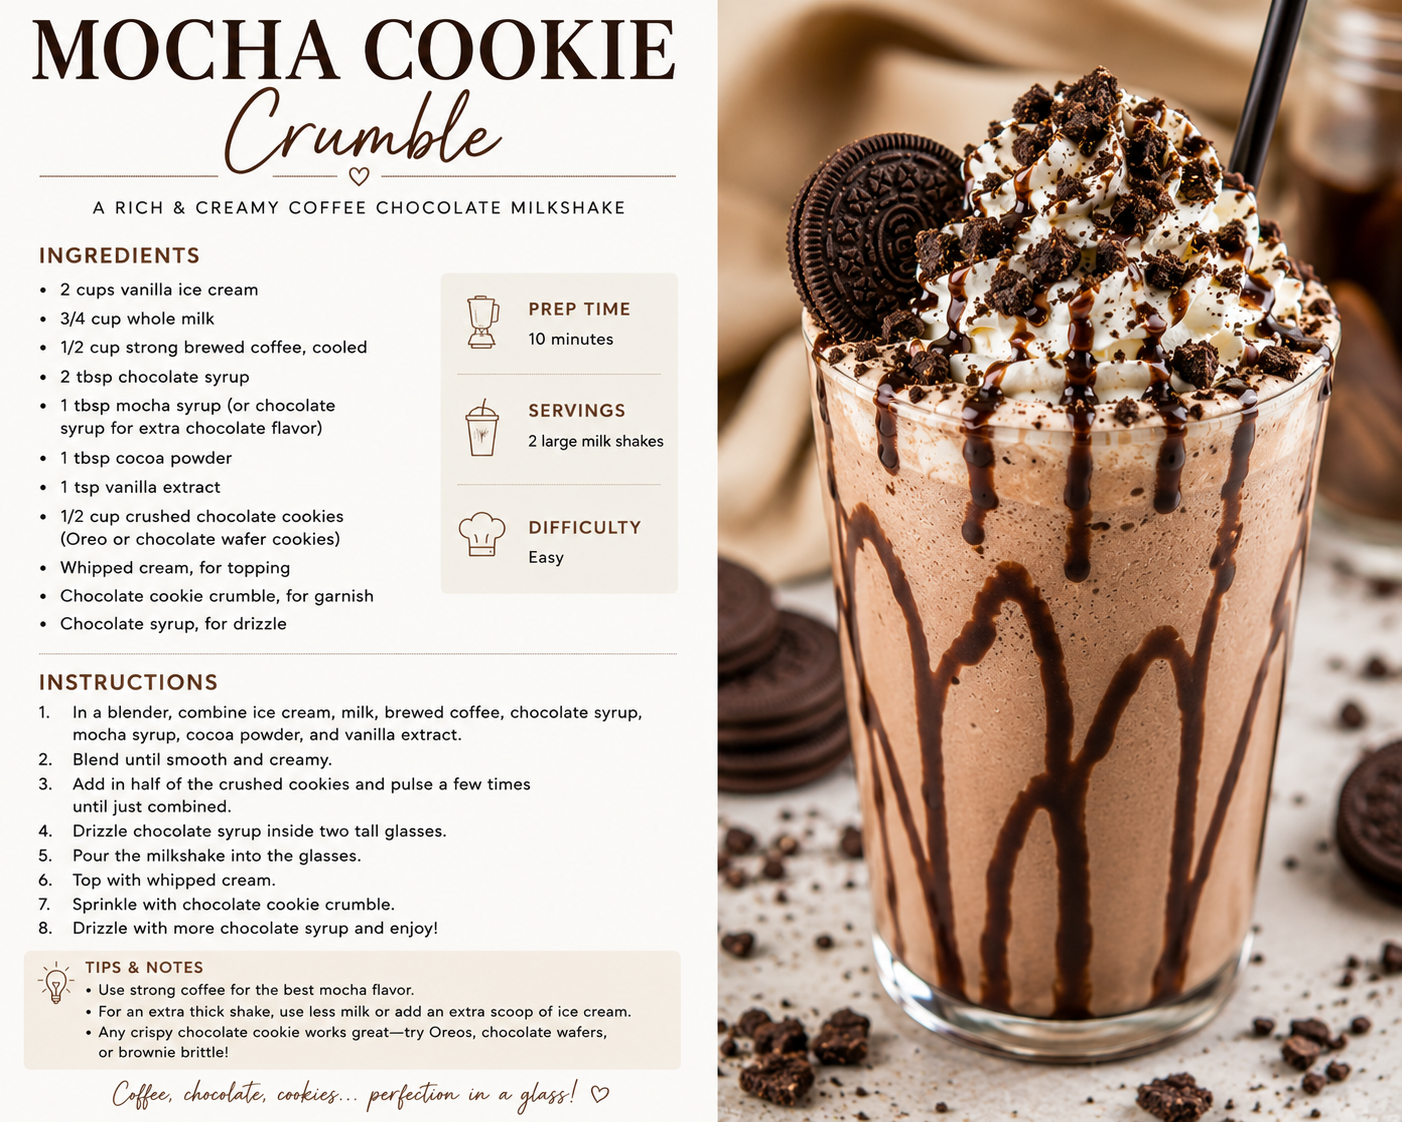
  • Mocha Cookie Crumble Frappuccino

    Mocha Cookie Crumble Frappuccino

    Ninja Creami Copycat

    This Mocha Cookie Crumble Frappuccino is the perfect combination of coffee, chocolate, and crushed cookies. It is rich, creamy, and just indulgent enough to feel like dessert while still technically qualifying as coffee—which feels like a loophole worth protecting.

    The Ninja Creami gives it that thick, smooth coffee-shop texture, while the chocolate drizzle, whipped cream, and cookie crumble make every sip a little extra. It is perfect for hot afternoons, weekend treats, or anytime regular iced coffee is not quite exciting enough.


    Why You’ll Love This Recipe

    • Rich mocha and coffee flavor
    • Thick, creamy Ninja Creami texture
    • Crunchy chocolate cookie pieces
    • Easy to customize
    • Much less expensive than buying one at a coffee shop

    Ingredients

    Frappuccino Base

    • 1 cup strong brewed coffee, cooled
    • ½ cup whole milk
    • ¼ cup heavy cream
    • 3 tablespoons chocolate syrup
    • 2 tablespoons sugar
    • ¼ teaspoon vanilla extract
    • Pinch of salt

    Mocha Cookie Crumble Topping

    • 2 tablespoons crushed chocolate sandwich cookies, such as Oreos
    • 1 tablespoon mini chocolate chips, optional

    For Serving

    • Chocolate syrup
    • Whipped cream
    • Extra crushed chocolate sandwich cookies

    Instructions

    Make the Frappuccino Base

    1. Add the cooled coffee, whole milk, heavy cream, chocolate syrup, sugar, vanilla extract, and salt to a bowl or pitcher.
    2. Whisk until the ingredients are completely combined and the sugar has dissolved.
    3. Pour the mixture into a Ninja Creami pint container.
    4. Place the container on a flat surface in the freezer and freeze for 24 hours.

    Spin the Frappuccino

    1. Remove the frozen pint from the freezer and place it in the Ninja Creami.
    2. Select the Lite Ice Cream setting.
    3. After the first spin, make a small hole in the center of the mixture.
    4. Pour approximately 3 tablespoons of milk or half-and-half into the hole.
    5. Select Respin.
    6. Continue respinning as needed until the Frappuccino is smooth and creamy.

    Assemble

    1. Drizzle chocolate syrup around the inside of a tall glass.
    2. Pour half of the Frappuccino into the glass.
    3. Sprinkle in some of the crushed chocolate sandwich cookies.
    4. Fill the remainder of the glass with the Frappuccino.
    5. Top generously with whipped cream.
    6. Drizzle more chocolate syrup over the whipped cream.
    7. Finish with the remaining cookie crumble and mini chocolate chips, if using.
    8. Serve immediately.

    Tips for the Best Frappuccino

    • Brew the coffee a little stronger than usual so the flavor stands up to the milk, cream, and chocolate.
    • Let the coffee cool completely before mixing the base.
    • Freeze the Ninja Creami container on a perfectly flat surface.
    • Do not worry if the mixture looks dry or crumbly after the first spin. Adding milk and using the Respin setting will smooth it out.
    • Use a combination of finely crushed cookies and larger cookie pieces for the best texture.
    • Chill the serving glass before assembling the drink to help it stay frosty longer.

    Easy Variations

    For an even richer chocolate flavor, add a little extra chocolate syrup before freezing.

    For a stronger coffee flavor, replace some of the milk used during the respin with cooled coffee.

    For extra cookie crunch, add another layer of crushed cookies halfway through the glass.


    This Mocha Cookie Crumble Frappuccino is creamy, chocolatey, and filled with just the right amount of cookie crunch. It tastes like something you would order from a coffee shop, but you can make it at home without changing out of your pajamas—which clearly makes the homemade version superior.
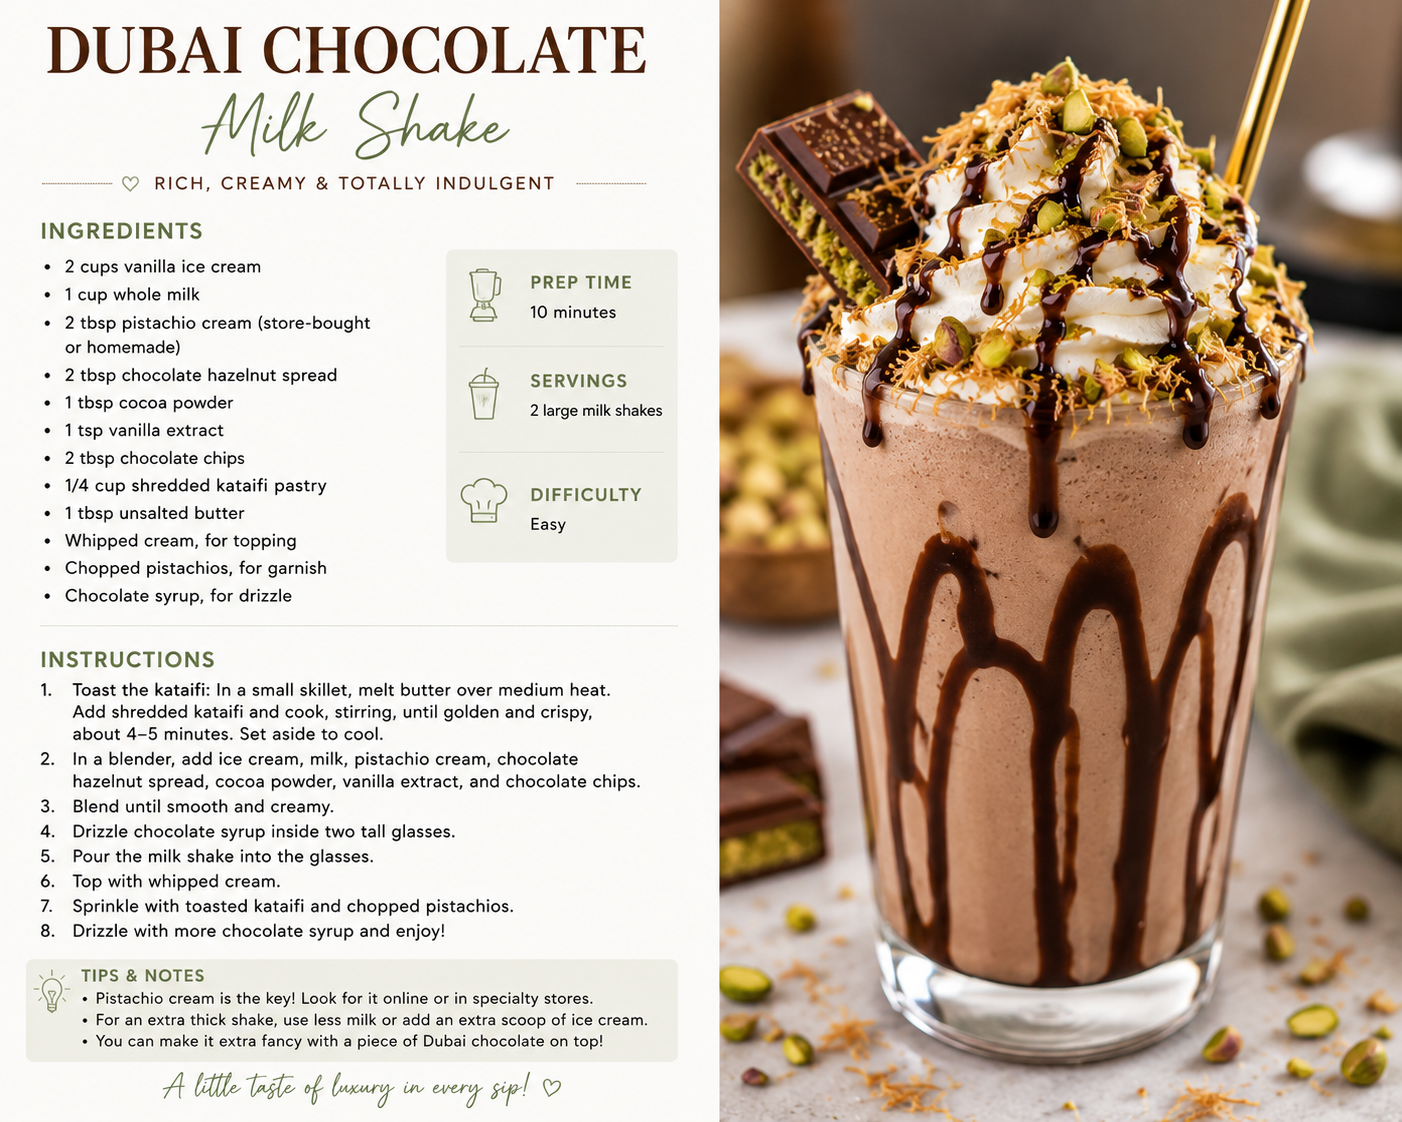
  • Dubai Chocolate Milkshake

    Dubai Chocolate Milkshake

    Ninja Slushi Version

    This Dubai Chocolate Milkshake is rich, creamy, and just a little over-the-top—in the best possible way. It starts with a thick chocolate slushie base, then gets layered with pistachio spread, chocolate syrup, and crushed waffle cones for that sweet, nutty crunch inspired by Dubai chocolate.

    It looks like a specialty dessert-shop drink, but the Ninja Slushi does most of the work. This one is perfect when an ordinary chocolate milkshake simply isn’t feeling dramatic enough.


    Why You’ll Love This Recipe

    • Rich and creamy chocolate flavor
    • Sweet pistachio topping
    • Crunch from crushed waffle cones
    • Easy to make in the Ninja Slushi
    • Fun enough for parties or dessert night

    Ingredients

    Chocolate Slushie Base

    • 4 cups chocolate milk
    • 1 cup regular milk
    • 2–3 tablespoons instant chocolate pudding mix

    Toppings

    • Bettergoods Pistachio Nut Butter
    • Chocolate syrup
    • Crushed waffle cones
    • Whipped cream, optional
    • Mini chocolate chips or M&M’s, optional

    Instructions

    Make the Chocolate Base

    1. Add the chocolate milk, regular milk, and instant chocolate pudding mix to a large bowl or pitcher.
    2. Whisk until the pudding mix is completely dissolved and the mixture is smooth.
    3. Pour the chocolate mixture into the Ninja Slushi.
    4. Process according to the machine’s instructions until thick and slushy.

    Assemble the Milkshakes

    1. Warm the pistachio nut butter in the microwave for about 10–15 seconds, just until it is easy to drizzle.
    2. Fill each glass with the chocolate slushie.
    3. Drizzle the warmed pistachio spread over the top.
    4. Add a generous drizzle of chocolate syrup.
    5. Sprinkle with crushed waffle cone pieces.
    6. Add whipped cream, mini chocolate chips, or M&M’s if desired.
    7. Serve immediately.

    Tips for the Best Milkshake

    • Whisk the pudding mix thoroughly so there are no dry clumps.
    • Start with cold milk so the Ninja Slushi can thicken the mixture more easily.
    • Warm the pistachio spread only long enough to make it pourable.
    • Crush the waffle cones into a mixture of fine crumbs and larger pieces for the best texture.
    • Drizzle pistachio spread and chocolate syrup inside the glass before filling for an extra dessert-shop look.

    This Dubai Chocolate Milkshake is thick, chocolatey, nutty, and crunchy all at once. It is definitely not a quiet little milkshake—and that is exactly why it is so good.

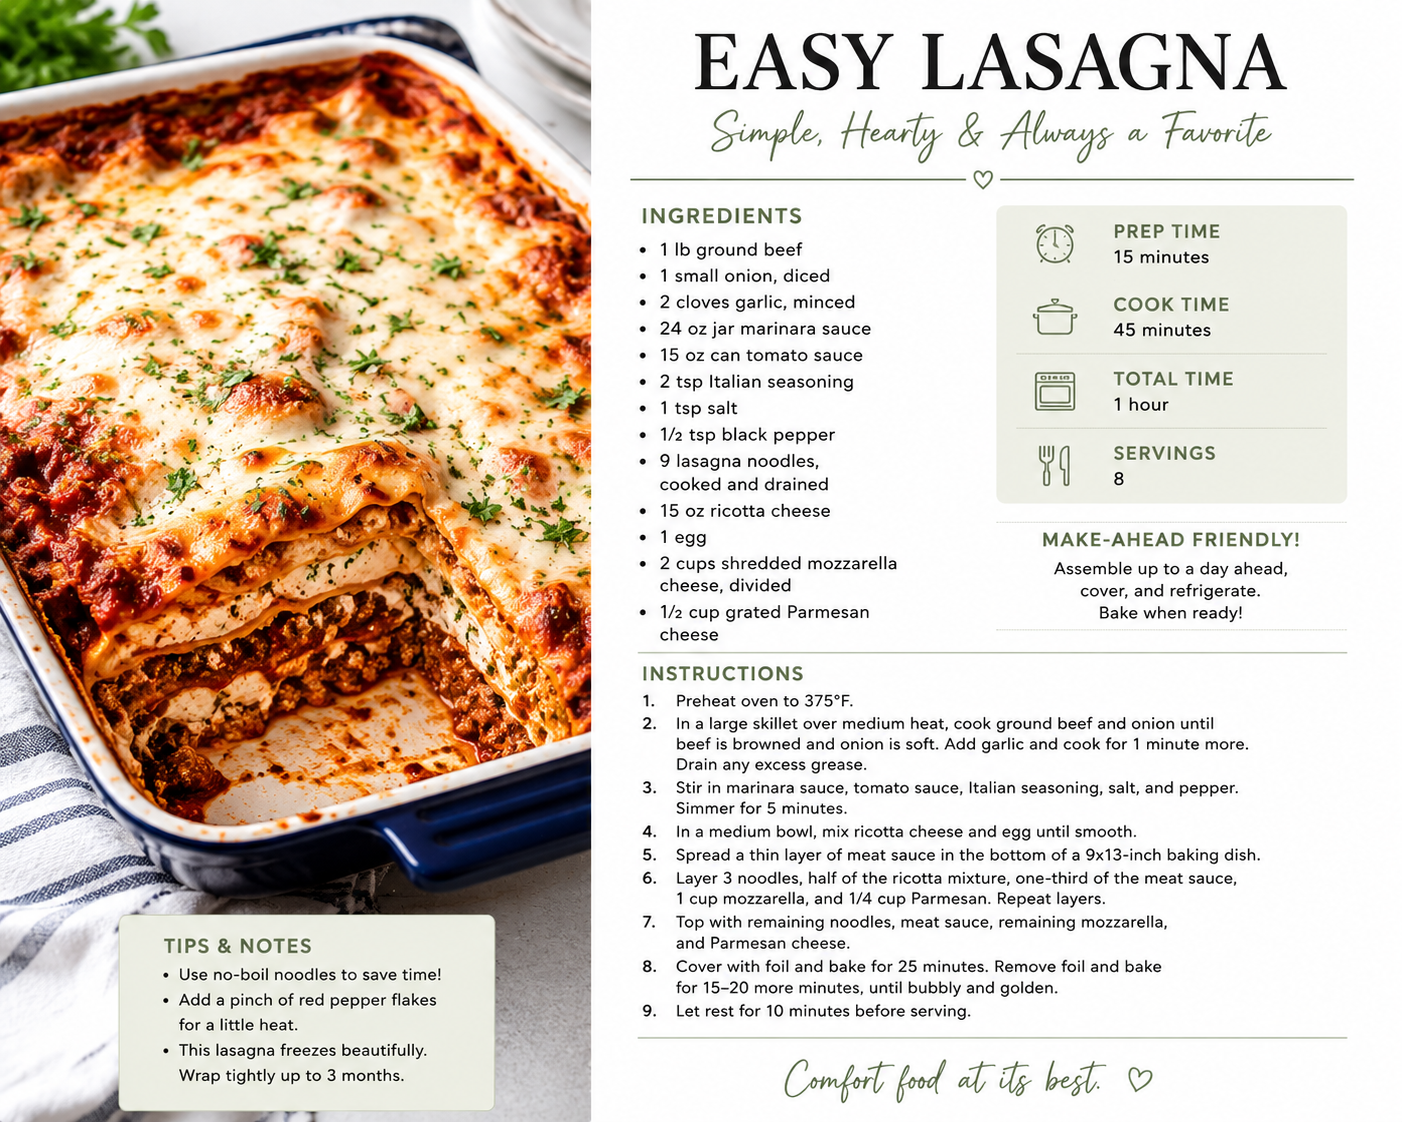
  • Easy Homemade Lasagna

    Easy Homemade Lasagna

    Lasagna is one of those meals that immediately makes the house feel cozy. It is warm, cheesy, filling, and perfect for feeding a hungry family without needing a table full of complicated side dishes.

    This version keeps things simple with a hearty meat sauce, creamy ricotta filling, and plenty of melted mozzarella. It tastes like a classic homemade lasagna should, but it is straightforward enough to make on an ordinary weeknight.


    Why You’ll Love This Recipe

    • Simple, familiar ingredients
    • Rich, cheesy, and filling
    • Easy to assemble
    • Great for feeding a family
    • Leftovers taste even better the next day

    Ingredients

    • Lasagna noodles
    • 1 pound ground beef
    • 1 onion, chopped
    • 2–3 cloves garlic, minced
    • 1 jar marinara or spaghetti sauce
    • 15 ounces ricotta cheese
    • 2–3 cups shredded mozzarella cheese
    • ½ cup grated Parmesan cheese
    • 1 egg
    • Italian seasoning, to taste
    • Dried basil, to taste
    • Dried oregano, to taste
    • Salt and pepper, to taste

    Instructions

    Make the Meat Sauce

    1. Brown the ground beef in a large skillet over medium heat.
    2. Add the chopped onion and cook until softened.
    3. Stir in the minced garlic and cook briefly, just until fragrant.
    4. Drain any excess grease.
    5. Add the marinara sauce, Italian seasoning, basil, oregano, salt, and pepper.
    6. Let the sauce simmer for 10–15 minutes.

    Make the Ricotta Filling

    1. Add the ricotta cheese, egg, Parmesan, salt, and pepper to a bowl.
    2. Stir until the mixture is smooth and evenly combined.

    Cook the Noodles

    1. Bring a large pot of salted water to a boil.
    2. Cook the lasagna noodles until al dente according to the package directions.
    3. Drain the noodles and set them aside.

    Assemble the Lasagna

    1. Preheat the oven to 375°F.
    2. Spread a thin layer of meat sauce across the bottom of a baking dish.
    3. Add a layer of lasagna noodles.
    4. Spread some of the ricotta mixture over the noodles.
    5. Add another layer of meat sauce.
    6. Sprinkle with shredded mozzarella.
    7. Repeat the layers until all the ingredients have been used.
    8. Finish with sauce and a generous layer of mozzarella on top.

    Bake

    1. Cover the baking dish with aluminum foil.
    2. Bake for 25 minutes.
    3. Remove the foil and bake for another 15–20 minutes, or until the cheese is melted, golden, and bubbling around the edges.
    4. Let the lasagna rest for 15–20 minutes before slicing.

    Serving Suggestions

    Serve this lasagna with:

    • Garlic bread
    • A simple garden salad
    • Roasted broccoli
    • Green beans
    • Caesar salad

    Tips for the Best Lasagna

    • Let the meat sauce simmer so the flavors have time to come together.
    • Do not overcook the noodles before assembling the lasagna.
    • Cover the lasagna during the first part of baking so the cheese does not brown too quickly.
    • Let it rest before cutting. This helps the layers stay together instead of sliding all over the plate.
    • Add extra mozzarella on top if your family believes there is no such thing as too much cheese. They are correct.

    This easy homemade lasagna is warm, hearty, and exactly the kind of meal everyone is happy to see on the table. It is simple enough for family dinner but comforting enough to feel a little special.

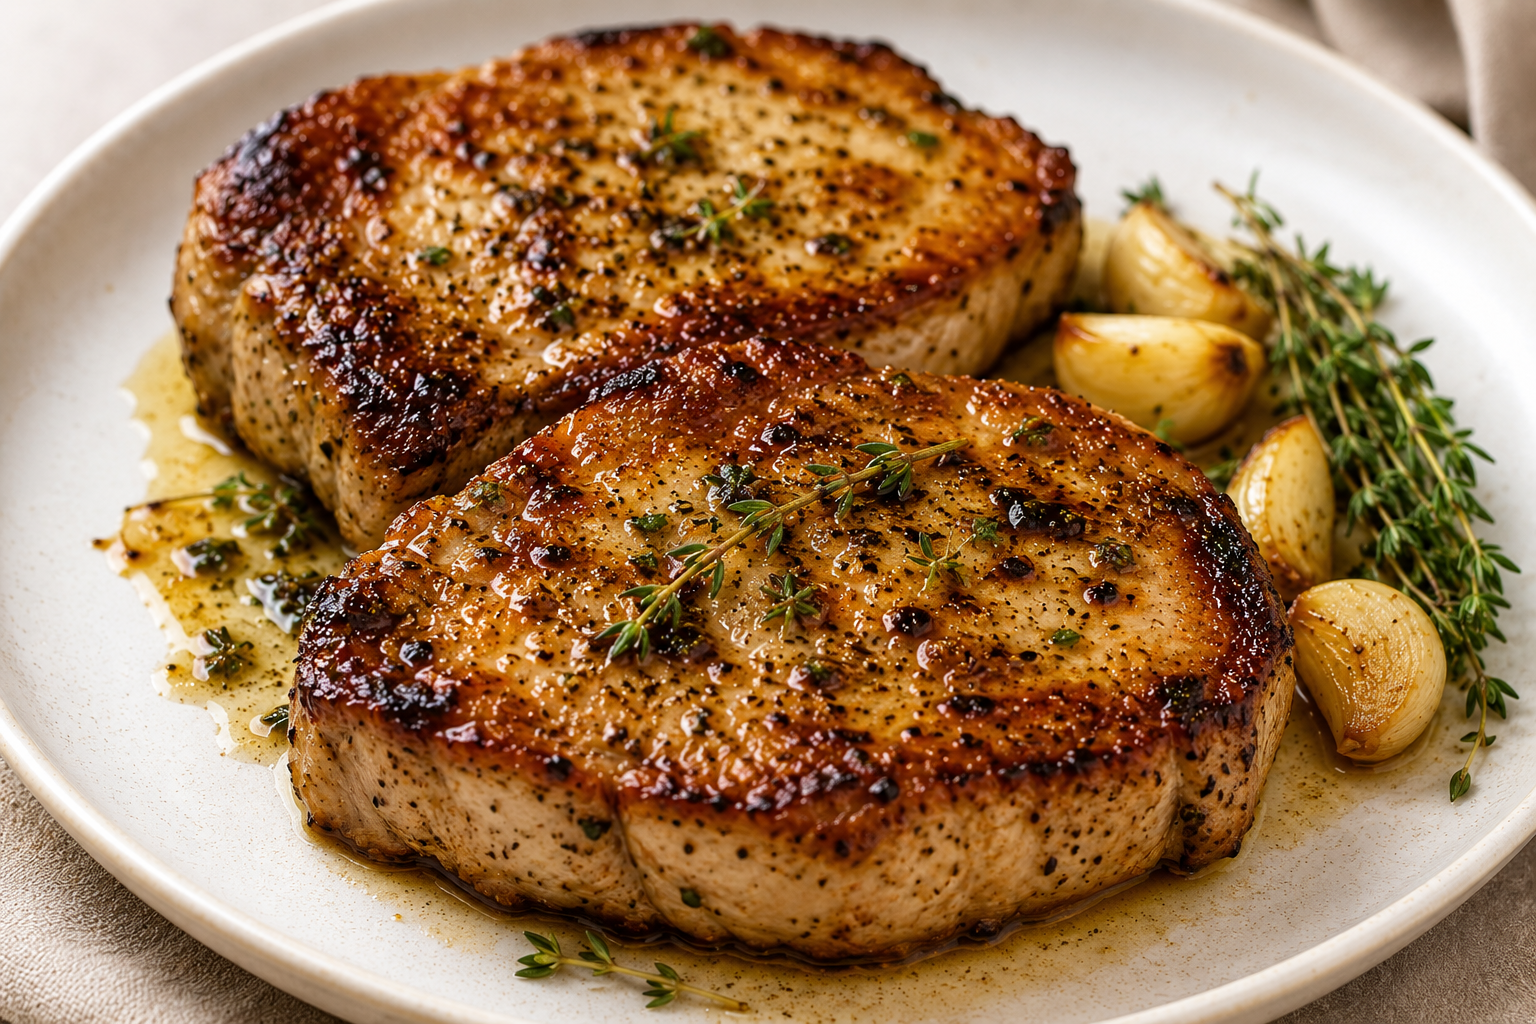
  • Garlic Herb Butter Sous Vide Pork Chops

    Garlic Herb Butter Sous Vide Pork Chops

    If you’ve never cooked pork chops sous vide before, you’re in for a treat.
    This method takes all the guesswork out of cooking and gives you juicy, tender pork chops every single time. No more dry, overcooked meat—just perfectly cooked pork with a beautiful golden crust from a quick sear.

    Whether you’re making a weeknight dinner or cooking for guests, this recipe is simple enough for beginners but tastes like something from a nice steakhouse.


    Why You’ll Love This Recipe

    • Foolproof and incredibly juicy
    • Tender from edge to edge
    • Full of garlic and herb flavor
    • Finished with a rich butter baste
    • Perfect for weeknight dinners or special occasions

    Ingredients

    • 2–4 thick-cut pork chops (1–1½ inches thick, boneless or bone-in)
    • 1½ teaspoons kosher salt
    • 1 teaspoon black pepper
    • 1 teaspoon garlic powder
    • 2 sprigs fresh thyme or rosemary
    • 2 cloves garlic, smashed
    • 2 tablespoons butter, divided
    • 1 tablespoon neutral oil (avocado or canola)

    Optional Flavor Boost

    • ½ teaspoon smoked paprika
    • Pinch of red pepper flakes

    Sous Vide Temperature

    For juicy pork with a slight blush in the center:

    140°F (60°C)

    For fully white pork:

    145°F


    Instructions

    Step 1: Season the Pork

    Pat the pork chops dry with paper towels.

    Season both sides with the salt, pepper, garlic powder, and optional smoked paprika.

    Place the pork chops into a vacuum-seal or zip-top freezer bag along with the smashed garlic, fresh herbs, and 1 tablespoon of butter.

    Seal the bag using a vacuum sealer or the water displacement method.


    Step 2: Sous Vide

    Preheat your sous vide water bath.

    Cook according to thickness:

    • 1-inch pork chops: 1½ hours
    • 1½-inch pork chops: 2 hours

    Once finished, remove the pork chops from the bag and pat them completely dry. This is the secret to getting a beautiful crust.


    Step 3: Sear

    Heat a cast-iron skillet over high heat until it’s just beginning to smoke.

    Add the neutral oil.

    Sear each pork chop for 45–60 seconds per side until golden brown.

    Reduce the heat slightly, then add the remaining tablespoon of butter along with the herbs.

    Tilt the skillet and spoon the melted butter over the pork chops for about 15–20 seconds.

    If your pork chops have a thick fat cap, stand them on their sides for a few seconds to render and crisp the fat.


    Optional Garlic Butter Pan Sauce

    Don’t waste all those flavorful browned bits!

    After removing the pork chops, add:

    • A splash of chicken broth or white wine
    • Scrape the bottom of the skillet
    • Simmer for about 30 seconds
    • Stir in a small pat of butter
    • Finish with a squeeze of fresh lemon juice

    Spoon the sauce over the pork chops before serving.


    Serving Suggestions

    These pork chops pair wonderfully with:

    • Roasted baby potatoes
    • Garlic green beans
    • Creamy mashed potatoes
    • A fresh garden salad with vinaigrette
    • Roasted asparagus

    Tips for Perfect Sous Vide Pork Chops

    • Choose pork chops that are at least 1 inch thick for the best results.
    • Dry the pork thoroughly before searing to achieve a deep golden crust.
    • Fresh herbs add incredible flavor while cooking in the bag.
    • Don’t skip the final butter baste—it adds richness and helps develop a beautiful finish.

    Frequently Asked Questions

    Can I use bone-in pork chops?
    Absolutely! Bone-in and boneless both work beautifully. Just use chops that are at least an inch thick.

    Do I need a vacuum sealer?
    No. A freezer-safe zip-top bag and the water displacement method work just as well.

    Can I cook them longer?
    Yes. Sous vide is very forgiving, and an extra 30–60 minutes won’t hurt the texture.

    Can I make these ahead of time?
    Yes! After the sous vide bath, refrigerate the sealed bag. When you’re ready to eat, simply reheat in the water bath for about 30 minutes and finish with a quick sear.


    Once you try pork chops cooked sous vide, it’s hard to go back. They’re consistently juicy, incredibly tender, and packed with flavor thanks to the garlic, herbs, and buttery finish. Pair them with your favorite sides, and you’ve got an easy dinner that feels like a restaurant-quality meal right at home.

  • Caramel Crunch Frappuccino (Ninja Creami Copycat)

    If you’re anything like me, coffee isn’t just about the caffeine—it’s about the experience. This homemade Caramel Crunch Frappuccino has quickly become one of my favorite afternoon treats because it tastes like something you’d grab from your favorite coffee shop, but it’s made right at home with the Ninja Creami.

    It’s rich, creamy, packed with caramel flavor, and finished with the perfect buttery crunch on top. Best of all, you can customize the sweetness exactly how you like it.


    Why You’ll Love This Recipe

    • Creamy coffeehouse texture
    • Rich caramel flavor in every sip
    • Much less expensive than buying one at a café
    • Easy to customize with your favorite milk or toppings
    • Perfect for hot summer afternoons

    Ingredients

    Frappuccino Base

    • 1 cup strong brewed coffee, cooled
    • ½ cup whole milk (or 2%)
    • ¼ cup heavy cream
    • 3–4 tablespoons thick caramel sauce
    • 2 tablespoons sugar or simple syrup
    • ¼ teaspoon vanilla extract
    • Tiny pinch of salt

    Caramel Crunch Topping

    • 1 tablespoon toffee bits
    • 1 tablespoon crushed vanilla wafers or shortbread cookies
    • Pinch of salt

    For Serving

    • Caramel sauce
    • Whipped cream

    Instructions

    Freeze the Base

    1. Whisk together the coffee, milk, heavy cream, caramel sauce, sugar, vanilla, and salt until completely smooth.
    2. Pour the mixture into a Ninja Creami pint container.
    3. Freeze on a level surface for 24 hours.

    Spin

    1. Insert the frozen pint into the Ninja Creami.
    2. Select Lite Ice Cream.
    3. After the first spin, create a small hole in the center.
    4. Add about 3 tablespoons of milk or half-and-half.
    5. Press Respin until the mixture becomes smooth and creamy.

    Assemble

    1. Drizzle caramel sauce around the inside of your glass.
    2. Fill the glass halfway with the Frappuccino.
    3. Add another drizzle of caramel.
    4. Fill the rest of the glass.
    5. Top generously with whipped cream.
    6. Finish with more caramel sauce and the caramel crunch topping.

    Serve immediately and enjoy!


    Tips for the Best Frappuccino

    • Use freshly brewed strong coffee for the richest flavor.
    • A thick caramel sauce works much better than a thin syrup.
    • If your Creami mixture looks crumbly after the first spin, don’t worry—that’s completely normal. One or two respins usually creates the perfect texture.
    • Freeze your serving glass for 10–15 minutes before pouring for an extra frosty coffeehouse feel.

    Frequently Asked Questions

    Can I make it decaf?
    Absolutely! Just substitute your favorite decaf coffee.

    Can I use dairy-free milk?
    Yes. Whole milk gives the creamiest texture, but oat milk and almond milk both work well.

    Can I make it sweeter?
    Of course. Add an extra tablespoon of caramel sauce or simple syrup to taste.


    There’s something satisfying about recreating your favorite coffee shop drinks at home, and this Caramel Crunch Frappuccino definitely delivers. It’s creamy, sweet, and has just the right amount of crunch on top. Whether you’re relaxing by the pool, tackling a DIY project, or simply treating yourself after a long day, this is one recipe you’ll want to make again and again.

  • Easy Southern Peach Cobbler

    There are some desserts that instantly feel like home, and peach cobbler is one of them. Warm peaches bubbling beneath a buttery, golden crust with a scoop of vanilla ice cream melting over the top… it doesn’t get much better.

    This recipe is incredibly simple to make, but it tastes like it took all afternoon. Whether you’re using fresh peaches from the farmer’s market, frozen peaches from the freezer, or canned peaches from the pantry, it turns out delicious every single time. It’s one of those desserts that’s perfect for family dinners, summer cookouts, or holiday gatherings.

    Ingredients

    For the Peach Filling

    • 4 cups peaches (fresh, frozen, or canned—drained if canned)
    • ¾ cup granulated sugar
    • 1 tablespoon lemon juice
    • 1 teaspoon vanilla extract
    • 1 teaspoon ground cinnamon
    • 1 tablespoon cornstarch (optional, for a thicker filling)

    For the Batter

    • ½ cup (1 stick) butter
    • 1 cup all-purpose flour
    • 1 cup granulated sugar
    • 1 cup milk
    • 1½ teaspoons baking powder
    • ¼ teaspoon salt

    Instructions

    1. Preheat your oven to 350°F.
    2. Place the butter in a 9×13-inch baking dish and let it melt while the oven preheats.
    3. In a large bowl, combine the peaches, sugar, lemon juice, vanilla, cinnamon, and cornstarch if using. Stir until well mixed.
    4. In another bowl, whisk together the flour, sugar, milk, baking powder, and salt until smooth.
    5. Carefully pour the batter over the melted butter. Do not stir.
    6. Spoon the peach mixture evenly over the batter. Again, do not stir. As it bakes, the batter will rise around the peaches and create a beautiful crust.
    7. Bake for 40–45 minutes, or until the top is golden brown and the filling is bubbling around the edges.
    8. Allow the cobbler to cool for about 10 minutes before serving.

    Tips for the Best Peach Cobbler

    • Fresh peaches provide the best flavor during peach season, but frozen peaches work beautifully year-round.
    • If using canned peaches, be sure to drain them well so the cobbler doesn’t become watery.
    • Sprinkle a little brown sugar over the top before baking for an extra caramelized crust.
    • Fresh raspberries make a delicious addition if you’re looking for a little tartness.
    • Serve warm with a generous scoop of vanilla ice cream or fresh whipped cream.

    Frequently Asked Questions

    Can I make this ahead of time?
    Yes! Bake it earlier in the day and simply warm individual servings before serving.

    Can I freeze peach cobbler?
    Absolutely. Allow it to cool completely, cover tightly, and freeze for up to three months. Thaw overnight in the refrigerator and reheat in the oven until warmed through.

    Can I use other fruit?
    Definitely! This recipe is also wonderful with blackberries, blueberries, apples, cherries, or a combination of your favorite fruits.

  • Easy Breakfast Casserole (Perfect for Busy Mornings)

    Easy Breakfast Casserole (Perfect for Busy Mornings)

    Some mornings just call for something simple that everyone will actually eat. This breakfast casserole has become one of our favorites because it’s hearty, filling, and easy enough to throw together without making a huge mess in the kitchen.

    I love that it can be prepped ahead of time if needed, and it’s also a great way to use ingredients I usually already have in the freezer. Whether we’re feeding family for the holidays or just making a lazy Saturday breakfast, this recipe never lasts long.

    Ingredients

    • 1 pound breakfast sausage
    • 1–2 cups frozen shredded hash browns
    • 1–2 cups frozen peppers
    • 6–8 eggs
    • ½ cup milk
    • 1–2 cups shredded Colby Jack and Cheddar cheese
    • 1 teaspoon garlic powder
    • 1–2 teaspoons minced garlic (optional)
    • Salt and pepper to taste

    Instructions

    1. Preheat your oven to 375°F.
    2. Brown the breakfast sausage in a skillet and drain any excess grease.
    3. Add the frozen peppers and hash browns to the skillet and cook until softened.
    4. Stir in the garlic powder and minced garlic if using.
    5. In a separate bowl, whisk together the eggs, milk, salt, and pepper.
    6. Grease a baking dish and spread the sausage mixture evenly across the bottom.
    7. Sprinkle cheese throughout the casserole and on top.
    8. Pour the egg mixture evenly over everything.
    9. Bake for 30–40 minutes, or until the eggs are completely set.
    10. Let the casserole rest for about 5–10 minutes before slicing.

    Tips

    • Add cooked bacon or diced ham for even more flavor.
    • Pepper Jack cheese gives it a little kick.
    • Leftovers reheat really well the next morning.
    • Serve with fresh fruit and biscuits for a complete breakfast.

    Enjoy!

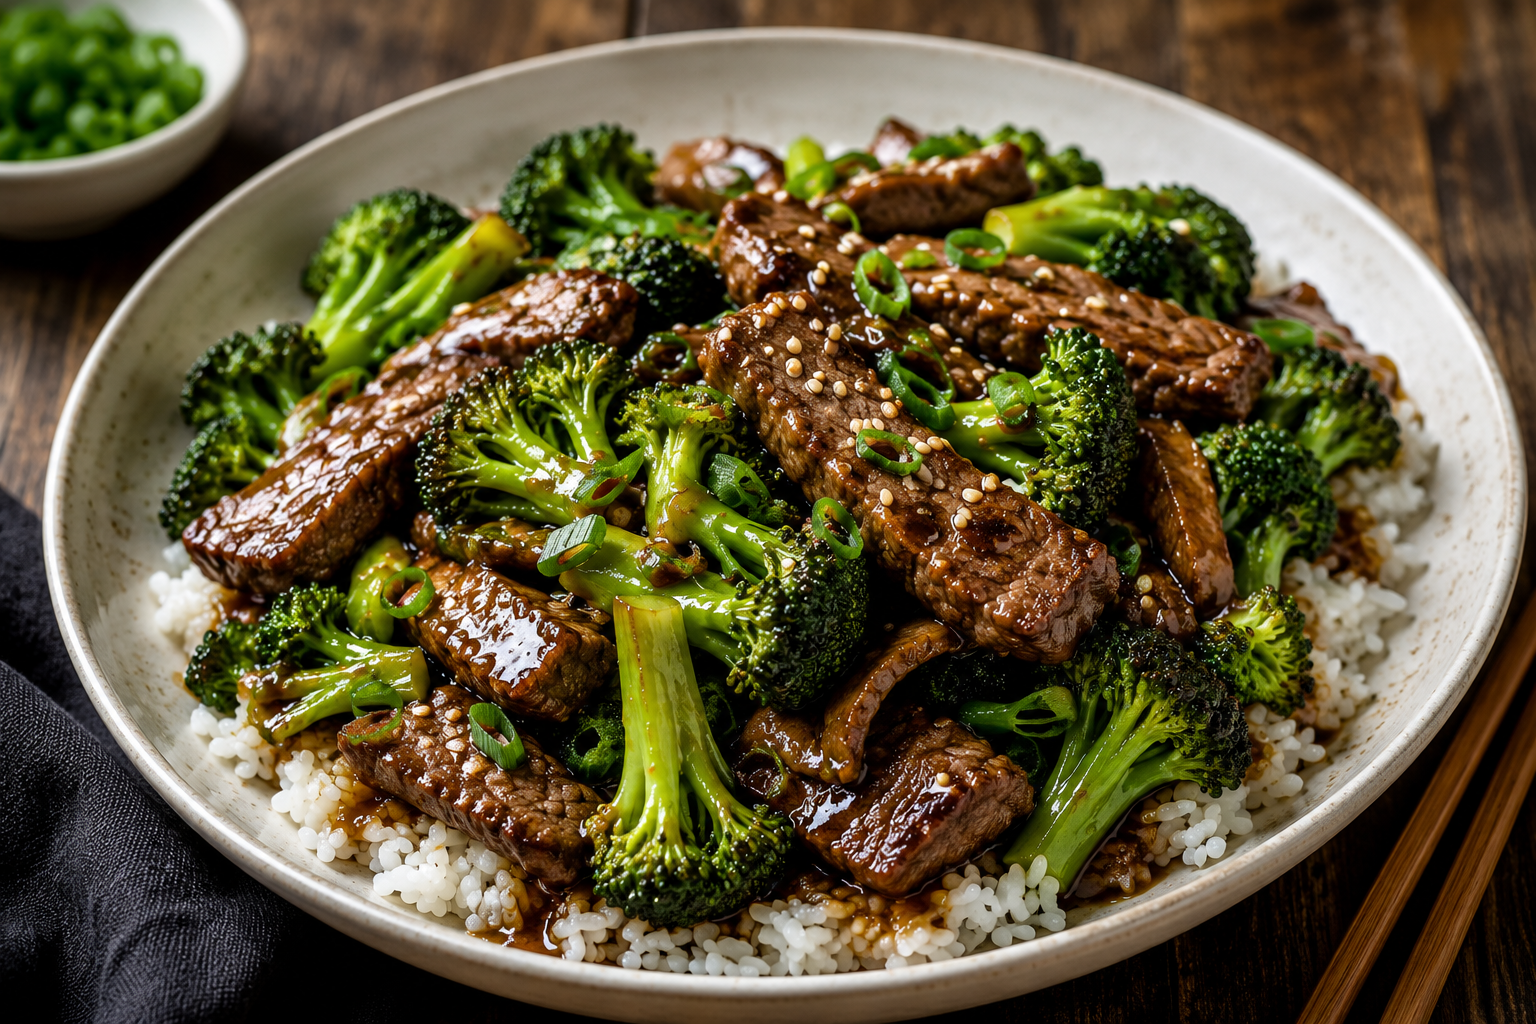
  • Beef & Broccoli Stir-Fry

    Beef & Broccoli Stir-Fry

    There are some recipes that quietly become part of your regular routine, and this is one of ours.

    It has everything I love in a weeknight dinner. It’s quick enough for a busy evening, tastes better than takeout, and doesn’t leave the kitchen looking like a disaster afterward. The beef stays tender, the broccoli still has a little bite, and the sauce is rich enough that everyone ends up spooning a little extra over the rice.

    If you’re looking for one of those meals that earns a permanent place in your dinner rotation, this one is worth keeping.

    Beef & Broccoli Stir-Fry

    Ingredients

    For the Beef

    • 1–1½ pounds flank steak, thinly sliced against the grain

    Quick Marinade

    • 1 tablespoon soy sauce
    • 1 teaspoon cornstarch
    • 1 teaspoon cooking oil

    For the Stir Fry

    • 2 large crowns broccoli, cut into florets
    • 3 cloves garlic, minced
    • 1 tablespoon fresh ginger, minced
    • 3 green onions, sliced (optional)
    • 2 tablespoons soy sauce
    • 2 tablespoons oyster sauce
    • 1 tablespoon brown sugar
    • 1 cup beef broth
    • 1 tablespoon cornstarch
    • 1 teaspoon sesame oil
    • 2–3 tablespoons cooking oil

    Serve over jasmine or white rice.

    Instructions

    1. Toss the sliced beef with the marinade ingredients and let it rest for about 15 minutes.
    2. Cook the rice according to package directions.
    3. In a bowl, whisk together the broth, soy sauce, oyster sauce, brown sugar, cornstarch, and sesame oil.
    4. Heat one tablespoon of oil in a hot skillet or wok.
    5. Sear the beef for 1–2 minutes per side, then remove it from the pan.
    6. Add another tablespoon of oil if needed and stir-fry the broccoli for 2–3 minutes.
    7. Add the garlic and ginger and cook for another 30 seconds.
    8. Return the beef to the skillet.
    9. Pour in the sauce and stir until everything is coated and the sauce thickens.
    10. Garnish with green onions and serve over hot rice.

    A Few Notes

    • Slice the steak against the grain for the most tender bites.
    • Don’t overcrowd the pan while browning the beef.
    • Leftovers reheat surprisingly well the next day.