Category: Woodworking & DIY

  • We Still Climb

    We Still Climb

    Today, I wake up with great pride in my husband and children.

    Robert and I spent one of our first dates climbing up Pinnacle Mountain with Subway in our backpacks. I had no idea then that he would be my husband, and those hikes we continued to take together were a foreshadowing of the future we were building in tandem.

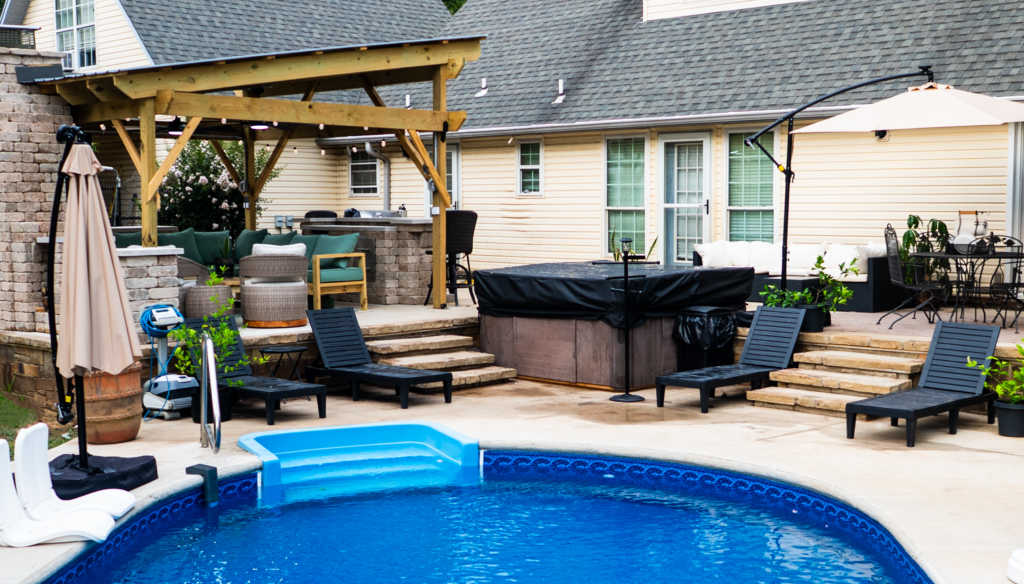
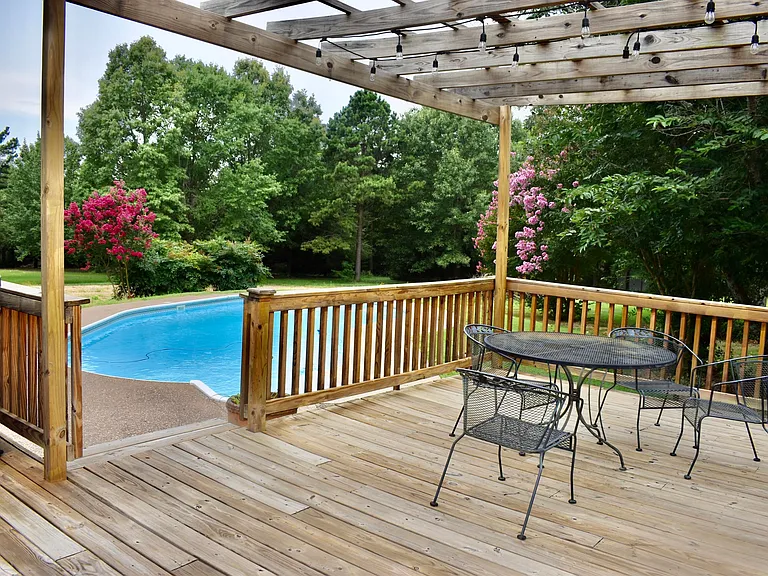
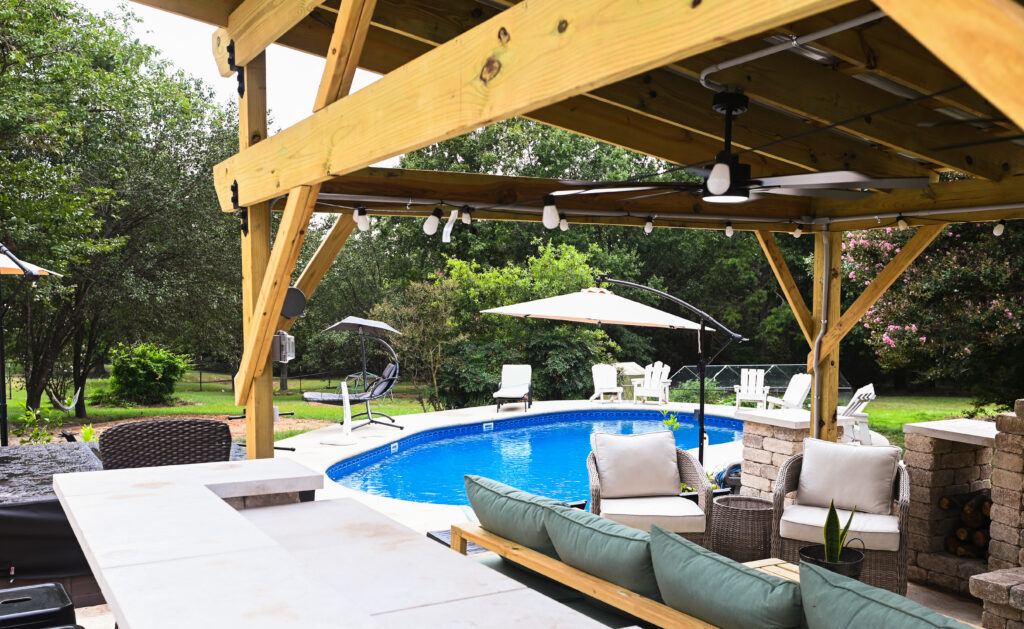
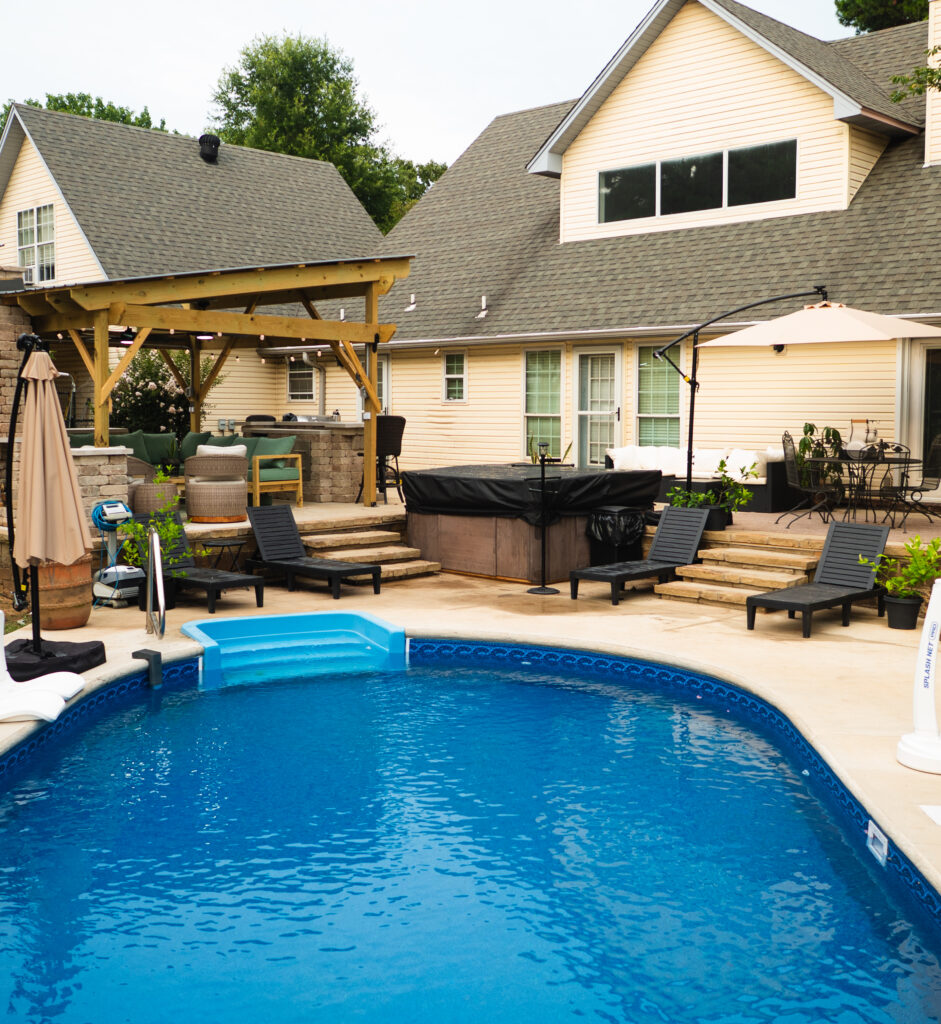
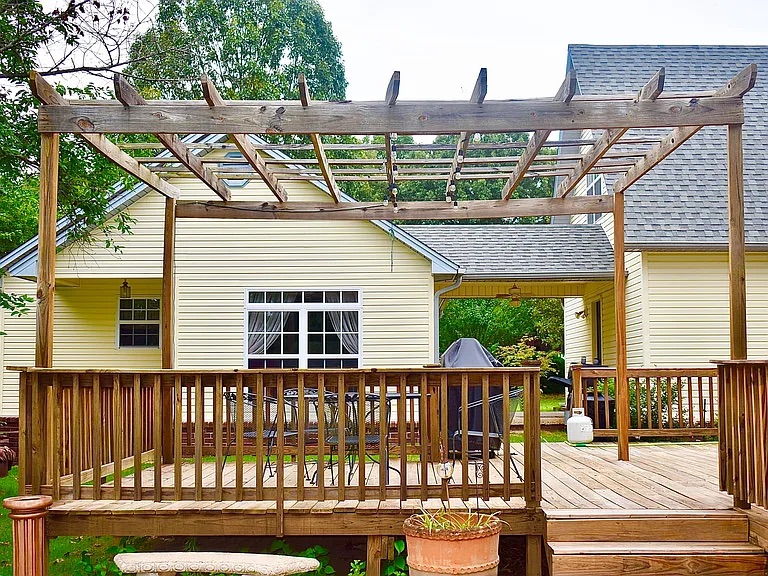
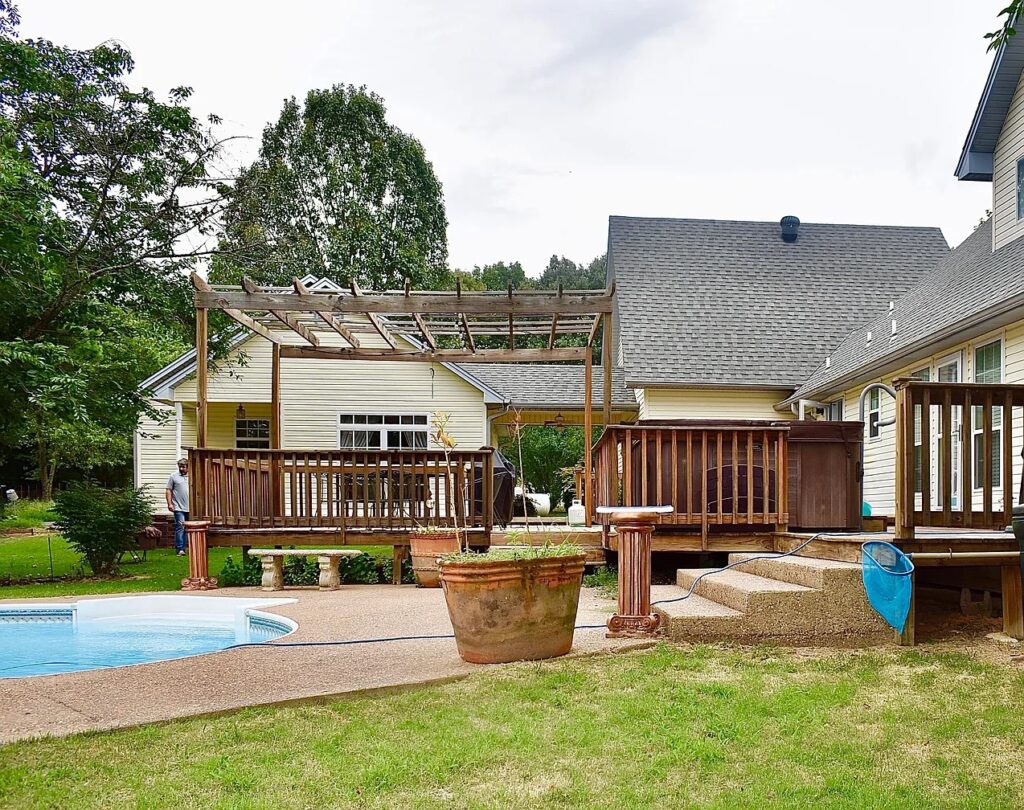
    Recently, we decided to gut our entire backyard deck and pool area.

    Before picture

    It started because Robert said we needed a new pool liner. And if we were going to replace the liner, we needed to replace the skimmer. And if we were going to replace the skimmer, he would like to add another one to make maintaining the pool easier.

    That led to tearing out the gravel around the pool and putting in concrete.

    The pool before the make over.

    Then that idea expanded to the wooden deck.

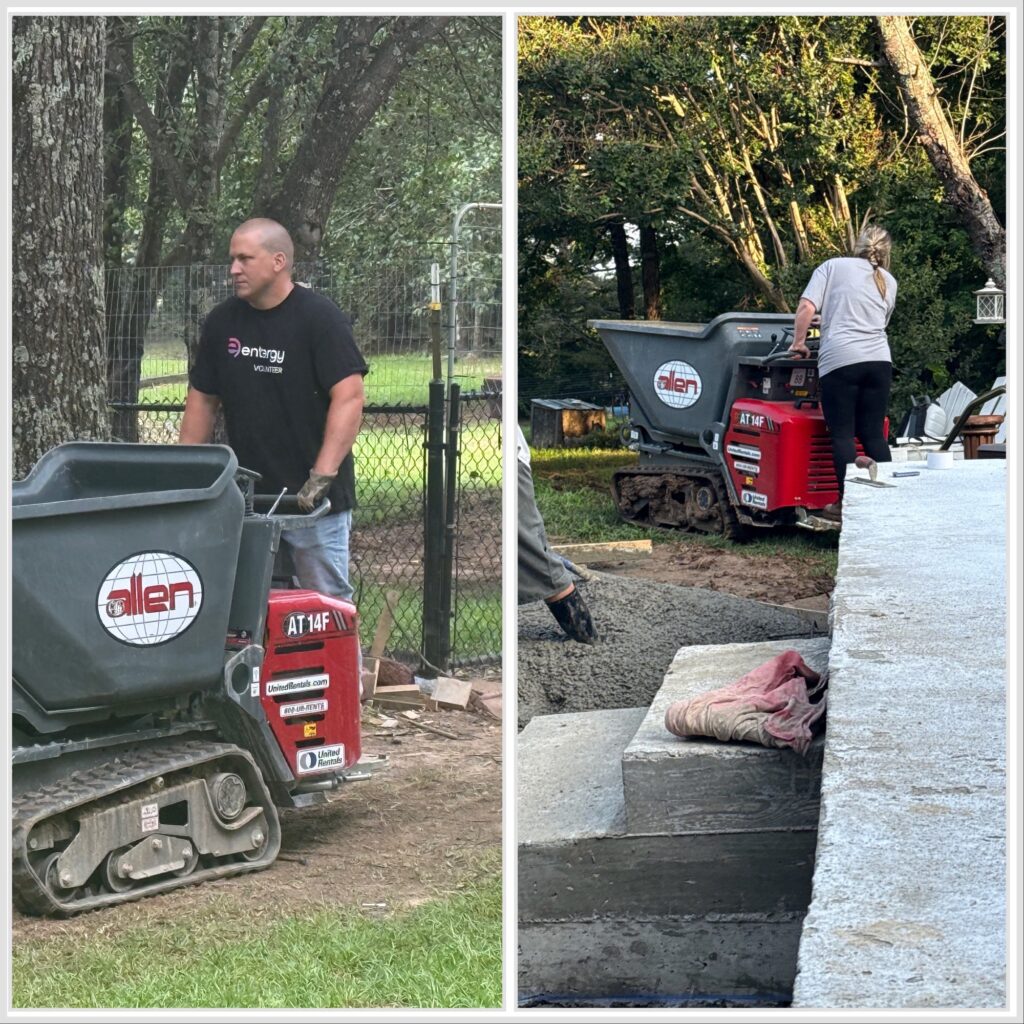
    Eventually, we had a whole new slab of concrete designed.

    We got numerous quotes for an outdoor kitchen, but they were ridiculously high. Then we finally got one reasonable quote, and the contractor sent us a picture of what we would get for that price.

    It was so small that Robert and I laughed.

    We clearly could not afford what we were looking for.

    Eventually, Robert and I ran across a company called Cornerstone that sold backyard kitchen kits.

    They have many to choose from here.

    I was immediately thinking, This is going to be so easy. We can do this.

    Robert was immediately thinking, This is crazy. I don’t know if we should do this.

    We kind of have this thing in our marriage.

    When I first met Robert, as smart and skilled as he is, he wouldn’t even do little things for me, like build a recipe box or make small wooden projects. It wasn’t because he didn’t love me or because he didn’t feel like doing them.

    It was because he simply lacked the confidence to think he could do them.

    And do them well.

    But I was looking at these plans thinking, This looks just like sewing plans. We just stack these little bricks like they tell us.

    We can do this.

    Turns out, we were both wrong.

    It was not easy.

    But we could do it.

    The first surprise came when the owner of the company called and told us that the first of our two shipments was coming.

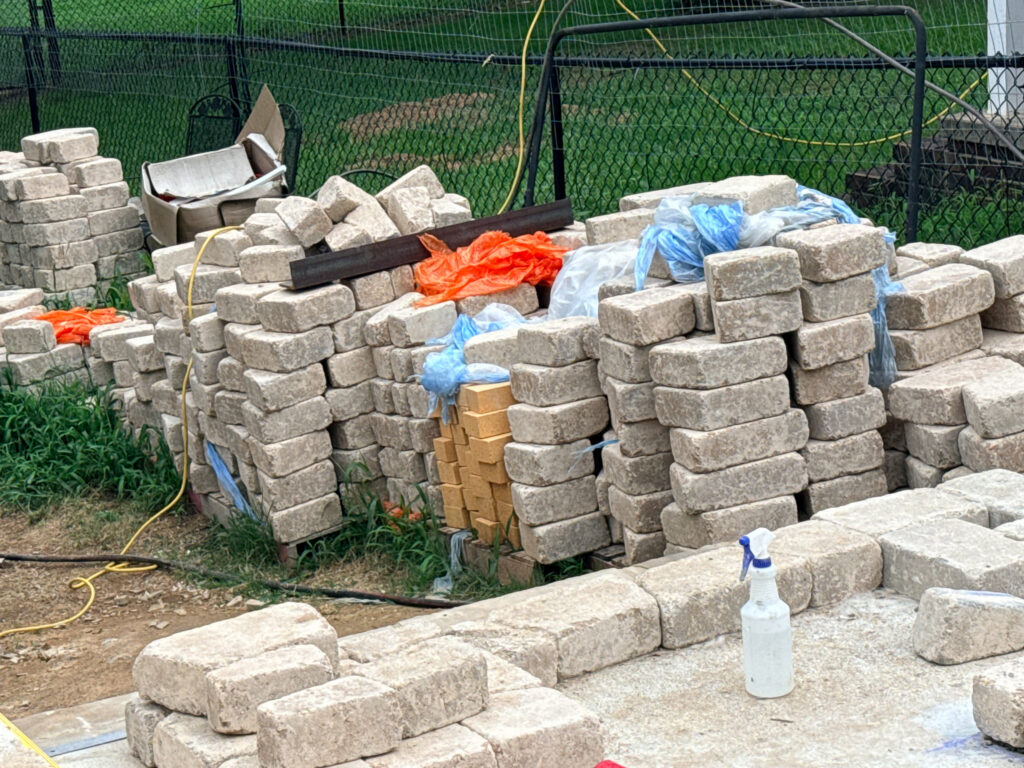
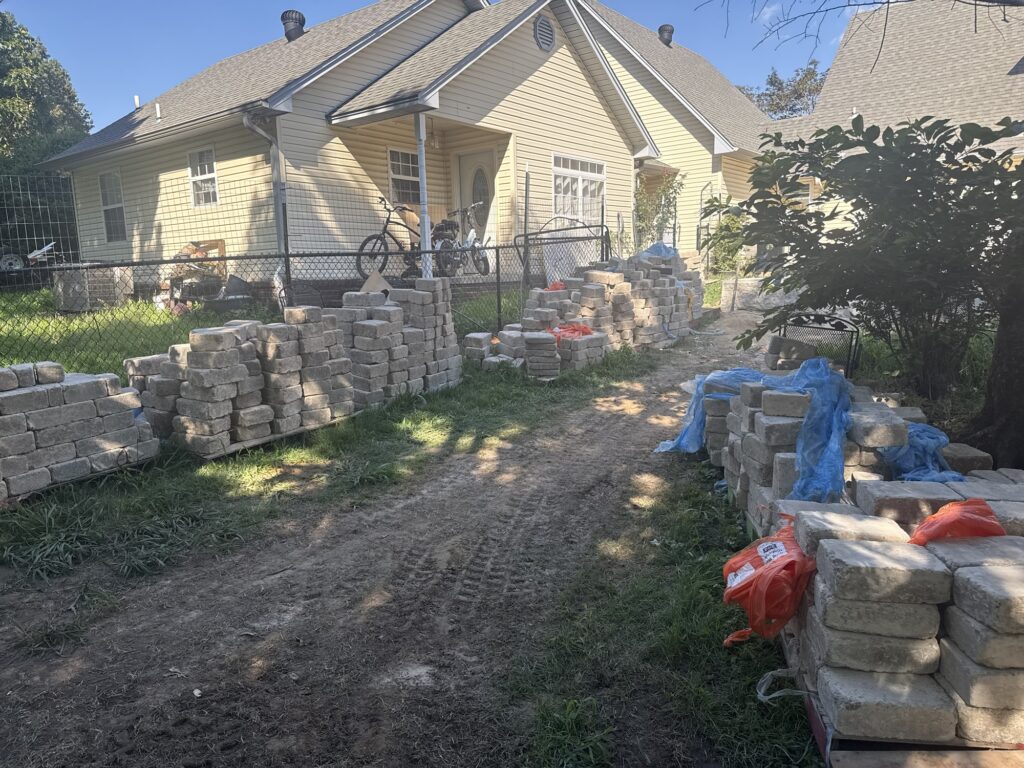
    Nine pallets of block.

    I think Robert’s anxiety immediately spiked because he was thinking, How am I going to fit all of those in the garage?

    I am pretty practical, and I also look for ways to cut corners, so I was immediately like, “These bricks are going toward an outdoor kitchen. They can literally live outdoors.”

    Problem solved.

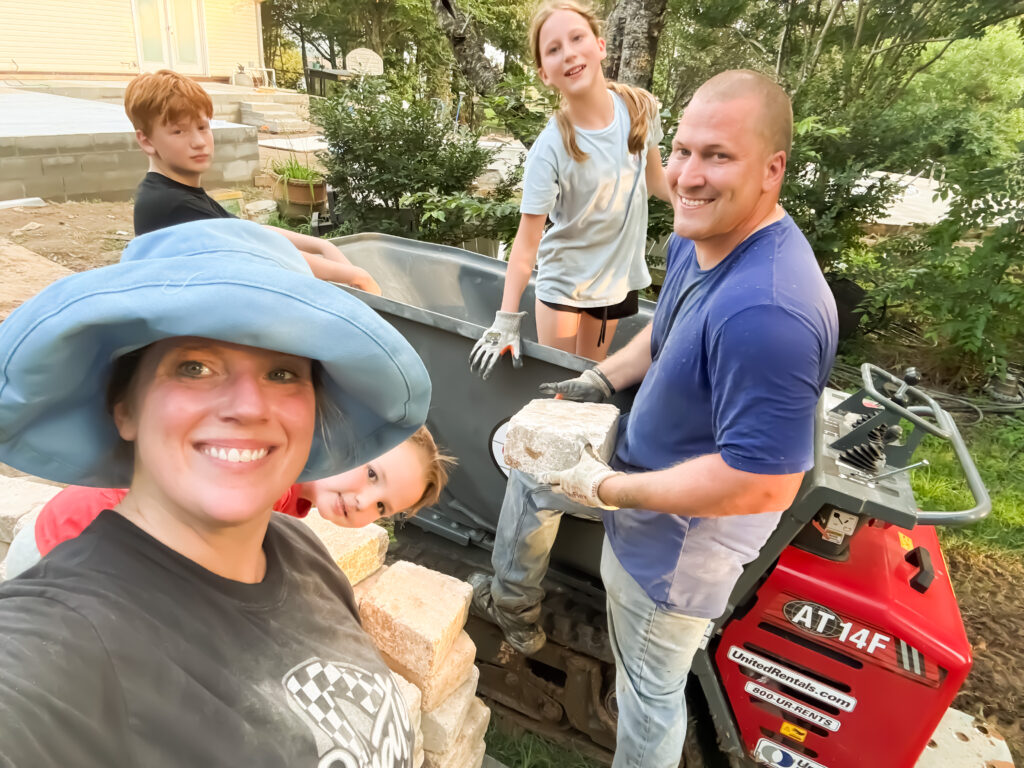
    Except then the delivery people offered to use a forklift to take the pallets up to the garage. It took everything Robert—who is very strong—the delivery man, and our son had just to help get the forklift up our driveway.

    And that was when we began to understand exactly what we had gotten ourselves into.

    Those blocks now had to make it completely around our property and into the backyard, where the construction was going to take place. They also needed to get close enough to the concrete pad that building with them wouldn’t be entirely impossible.

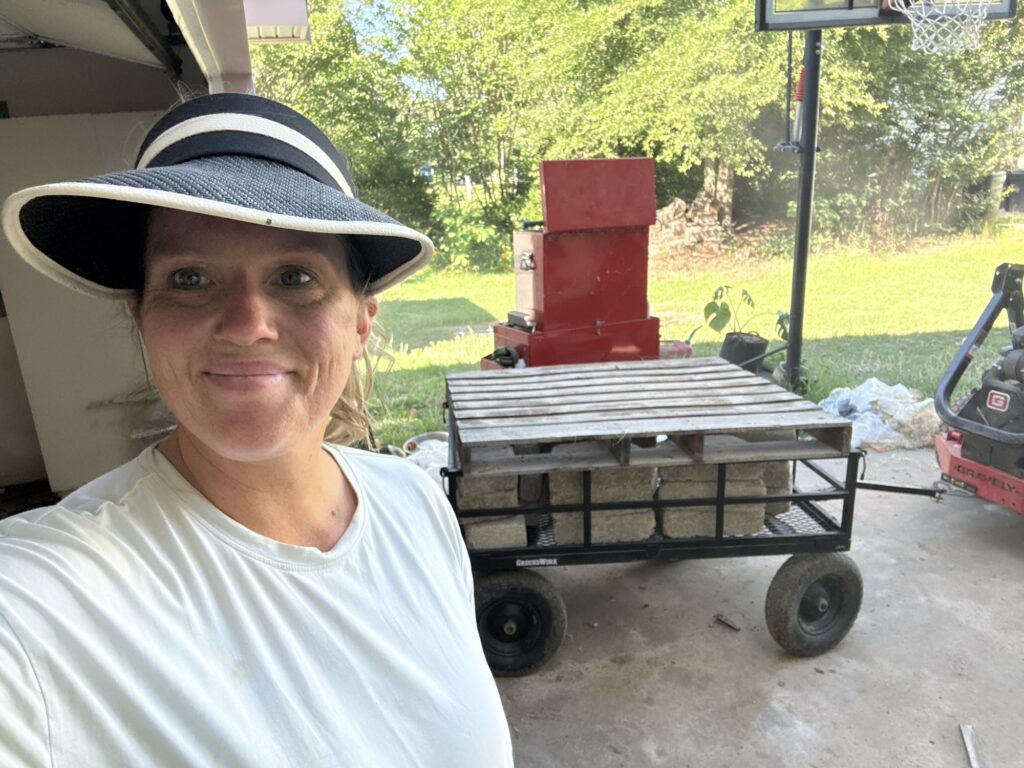
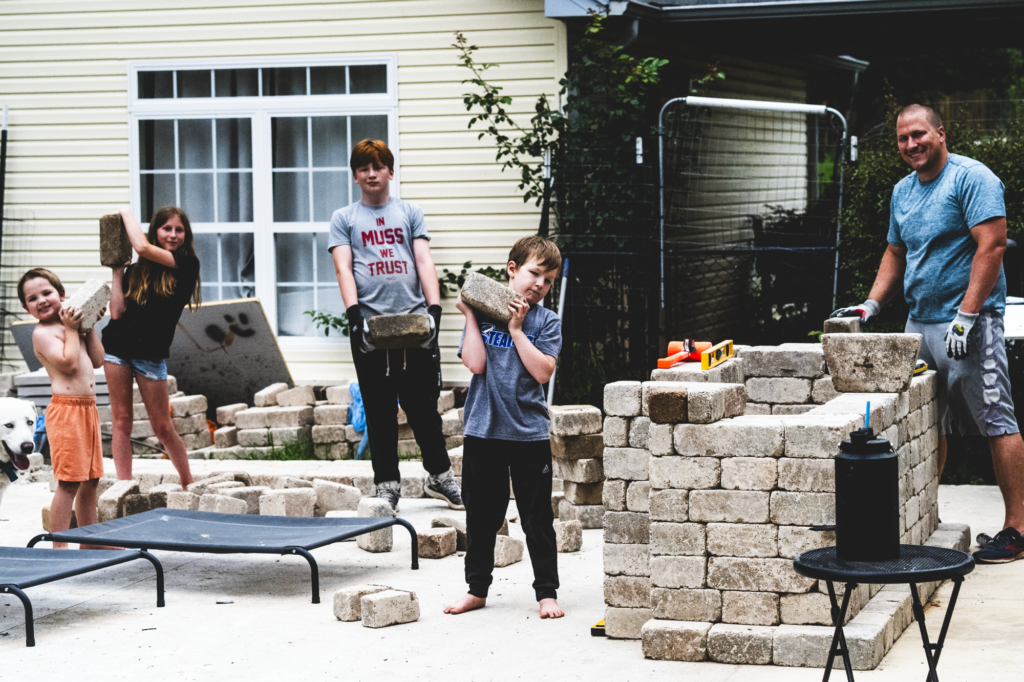
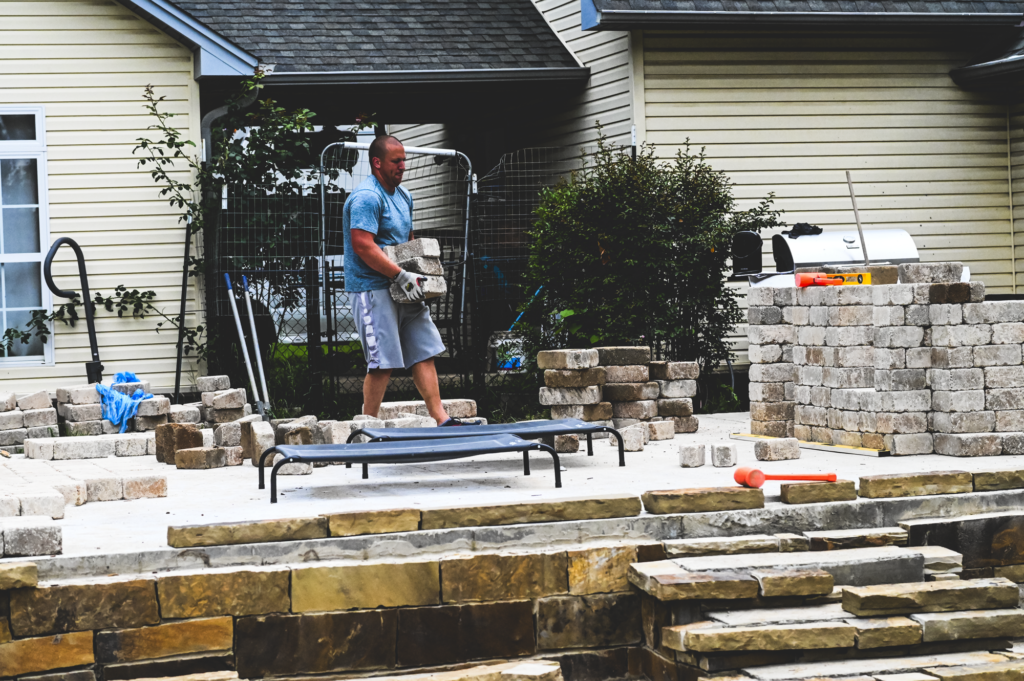
    So we started moving them.

    Eventually, we moved all of them.

    About 25,000 pounds of concrete blocks.

    Each one weighed around 40 to 50 pounds.

    We moved them one at a time.

    I wrote about that here.

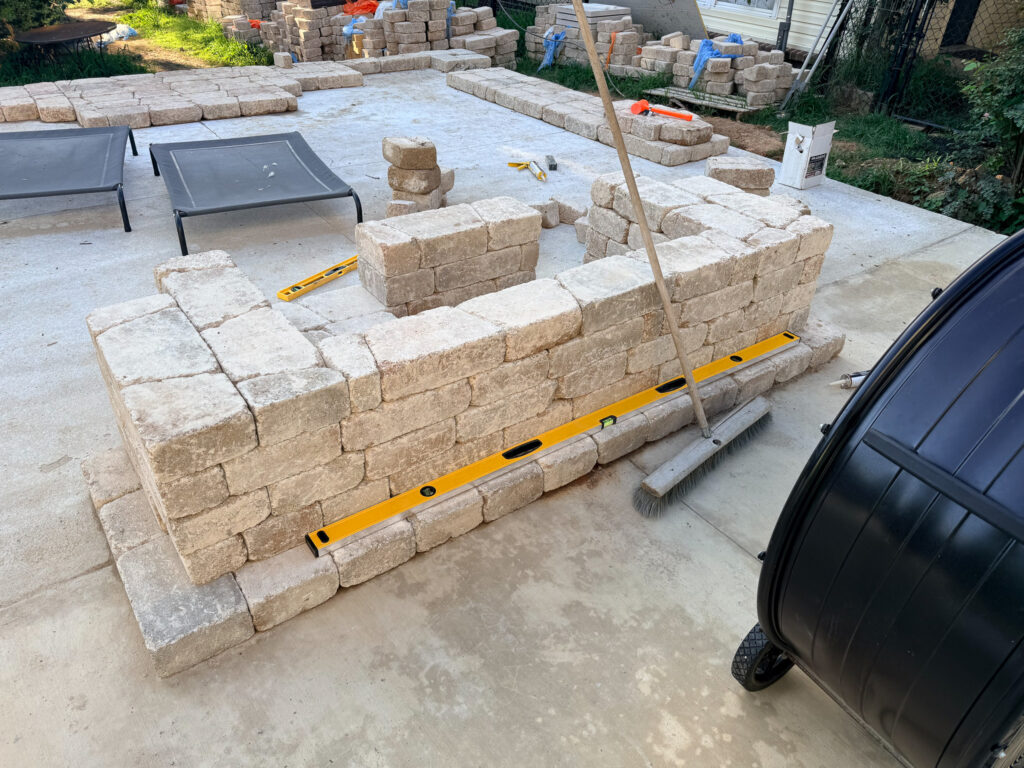
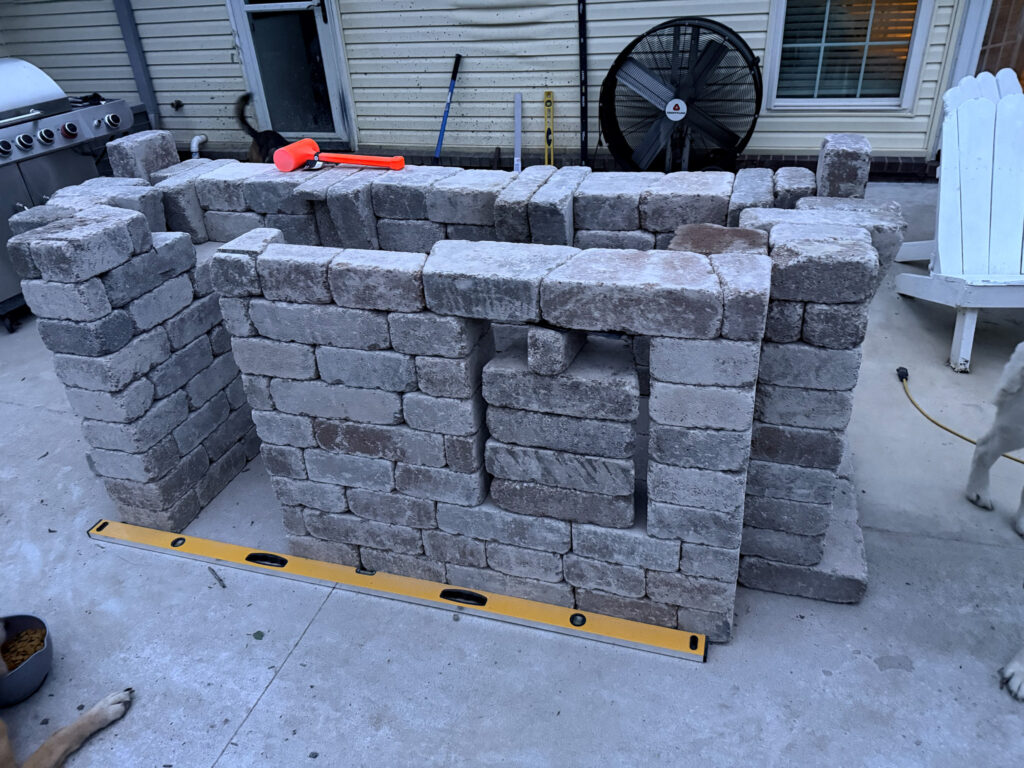
    And then we had to build with them.

    We wanted the whole kitchen finished by the Fourth of July, but we had a problem: our concrete needed time to cure.

    So on day 14, I suggested that we start with one row.

    Then another layer.

    Then another.

    Once we finished that, we moved on to the next thing.

    Robert did a lot of the first and second structures by himself, but then we got to the fireplace.

    It was much bigger.

    And I knew I needed to jump in.

    So we did it together.

    And we worked.

    Night after night, we would start when Robert got home from work and keep going until 10:00 or 11:00 at night. Then we would feed our family whatever restaurant was still open.

    And then we would get up and do it again.

    We were exhausted.

    We were sore.

    We were working in 100-degree heat.

    We both lost weight during the process.

    Then one night, I woke up around 3:00 in the morning and realized Robert wasn’t beside me.

    I thought for sure he had gone to check on the pool. He had been having anxiety about it, so I figured he had gone to check the liner and would be right back.

    I waited for him to come back.

    I tried to fall asleep, but I couldn’t.

    Before I knew it, it was 5:00 in the morning, and Robert came through our bedroom door to get ready for work.

    He had been on the couch the whole time.

    He was in so much muscle pain that his arms were going numb.

    Mine were too.

    We did eventually discover that if you prop yourself up on a cushion instead of lying flat, it helps with some of the numbness. A helpful tip, I suppose, if you ever decide to move and stack 25,000 pounds of concrete blocks.

    Anyway, Robert crawled into bed just to sit with me.

    We were both thinking about how much work we had already done.

    How much work we still had left.

    How sore we were.

    Then Robert pulled up his fitness ring app.

    He had slept for 29 minutes.

    Twenty-nine minutes.

    And I just started sobbing.

    How much could we put on each other?

    How much could we put on him?

    He still had to go to work.

    I’ve learned recently that I have an anxious attachment, and I don’t like rupture. I don’t like unpredictability. And this felt unpredictable to me because my husband was about to go to work on 29 minutes of sleep.

    I immediately started feeling all the things I knew he was going to feel—the queasiness I get when I don’t sleep, the irritability, the exhaustion.

    I think that is just the empath in me. I hurt deeply when I love somebody, and I can feel almost anyone’s pain.

    It’s the weirdest thing.

    Robert told me not to cry.

    He told me he was going to be fine.

    And then he went to work.

    I cried for about 30 minutes after he left until I finally cried myself back to sleep.

    When I woke up, I felt okay.

    But I was determined to get us to bed early that night.

    Those were some of the hard moments we went through to make this happen.

    But through the whole thing, I learned how ridiculously strong Robert is.

    I don’t think I ever fully realized his strength.

    He continues to amaze me every day, and one thing is for sure: I will never again be surprised when he surprises me with something new he can do.

    We worked.

    We stacked block after block after block.

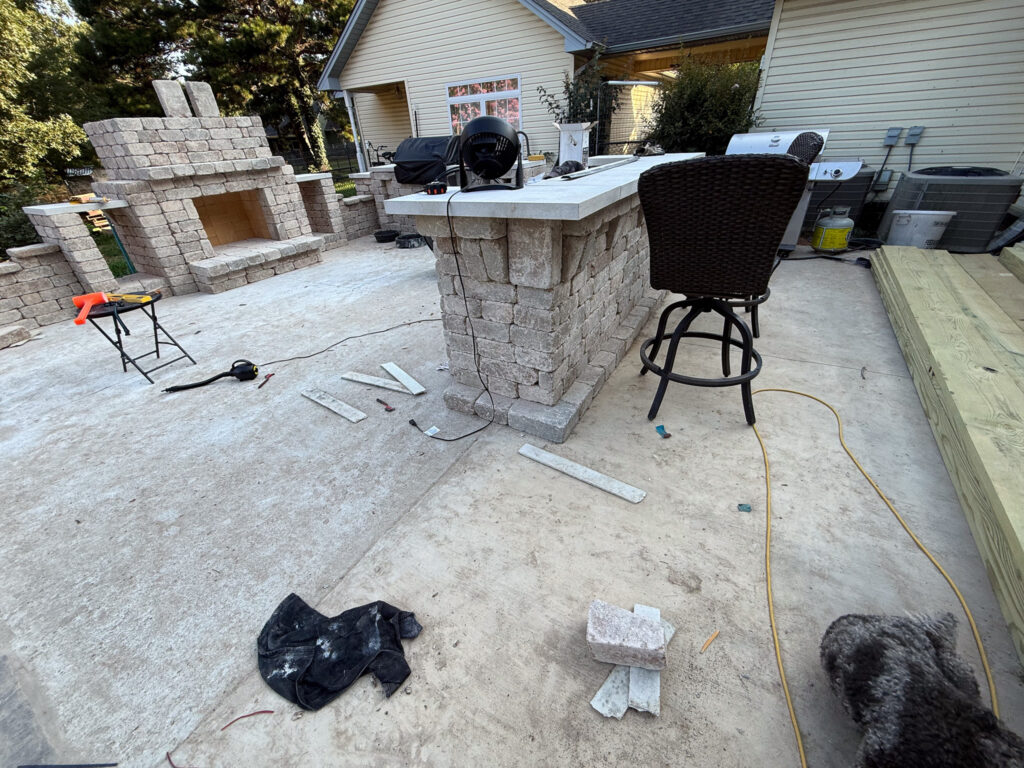
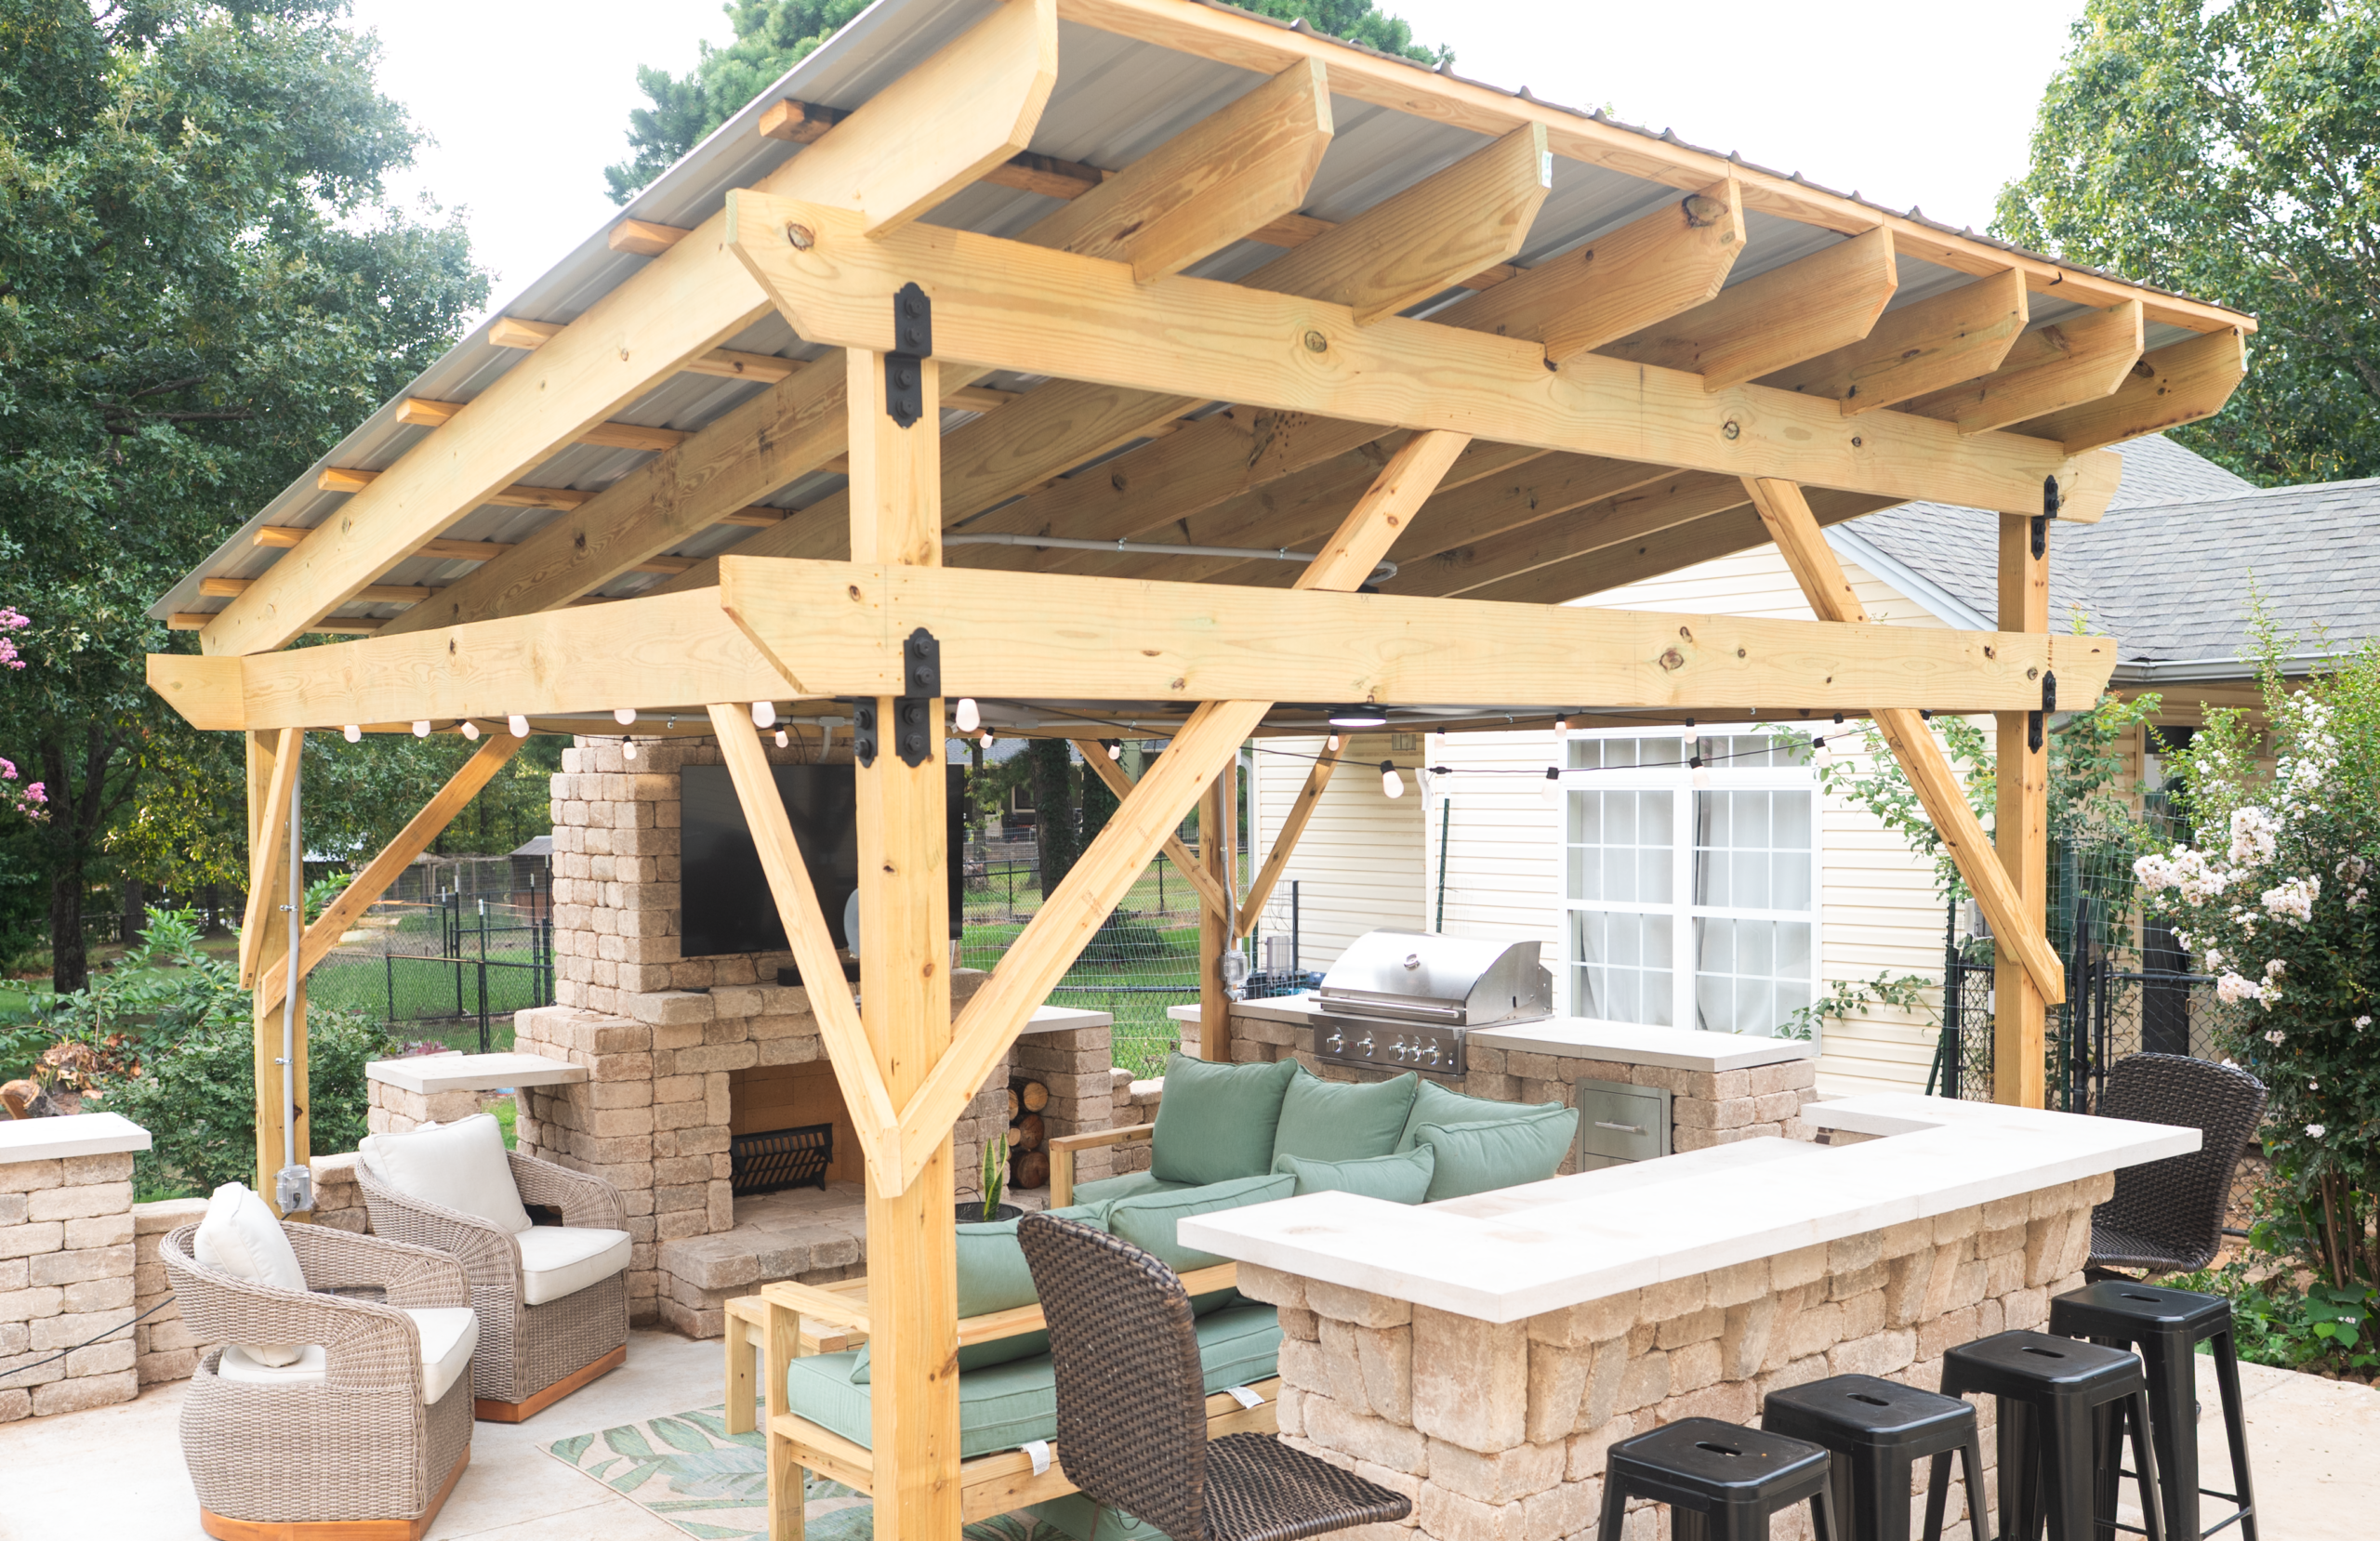
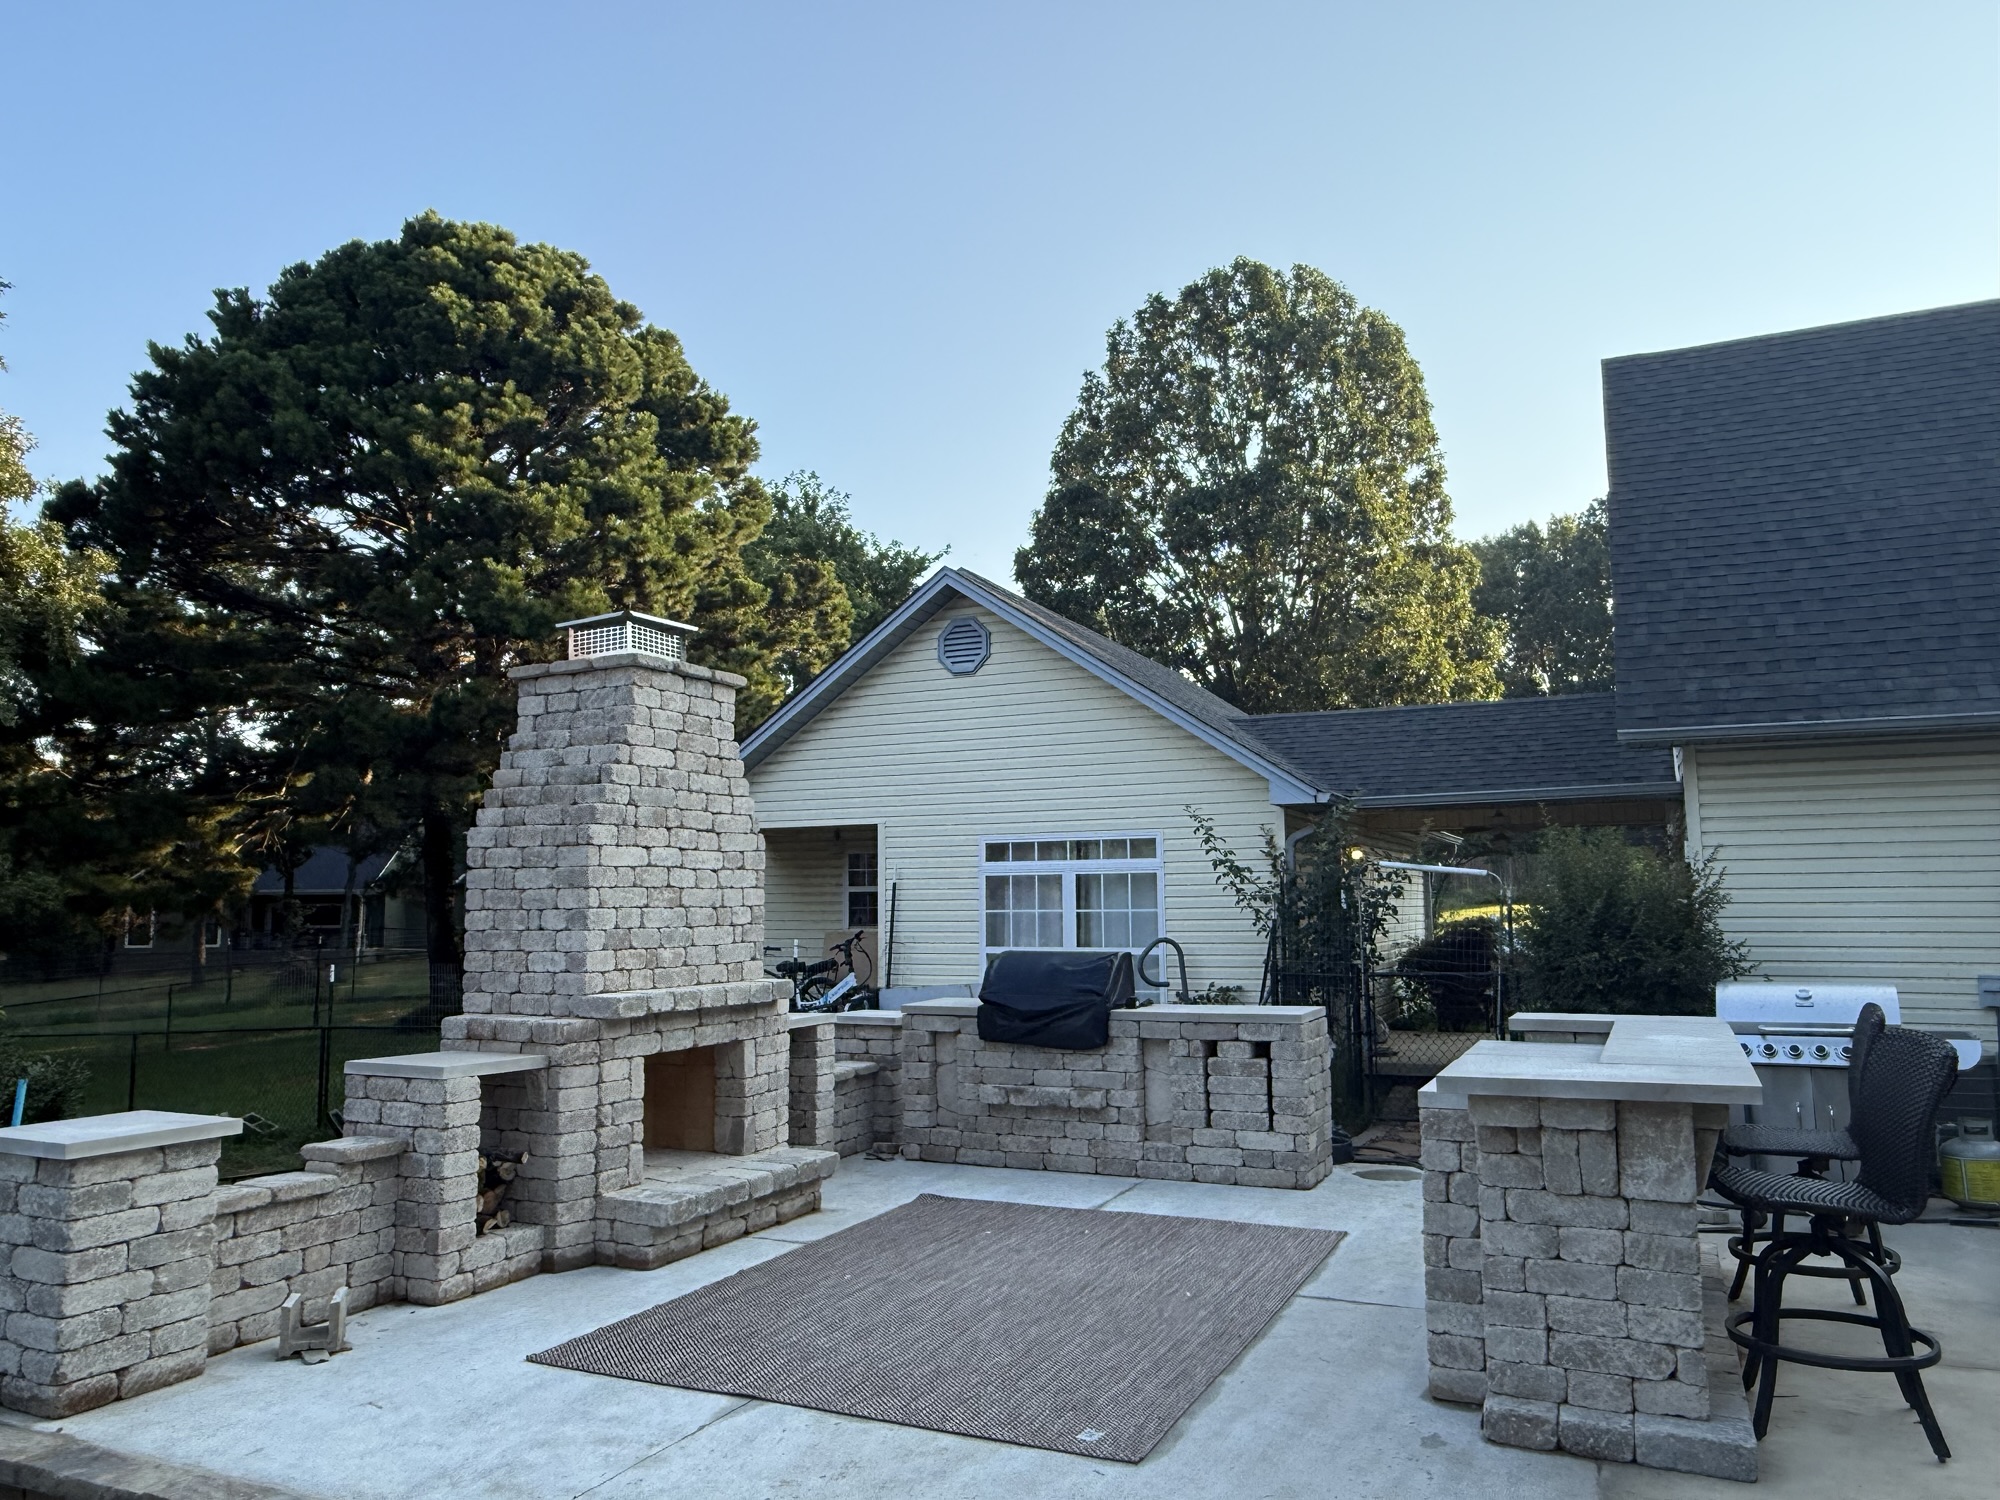
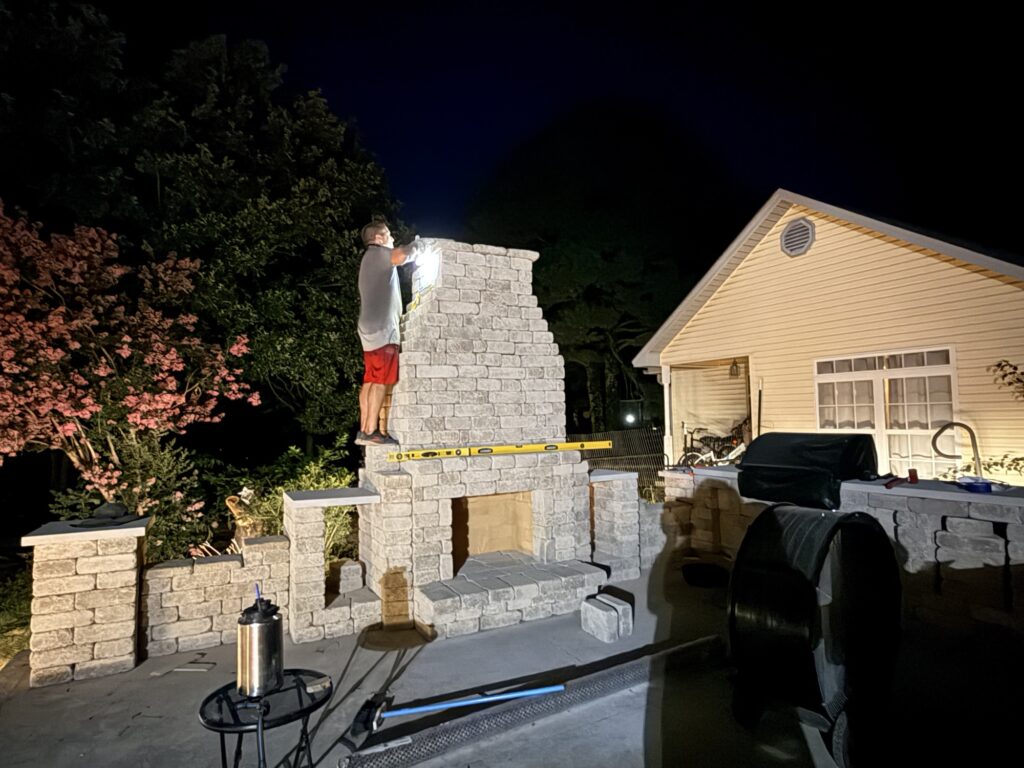
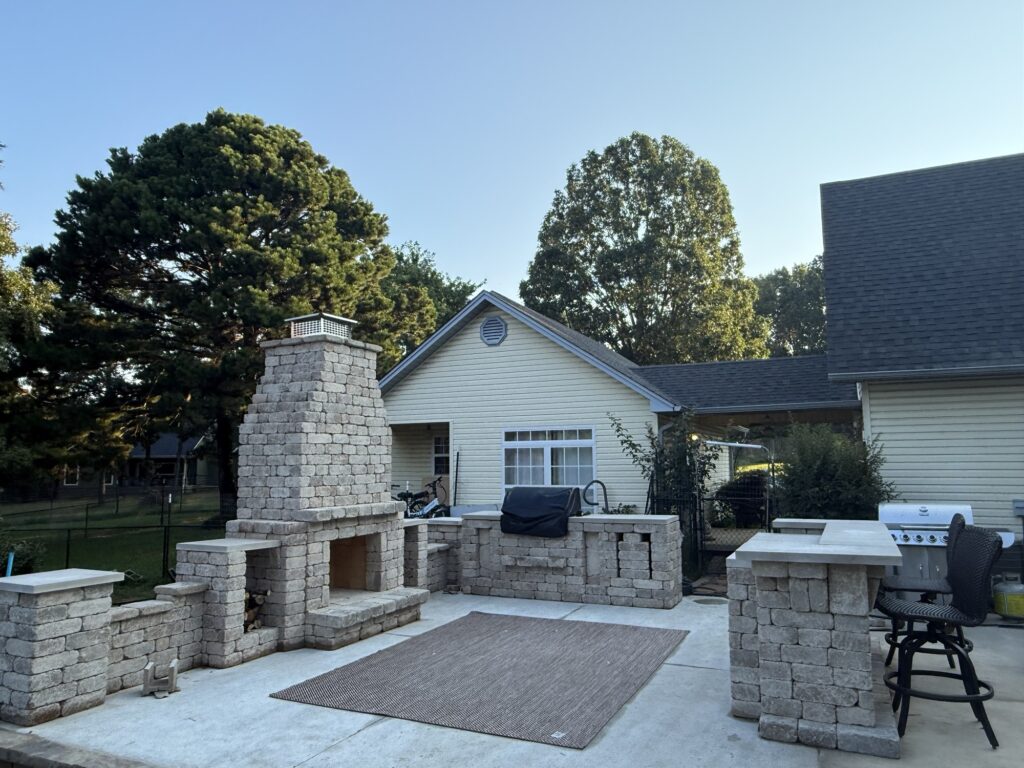
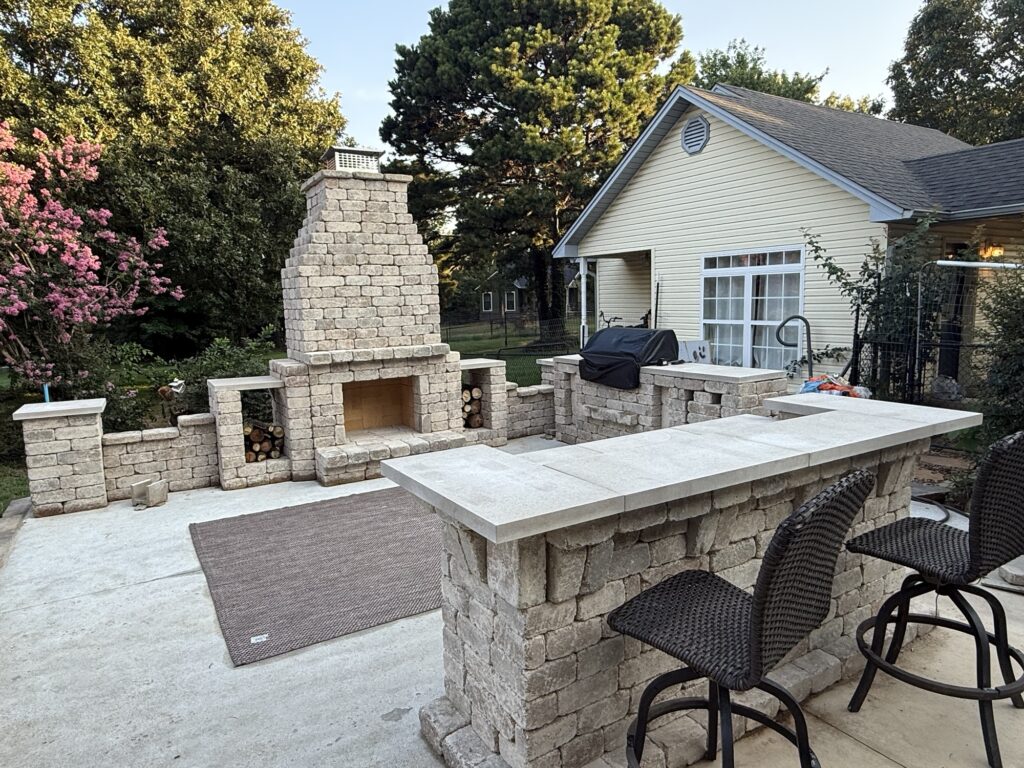
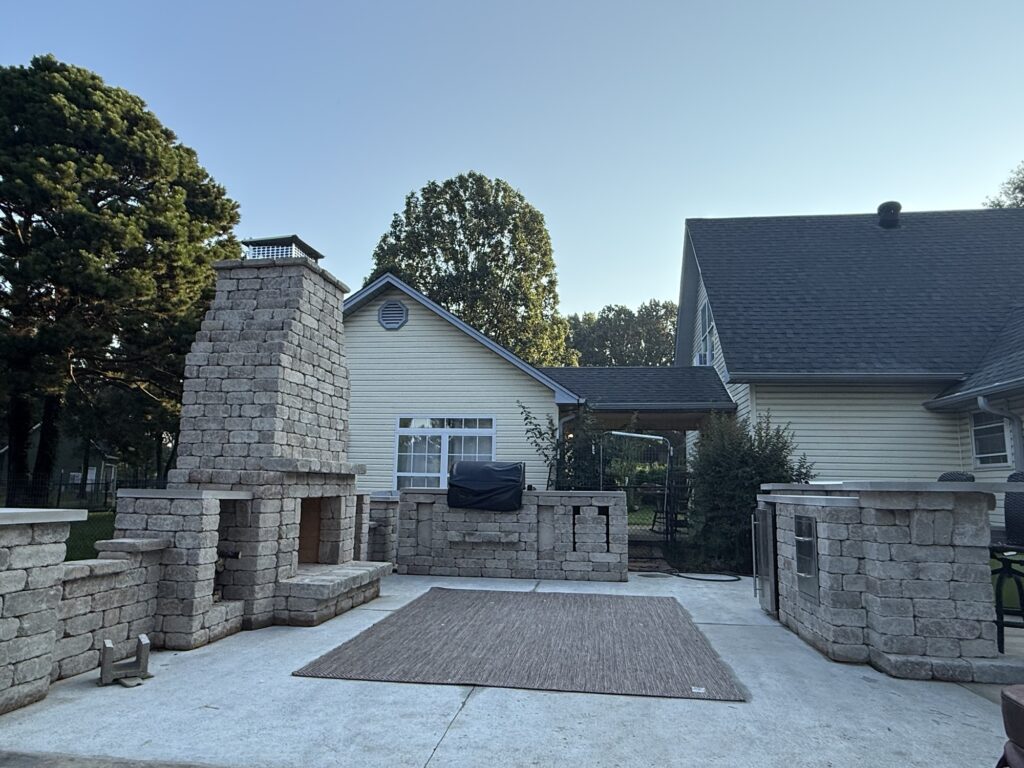
    We built a ten-foot-tall fireplace.

    An island.

    A kitchen and grill area.

    It was one of the hardest and most rewarding things I have ever done.

    And while we built it together, Robert was the backbone of the whole thing.

    He made sure everything was level. He had to learn how to use mortar because the adhesive that came with the kit was only useful if you already had a level surface.

    Our concrete, as concrete almost always is, was slightly unlevel.

    So Robert had to mortar it.

    He was nervous about that because, like I said, he doesn’t like to do anything unless he can do it with perfection and precision.

    Then he learned that he was skilled at that too.

    And we just kept working.

    Night after night.

    Round after round.

    Block after block.

    And it reminded me of the first time we climbed Pinnacle Mountain together.

    We climbed because we wanted to get to the top.

    That is what this was too.

    We were climbing because we wanted an outdoor kitchen that was affordable to us.

    We climbed through 25,000 pounds of blocks.

    Through 100-degree heat.

    Through sore muscles and numb arms.

    Through 29 minutes of sleep.

    Through mortar and measurements and making sure everything was level.

    We kept climbing.

    And somewhere along the way, our children started climbing with us.

    They carried blocks.

    They worked beside us.

    They watched their dad learn how to do something he had never done before.

    They watched their mom look at something enormous and say, We can do this.

    And then they watched us do it.

    Robert and I spent one of our first dates climbing a mountain together with Subway in our backpacks.

    I had no idea then that I would marry him.

    I had no idea that we would build a life together.

    I had no idea that, years later, we would stand in our backyard with four children, surrounded by thousands of pounds of concrete blocks, building something that once seemed completely beyond us.

    But I think those early hikes were a foreshadowing of the future we were building in tandem.

    Because we like doing hard things together.

    And I think that is what marriage is.

    Every day, doing hard things.

    Sometimes carrying more than you think you can carry.

    Sometimes looking at the person beside you and realizing you never fully understood how strong they were.

    Sometimes climbing when you are tired.

    Sometimes climbing when you are sore.

    Sometimes climbing when you have no idea how much farther you have to go.

    Robert is putting the final cap on the fireplace.

    But continuing to climb because you want to see what is waiting at the top.

    And today, when I look at what we built, I am ridiculously proud.

    Not just of the fireplace.

    Not just of the kitchen.

    Not just of the 25,000 pounds of concrete blocks that somehow made their way from our driveway, around our property, and into something that will probably outlive us.

    I am proud of my husband.

    I am proud of my children.

    I am proud of us.

    All these years later, we still climb.

    And now our children climb with us.

    And probably the most daunting idea is that what we’ve built in our backyard will outlive us, just like what we built in marriage.

  • Office Makeover (and the Vision No One Else Could See)

    Office Makeover (and the Vision No One Else Could See)

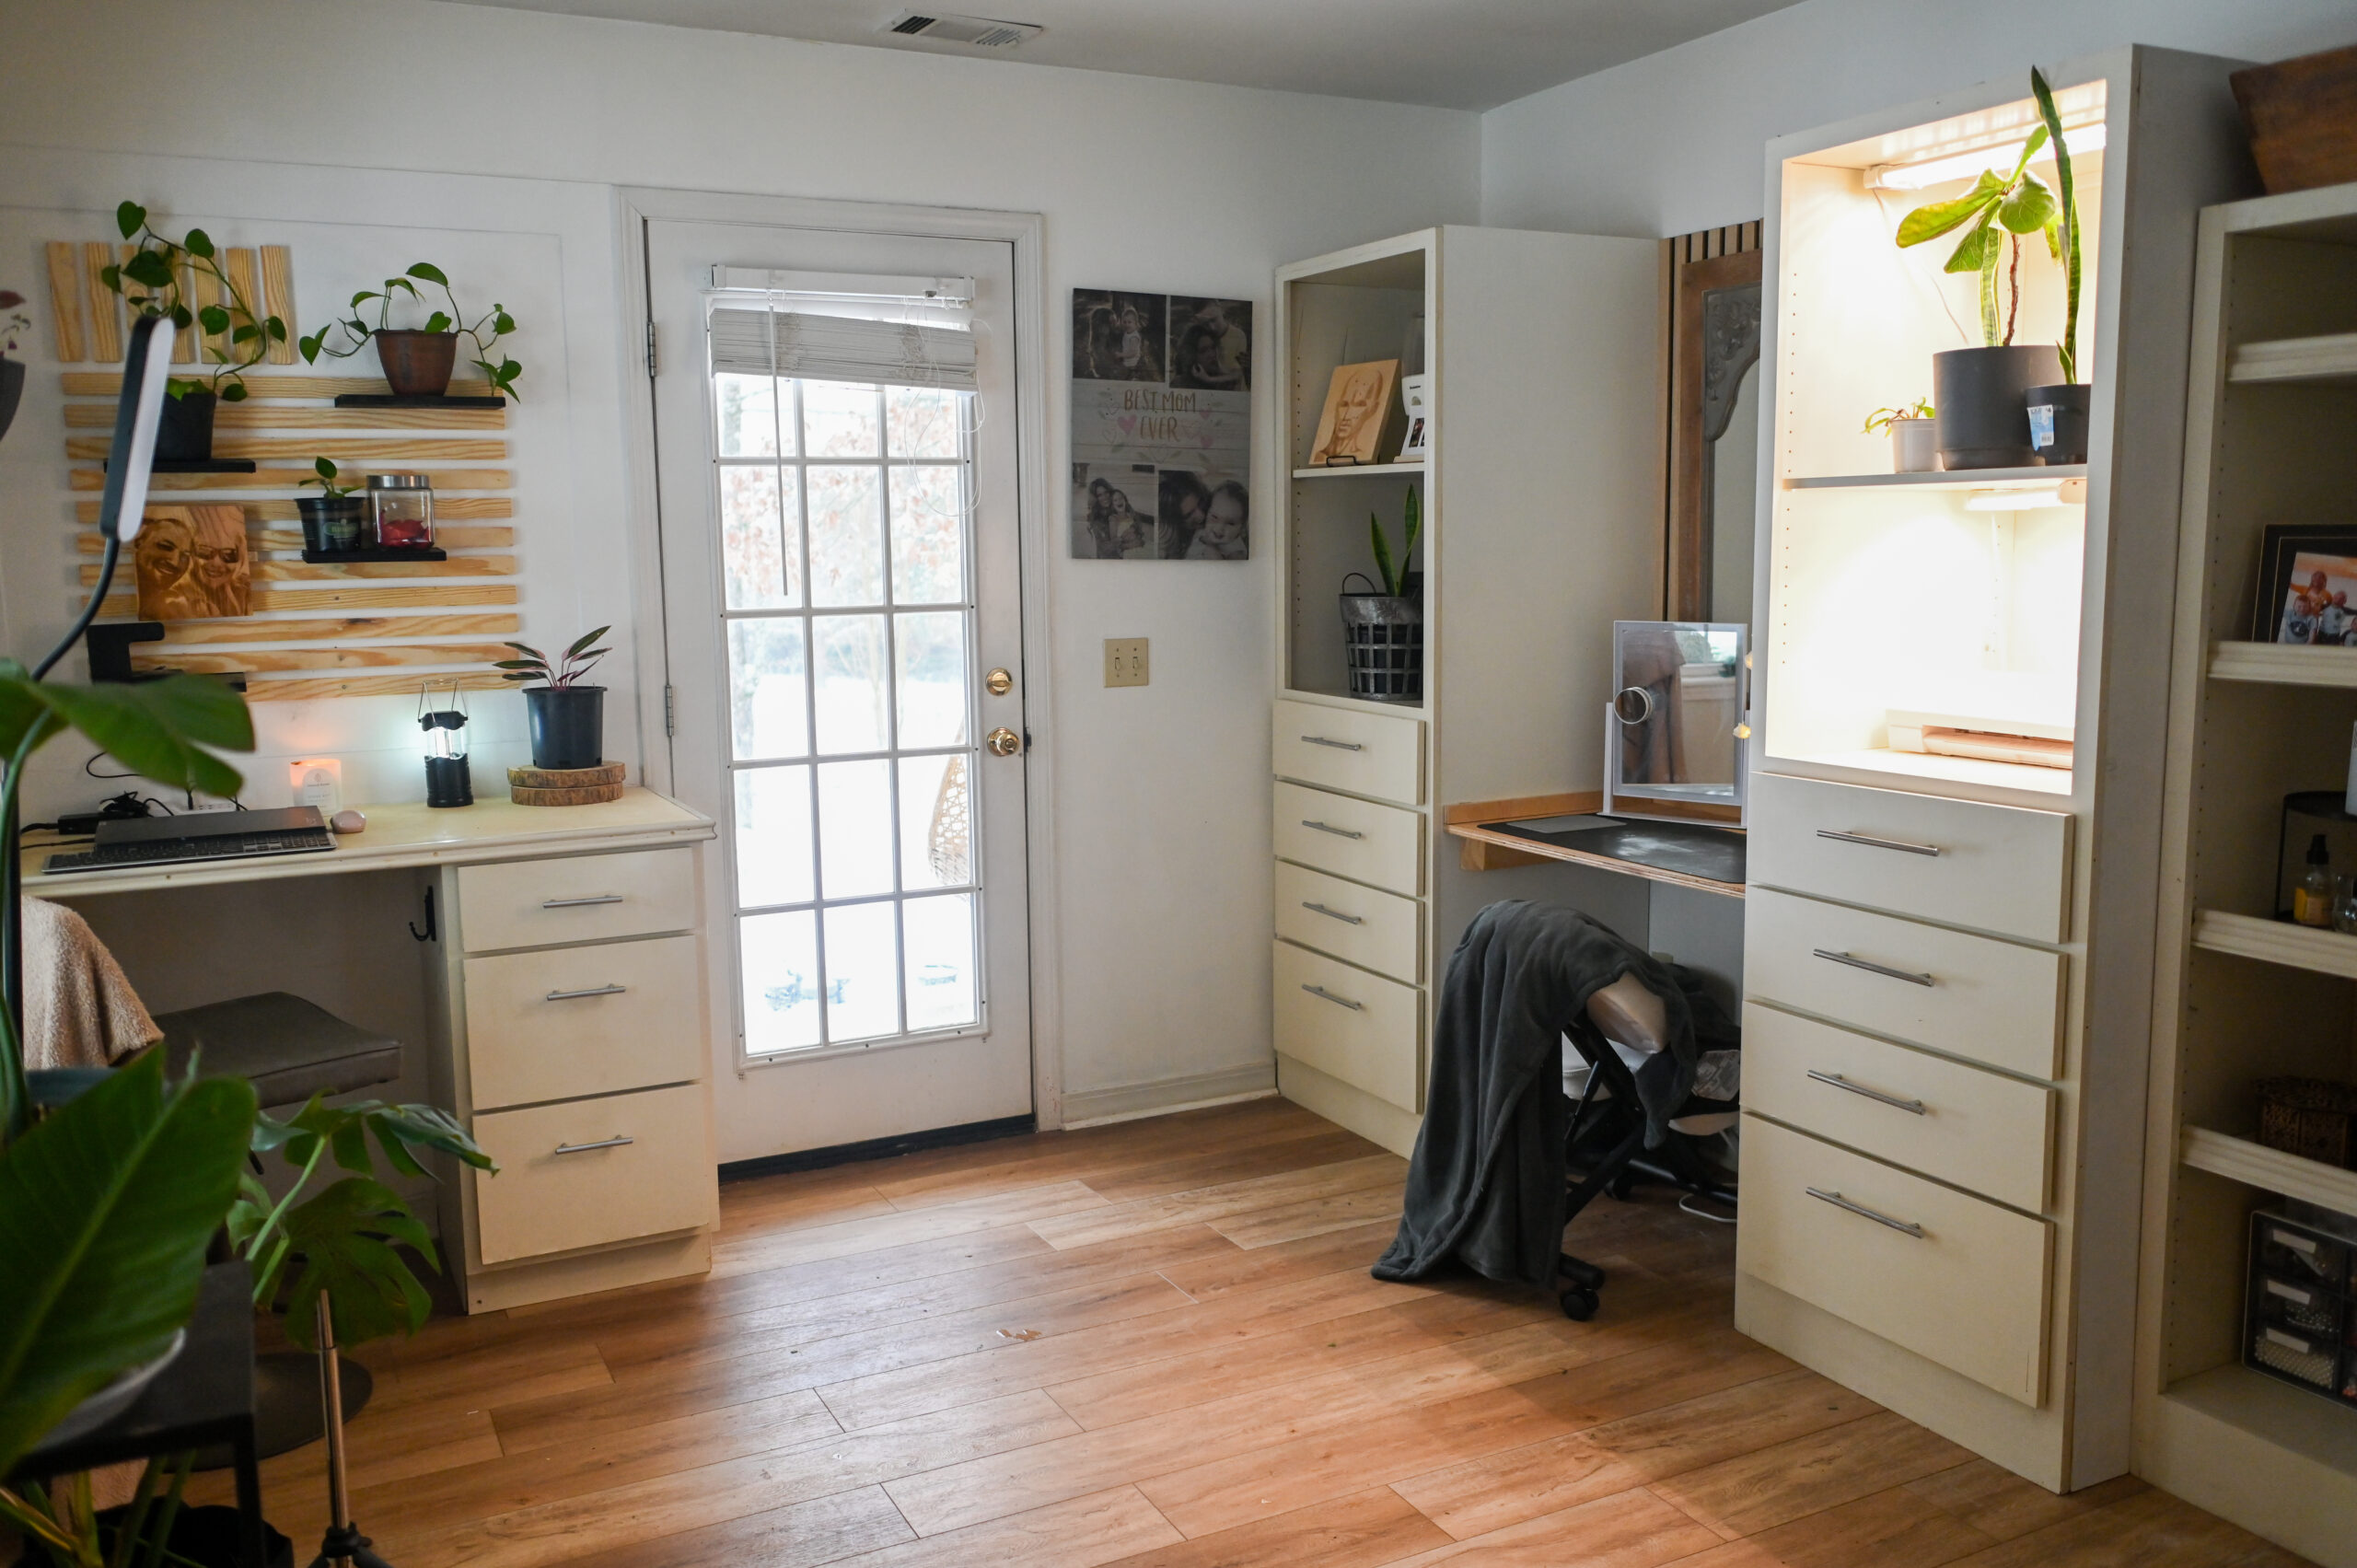
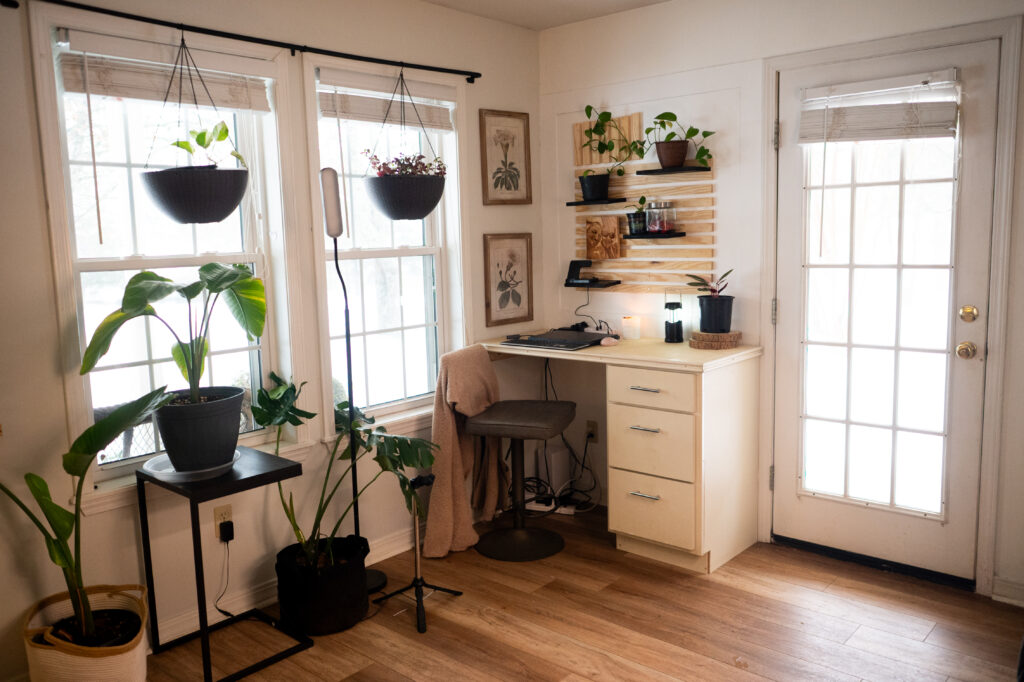
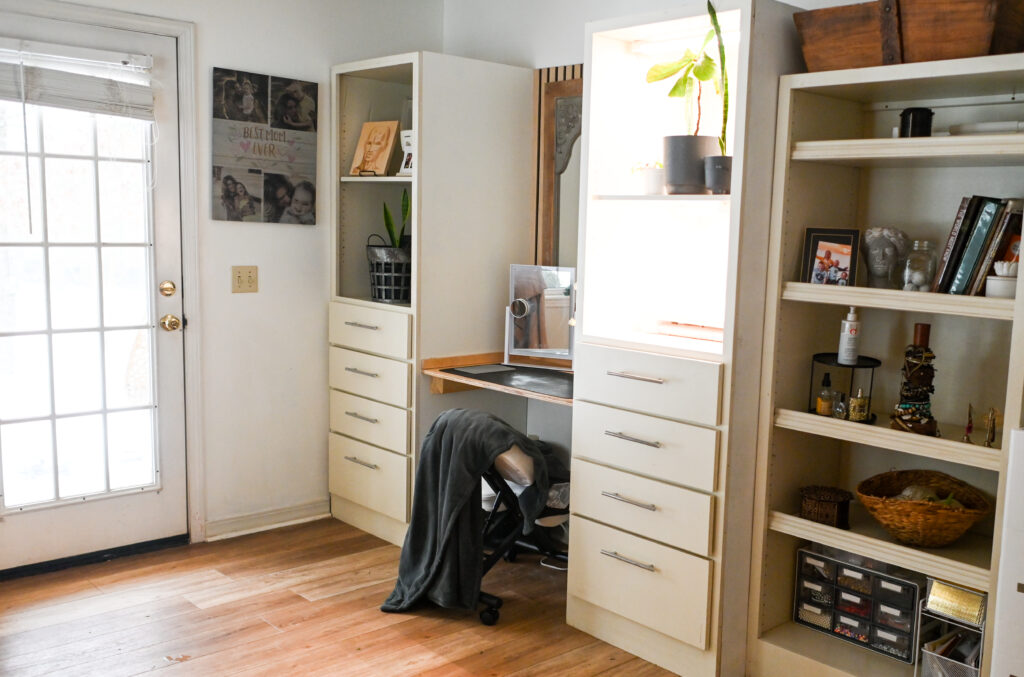
    My office DIY makeover that shocked everyone, including me.

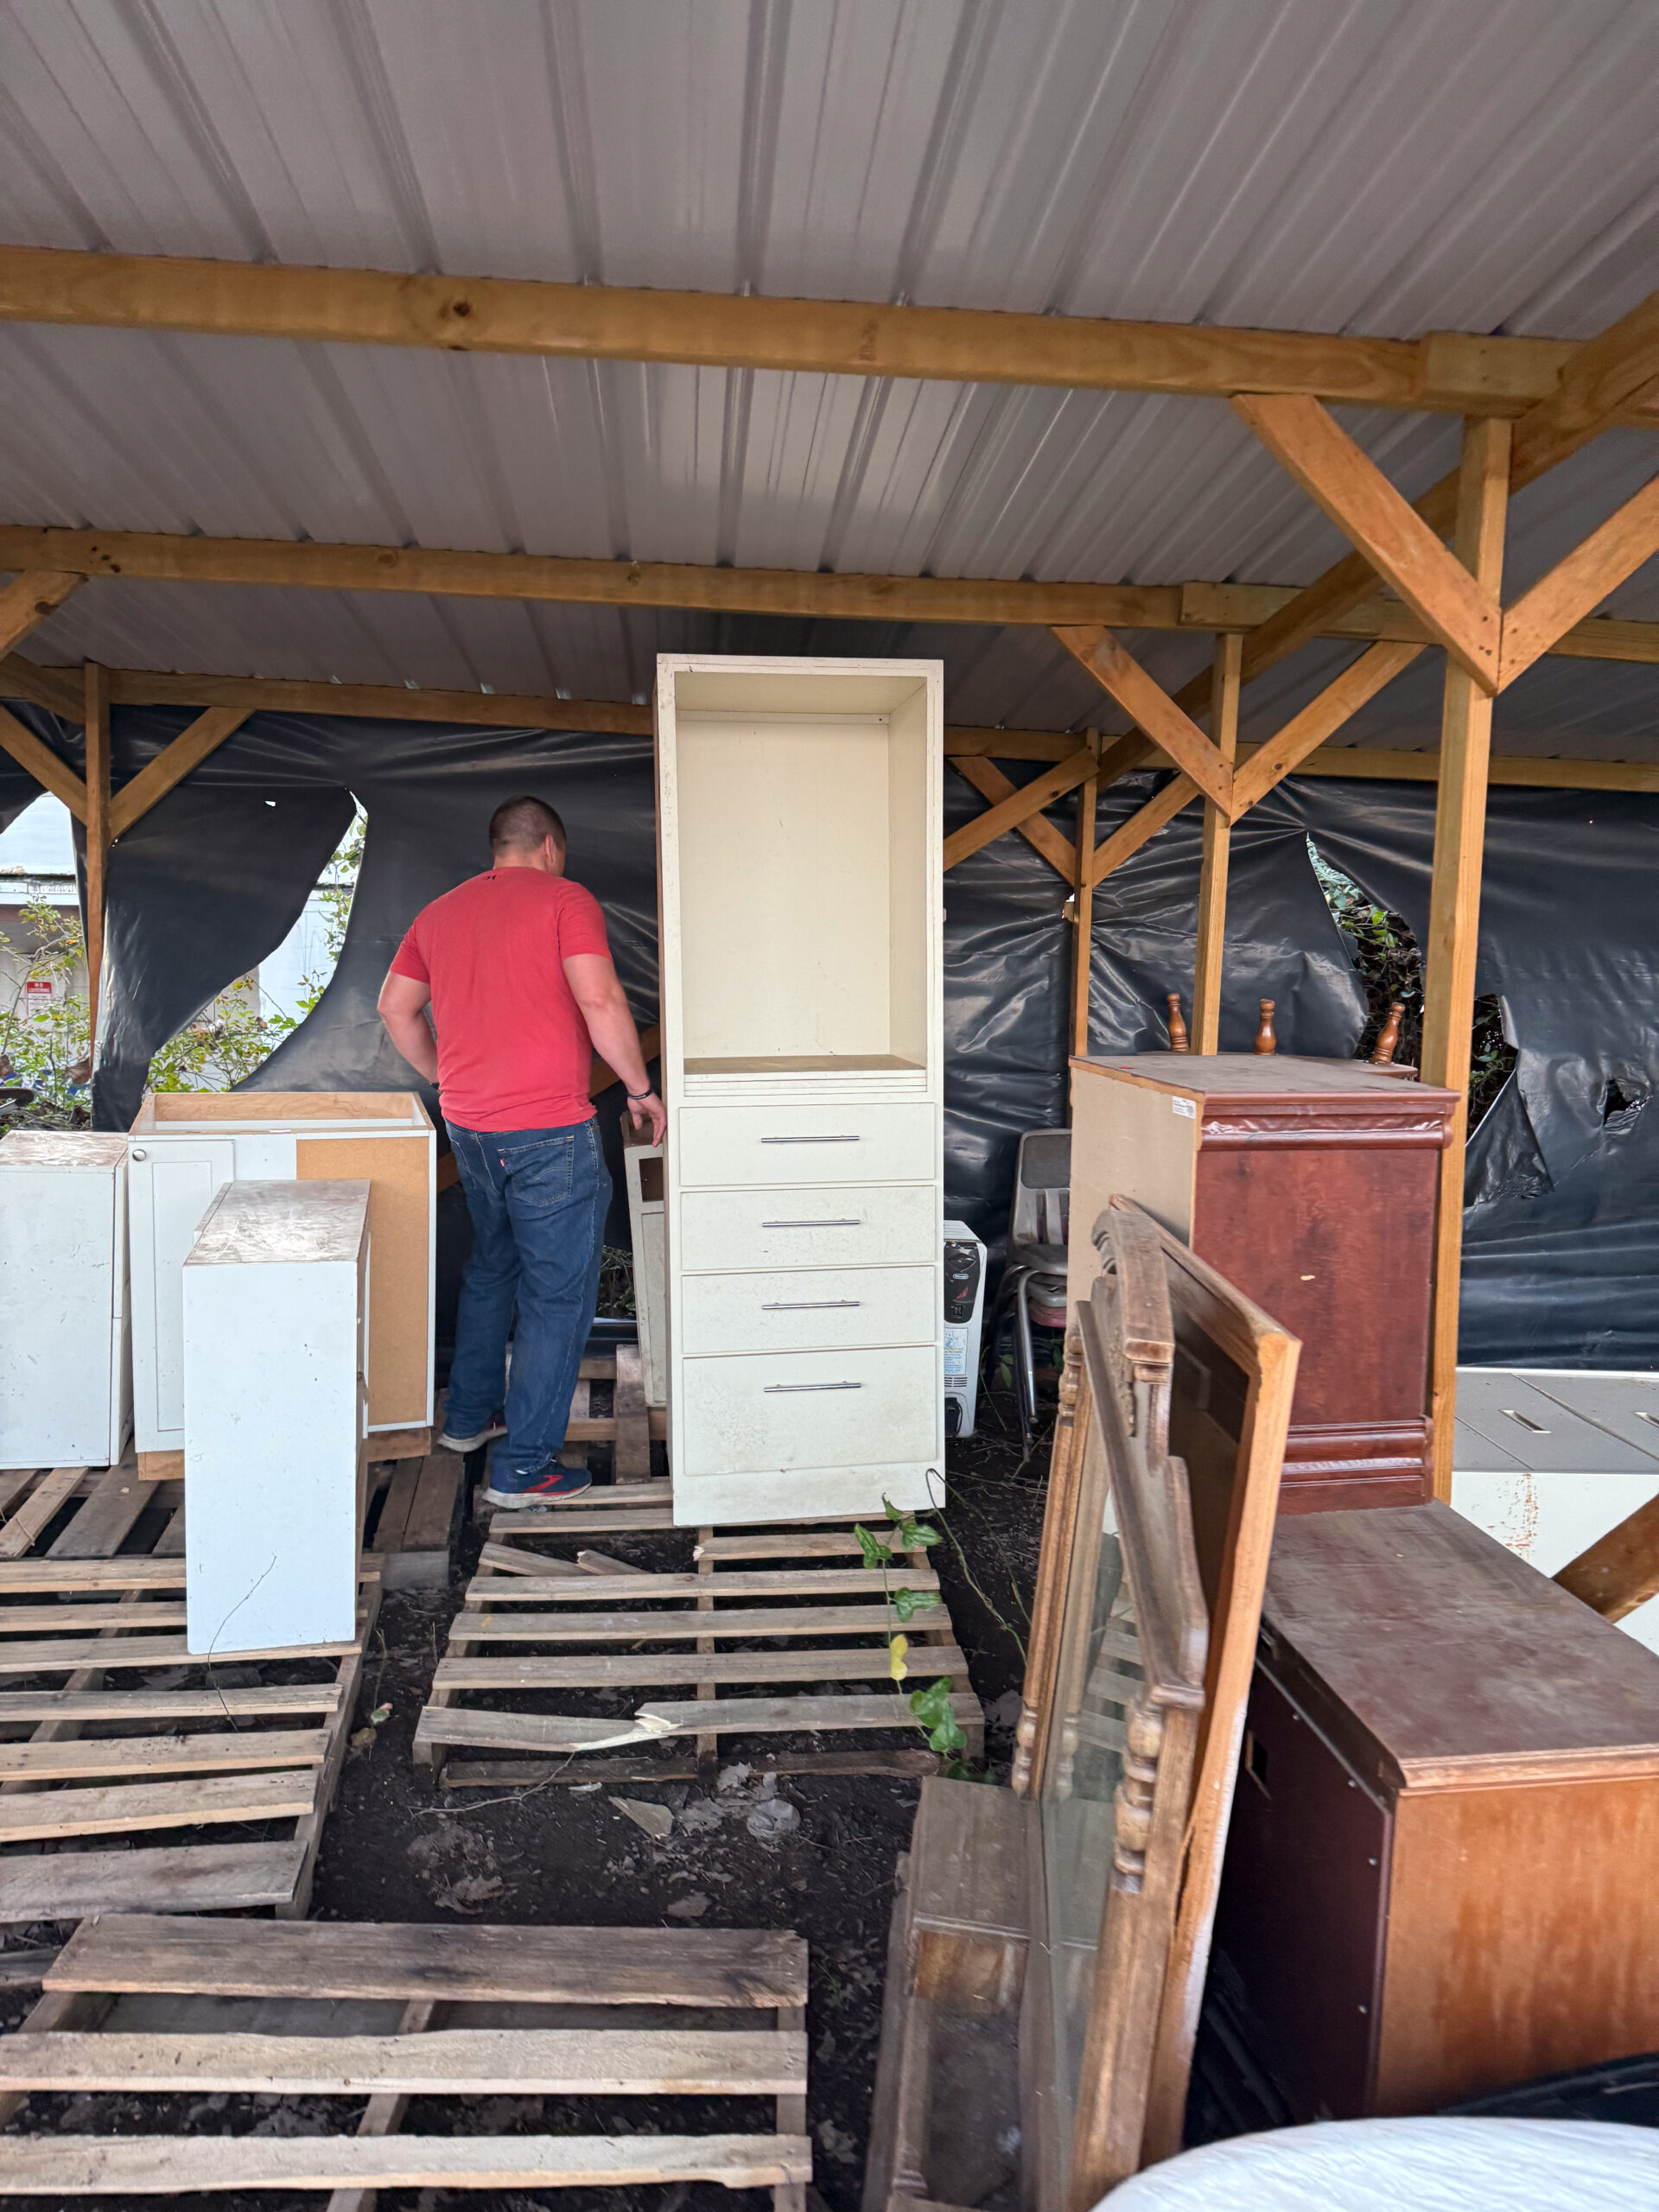
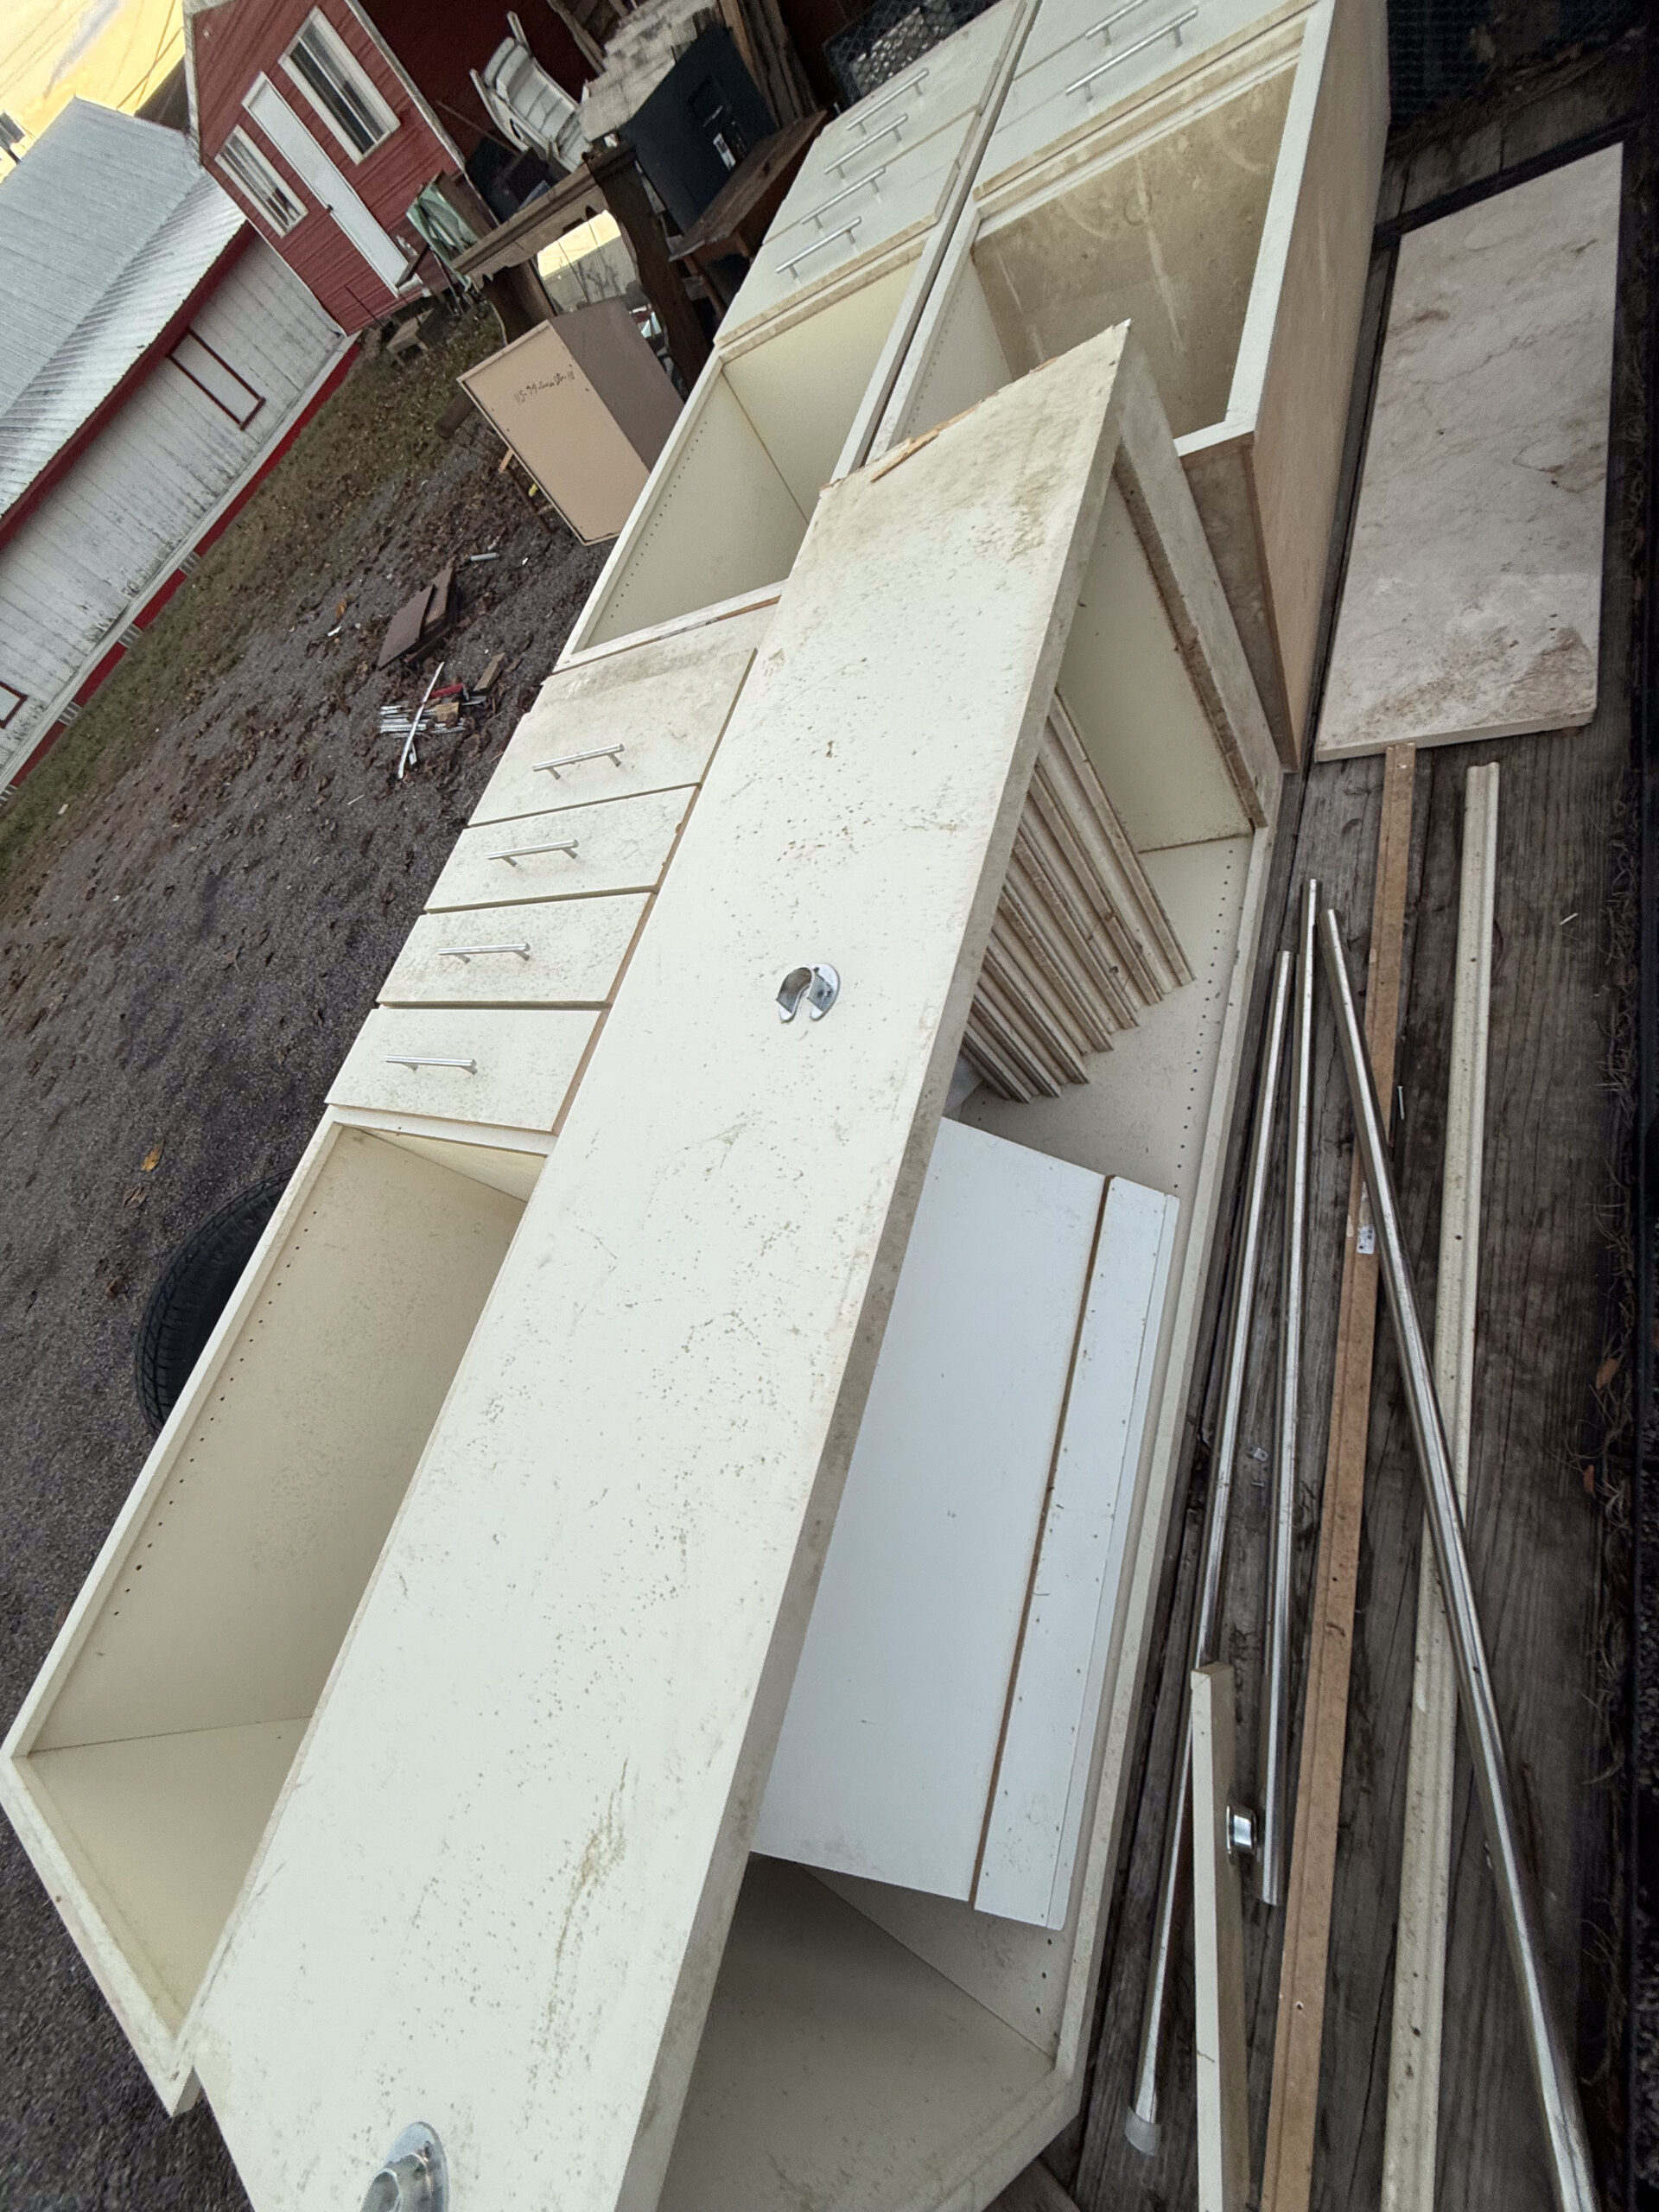
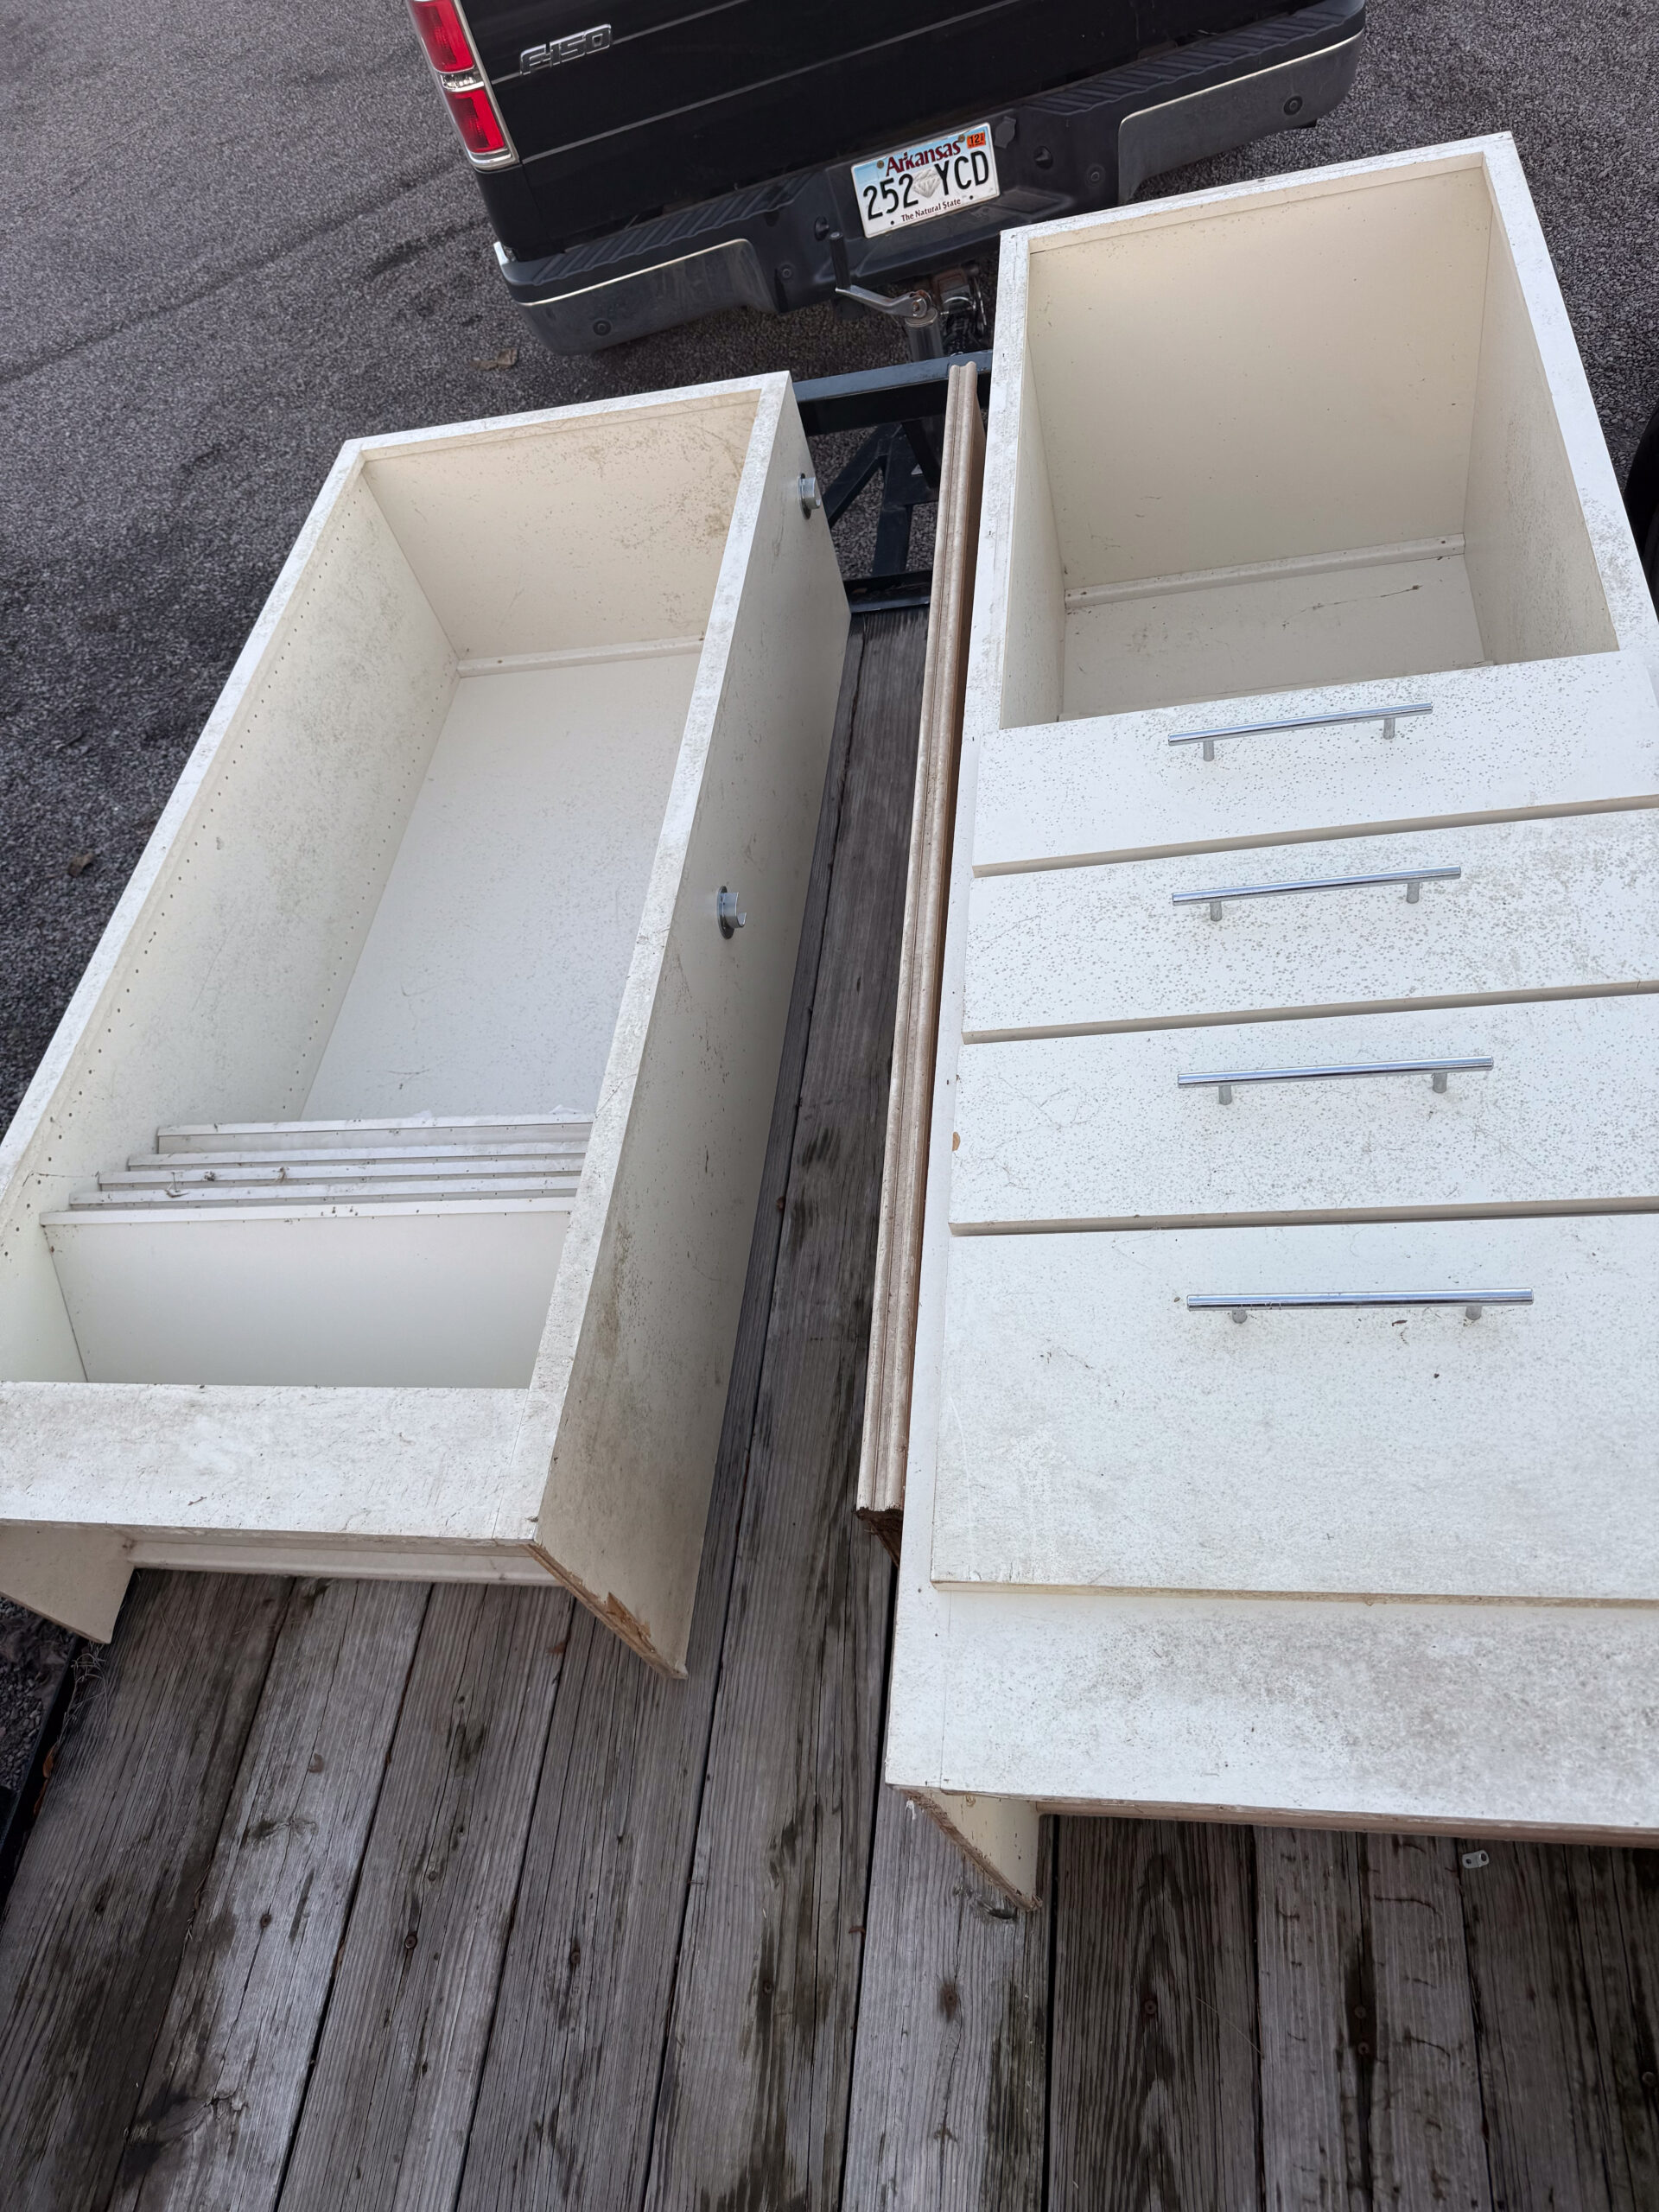
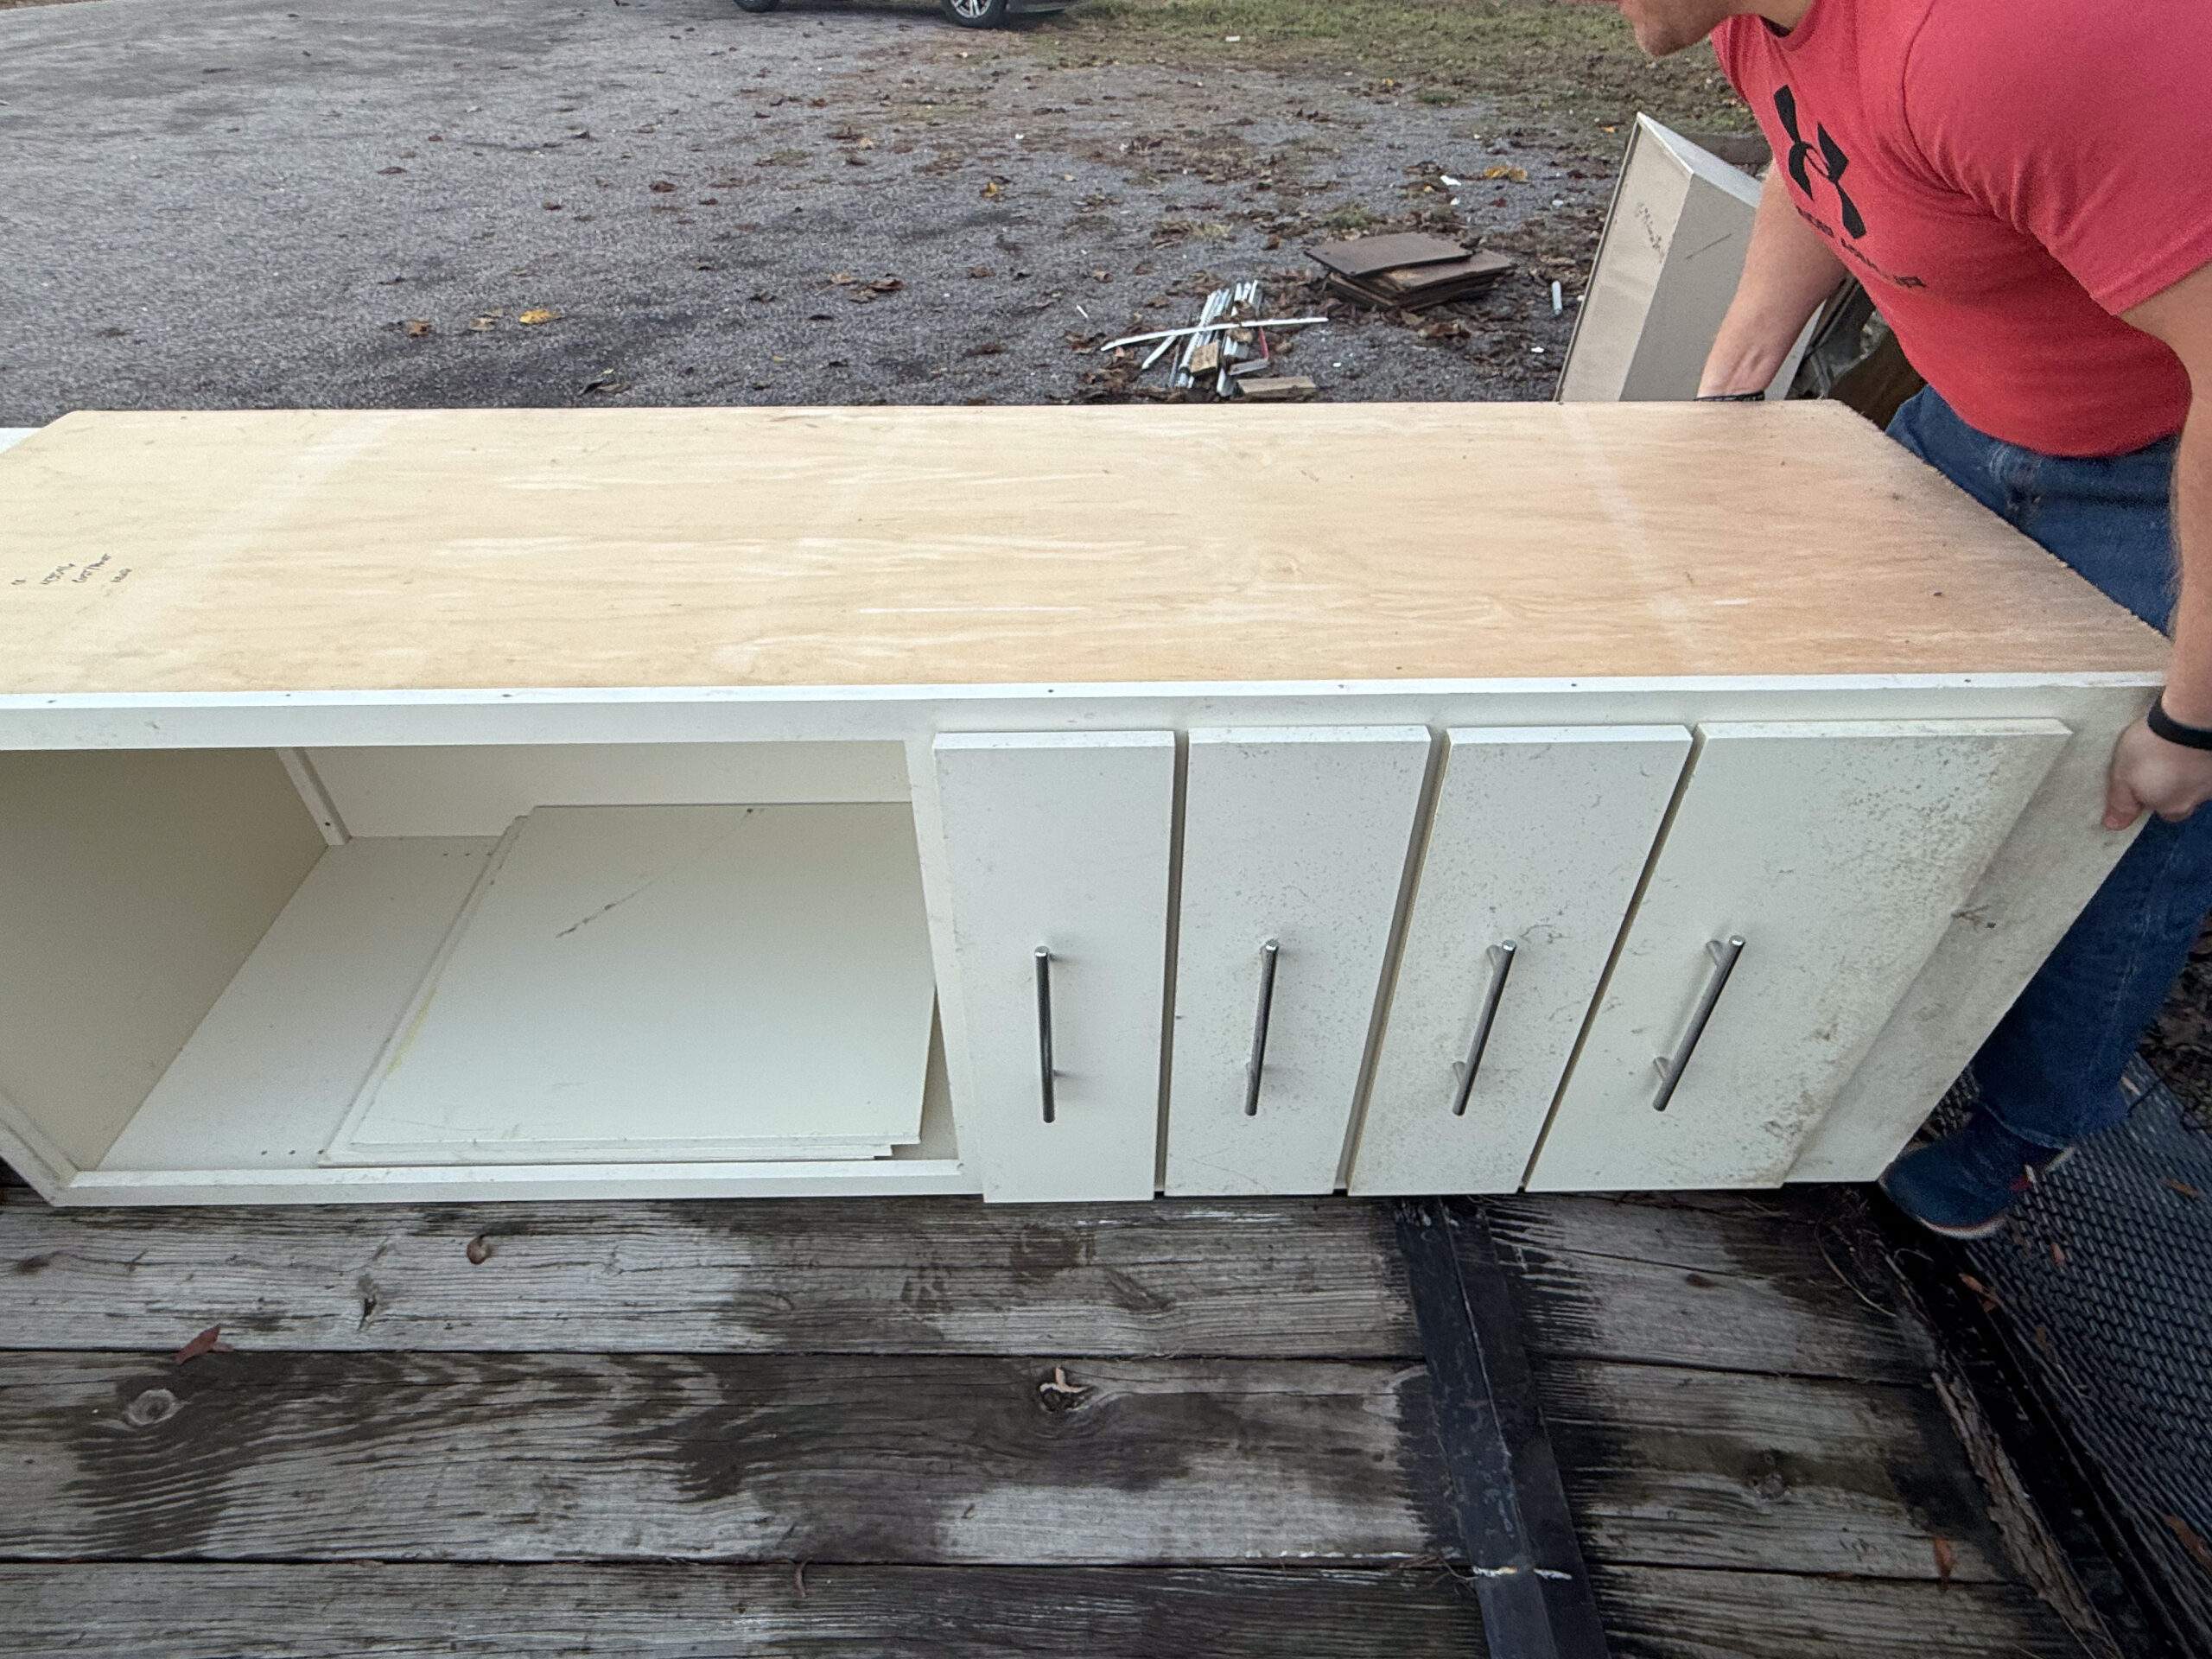
    The first two photos are the before.
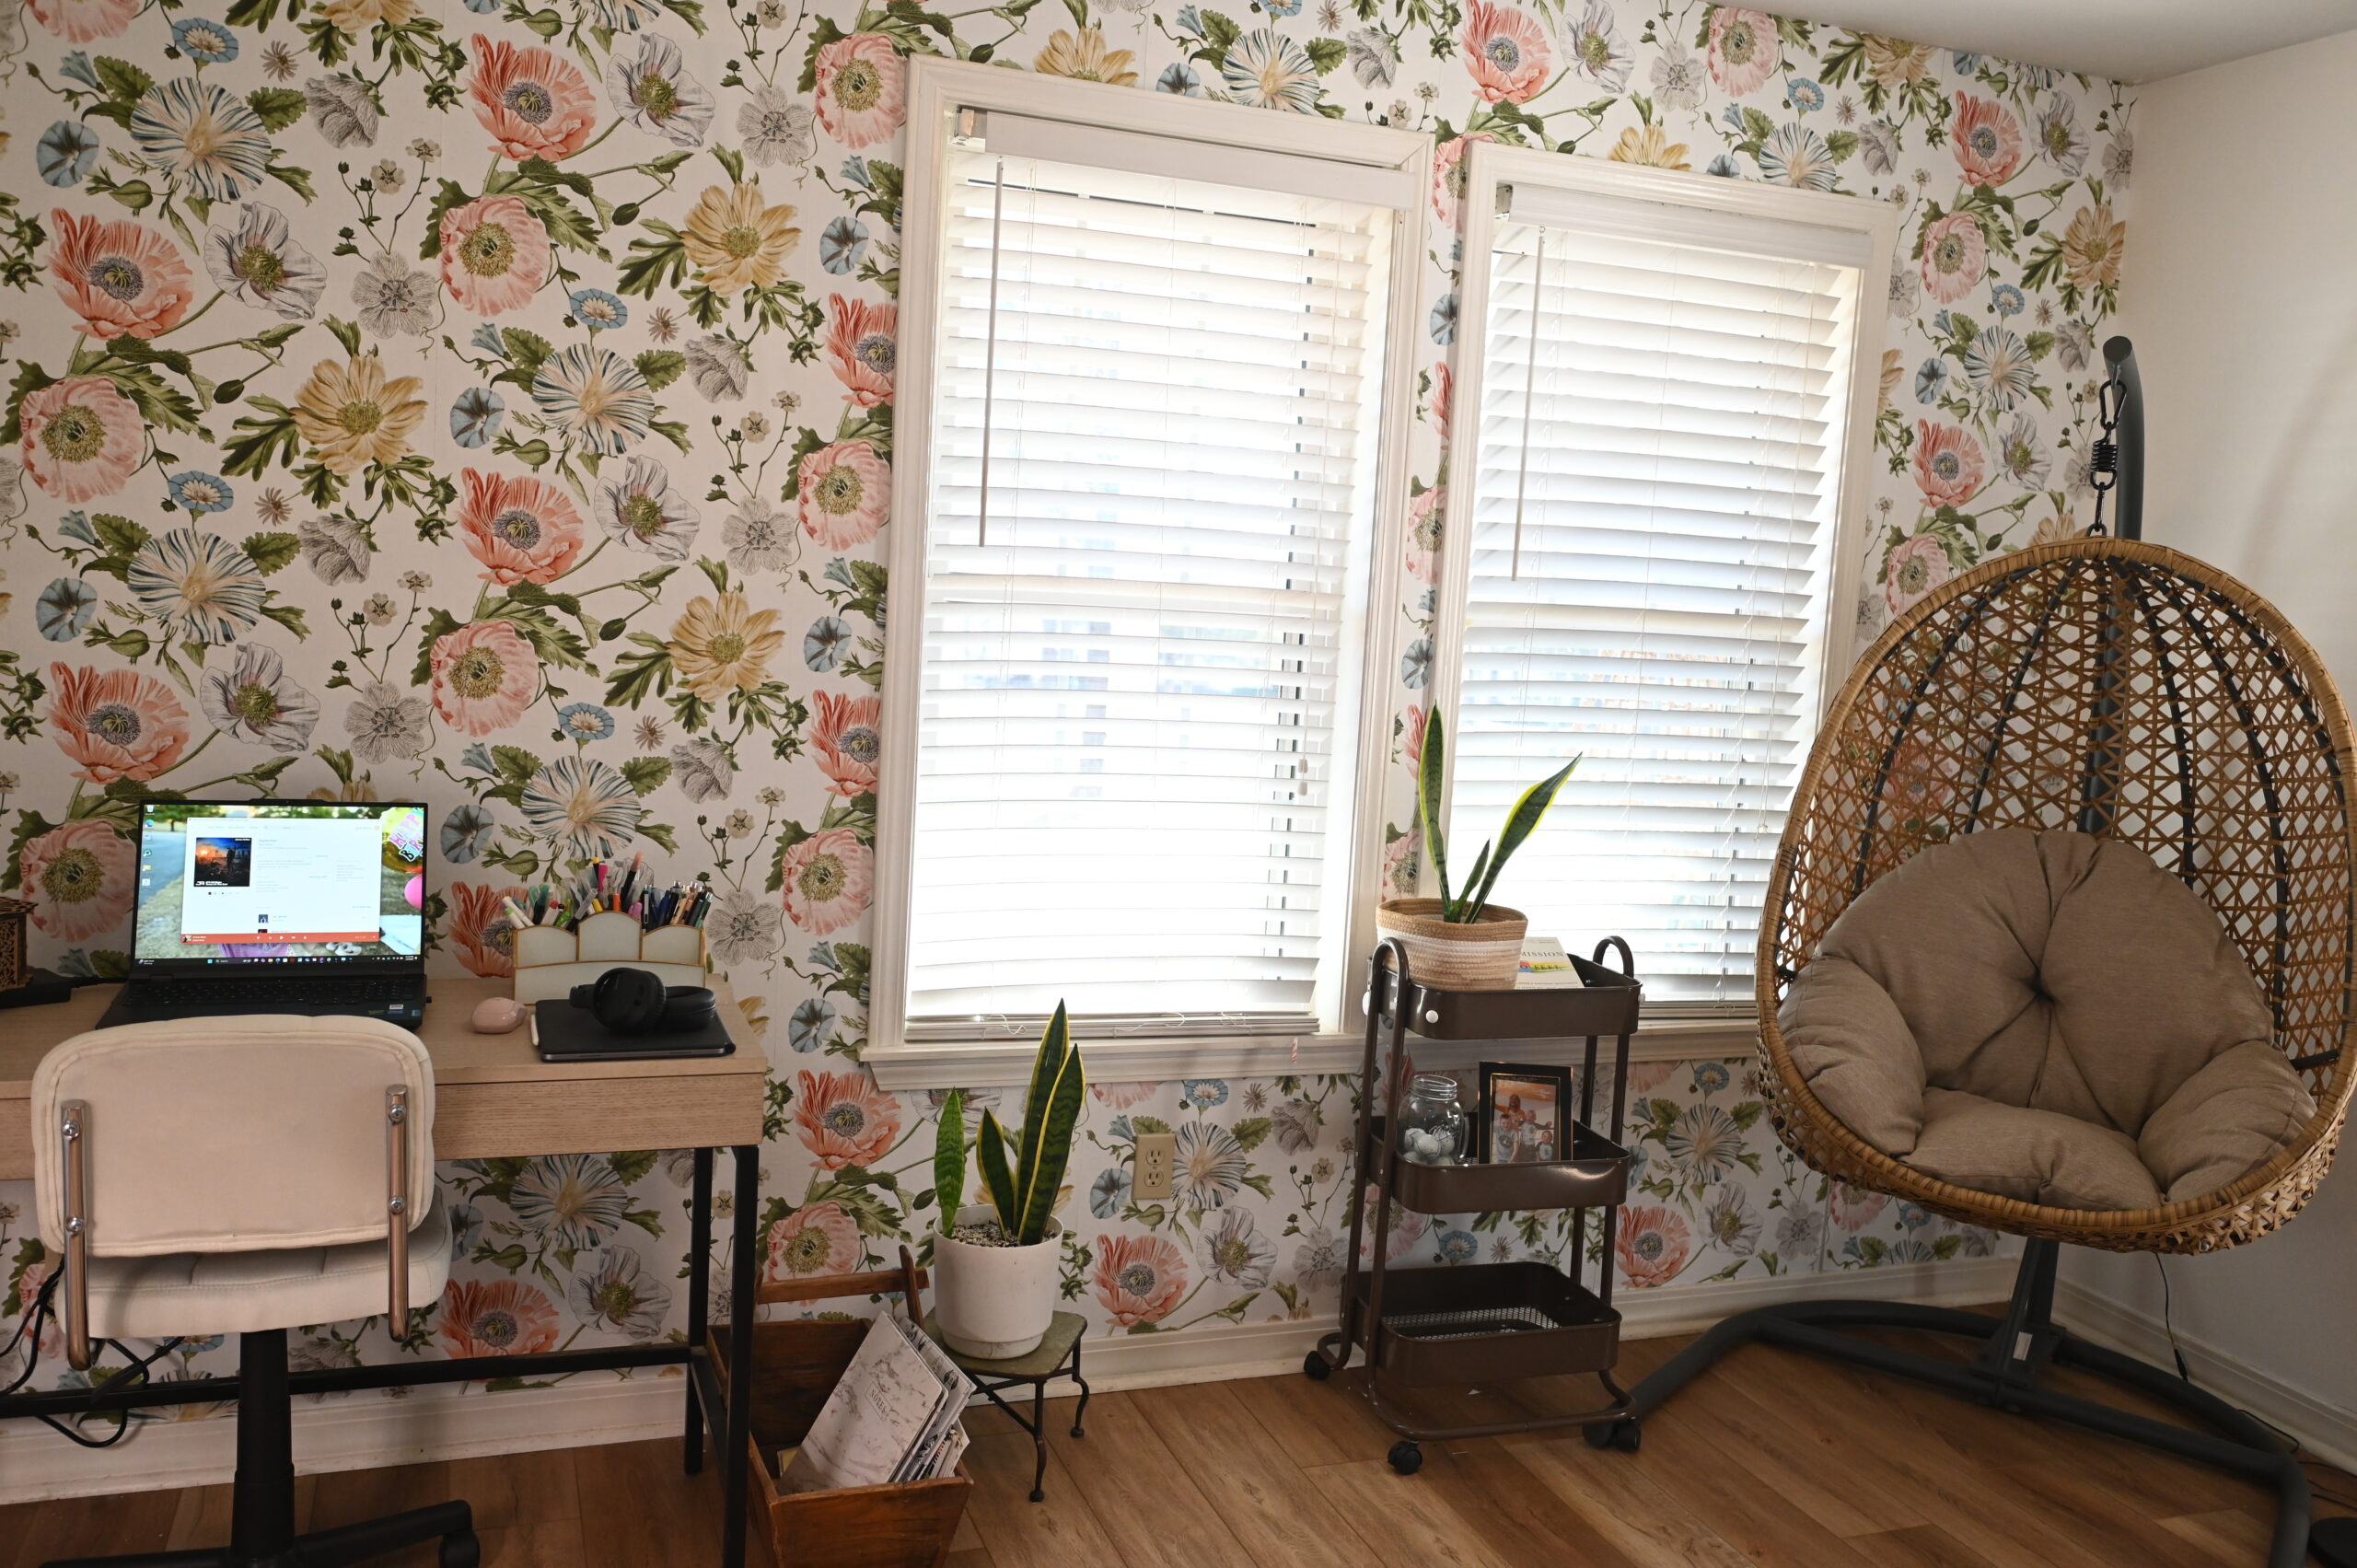
    The rest are the after.

    This office makeover didn’t start with a plan. It started the way most good projects do—scrolling Facebook Marketplace.


    How This Office Even Happened

    I came across a Marketplace listing for $300 that included:

    • Four tall cabinets with drawers and adjustable shelves
    • A full-height bookcase cabinet with adjustable shelves all the way up
    • The drawer setup that now holds my laptop
    • A full bathroom vanity set
    • Granite countertops

    All of it was made of melamine. Some pieces needed a good wash, but several cabinets had brand new hardware and were structurally solid.

    Too good to pass up.


    The Part Where No One Else Saw It

    I should probably say this part out loud:

    Robert did not want these cabinets.

    To him, they looked like junk.

    My dad helped us unload them, took one look, and joked that he would divorce his wife if she ever came home with something like this.

    Confidence was low.

    And honestly? I get it. They were dirty, scuffed, sitting on pallets—nothing about them looked “finished.” They were just potential.

    Which, at the time, I was apparently the only one seeing.


    Why the Office Came First

    I didn’t know exactly where every cabinet would go, but I did know where I wanted to spend my time.

    So the office came first.

    I used:

    • The tall cabinets
    • The drawer unit
    • The bookcase cabinet

    Only half of the $300 haul ended up in this room. The rest was always meant for another space—I just didn’t know which one yet.


    The Sewing Room That Didn’t Work

    After the office was finished, I moved my sewing setup upstairs into the kids’ playroom.

    On paper, it made sense.

    And Robert made it as pretty as one could…
    In real life, it didn’t make sense.

    Too close to the kids’ rooms.
    Too messy.
    Too stressful.

    I could not mentally get myself to sew up there.

    And that mattered.


    The Pivot

    I already knew I felt calm in my office. I already knew I could focus there.

    So instead of forcing myself into a space that looked good but didn’t work, I did the obvious thing:

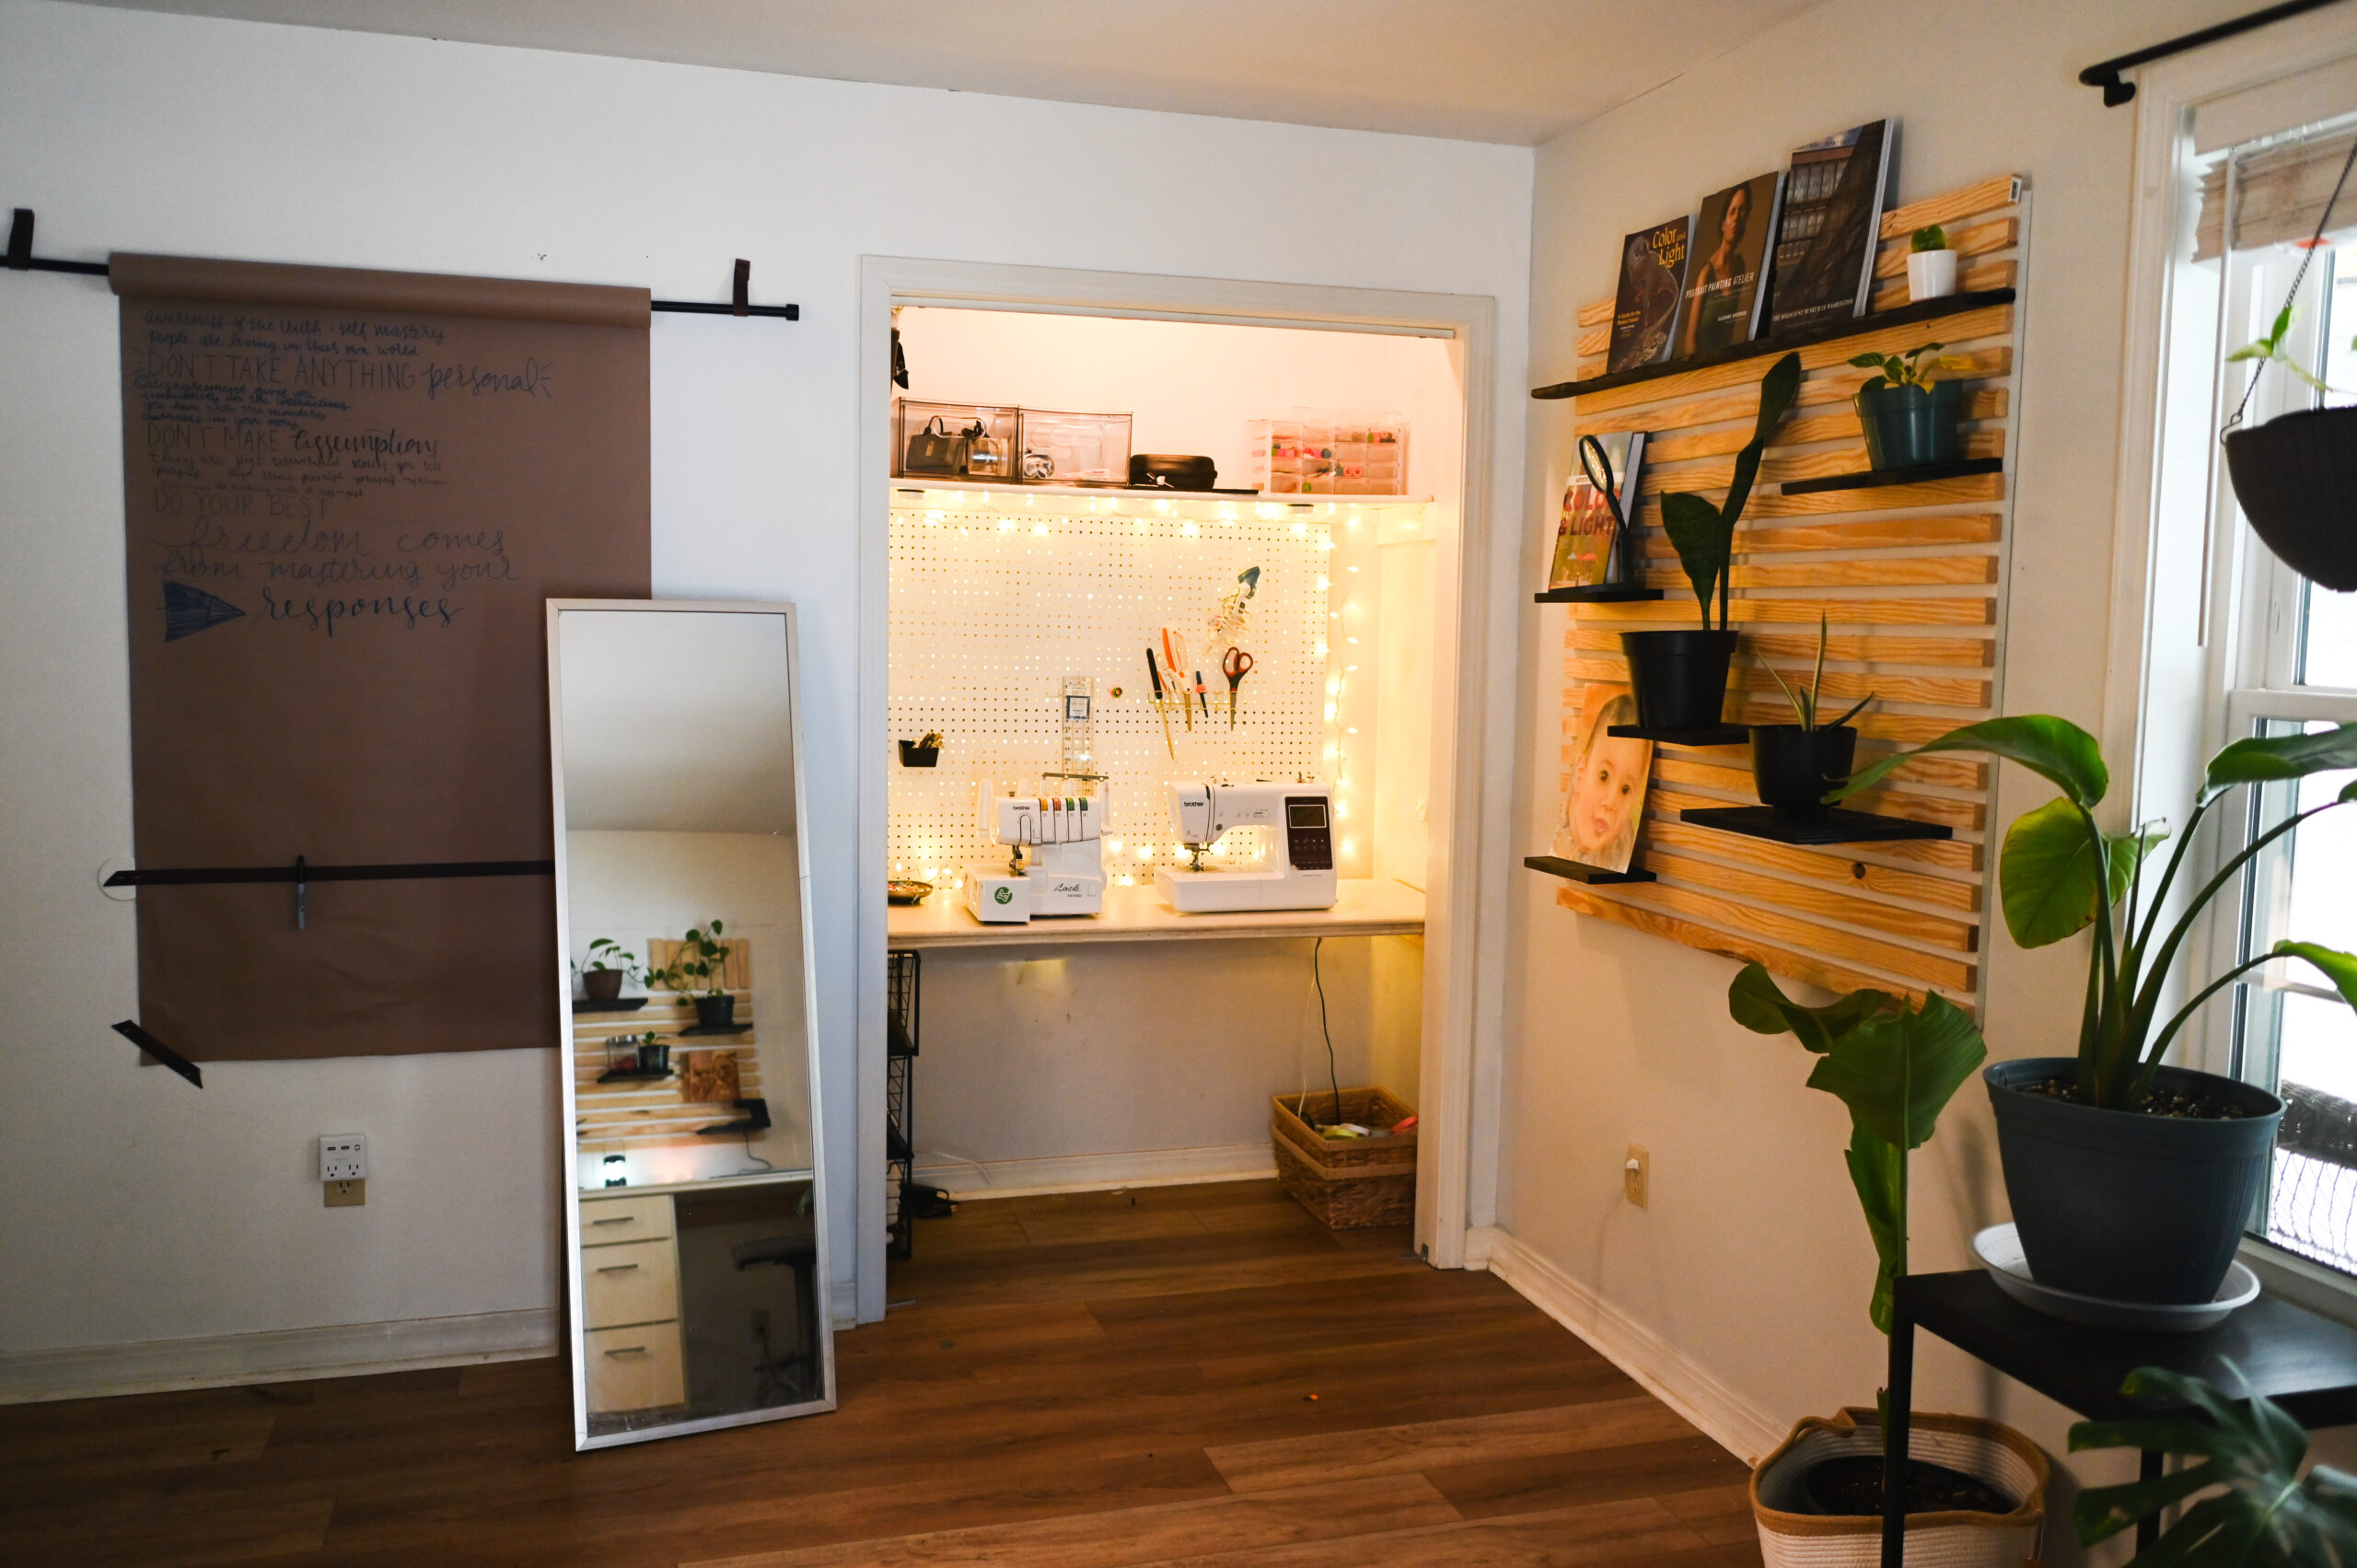
    I removed the closet in my office and turned it into a dedicated sewing space.

    I’ve already shared a step-by-step video of that process on Facebook, so this post focuses on the finished setup. But I will eventually make a step-by-step post.


    The Slat Wall Build

    There are two slat walls in this space, built two different ways.

    The Large Slat Wall

    • Hung a 4’ x 4’ piece of ¾” plywood
    • Found and marked studs first
    • Rolled a cart against the wall and rested the plywood on top to support it while I secured it (not graceful, very effective)
    • Screwed the plywood directly into the studs

    Then I:

    • Cut ½” x 4’ white wood
    • Nailed each piece to the plywood
    • Added one screw per slat for sturdiness
    • Used wood filler, sanded, and blended everything together

    The Desk Area Slat Wall

    I kept it simply and stylish with a white trimmed out square shape, and instead of plywood, I:

    • Predrilled the slats
    • Screwed them directly into the studs

    Sometimes less work really is the smarter move.


    The Desk (and a Small Mystery)

    The desk came from the original cabinet set.

    And honestly? I think it might have been a bathroom vanity in a former life.

    No proof. No regrets.


    The Budget (Full Transparency)

    • $300 total for all cabinets
    • Half used in this office
    • Half installed in the kids’ playroom

    So this office makeover used $150 in furniture.

    No tricks. No rounding down. Just reality.


    The Moment That Made Me Laugh

    After everything was installed—after the office took shape and the vision finally made sense—Robert said:

    “Your dad and I were just talking about how we cannot believe how you envisioned this. We just couldn’t see it.”

    And that was it.

    Sometimes the person building it sees the finished version long before anyone else can.


    Why This Works

    • Sewing has its own defined zone
    • Supplies are visible but controlled
    • The office still feels like my space
    • The kids’ playroom stays a playroom
    • I’m not mentally exhausted before I even start creating

    Final Thought

    This makeover wasn’t about trends or perfection.

    It was about listening to myself—and pivoting when something didn’t work.

    Sometimes the best projects don’t start with a blueprint.
    They start with a good deal… and the confidence to trust your vision.

    My desk area
    Sewing space and slat wall with adjustable shelves
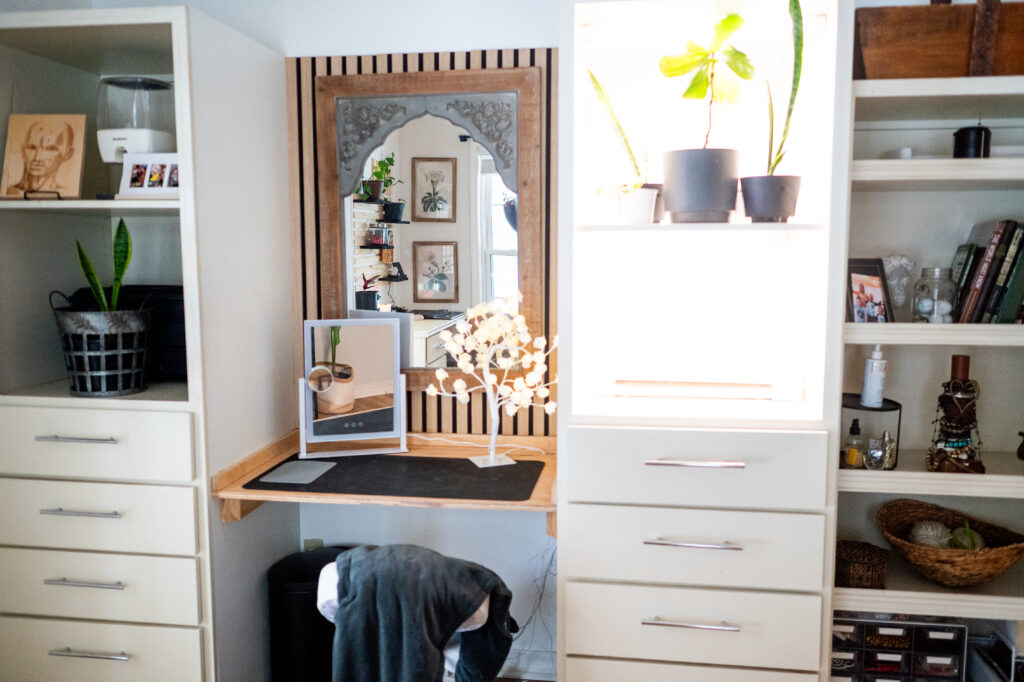
    To the right, my “get ready” area. Plus a little artificial light for my plant
    I love this space!

  • DIY Breakfast Nook Bench

    DIY Breakfast Nook Bench


    The DIY Dining Room Nook I Wasn’t Supposed to Touch

    Some projects are born from inspiration.

    This one was born from an argument.

    I had been wanting to redo our dining room nook for a while. It wasn’t bad — it was fine. But “fine” has never really been my thing. Robert didn’t want me to mess with it, not because he hated the idea, but because he didn’t want to be pulled into another project.

    And honestly? That part was fair.

    The problem with Robert and me working together is simple:

    • He likes plans.
    • I like vision.

    I hate plans because plans feel like commitments. Vision feels like freedom.

    So anyway… one day we had a fight. And in the middle of it, I realized something important.

    This was my window.

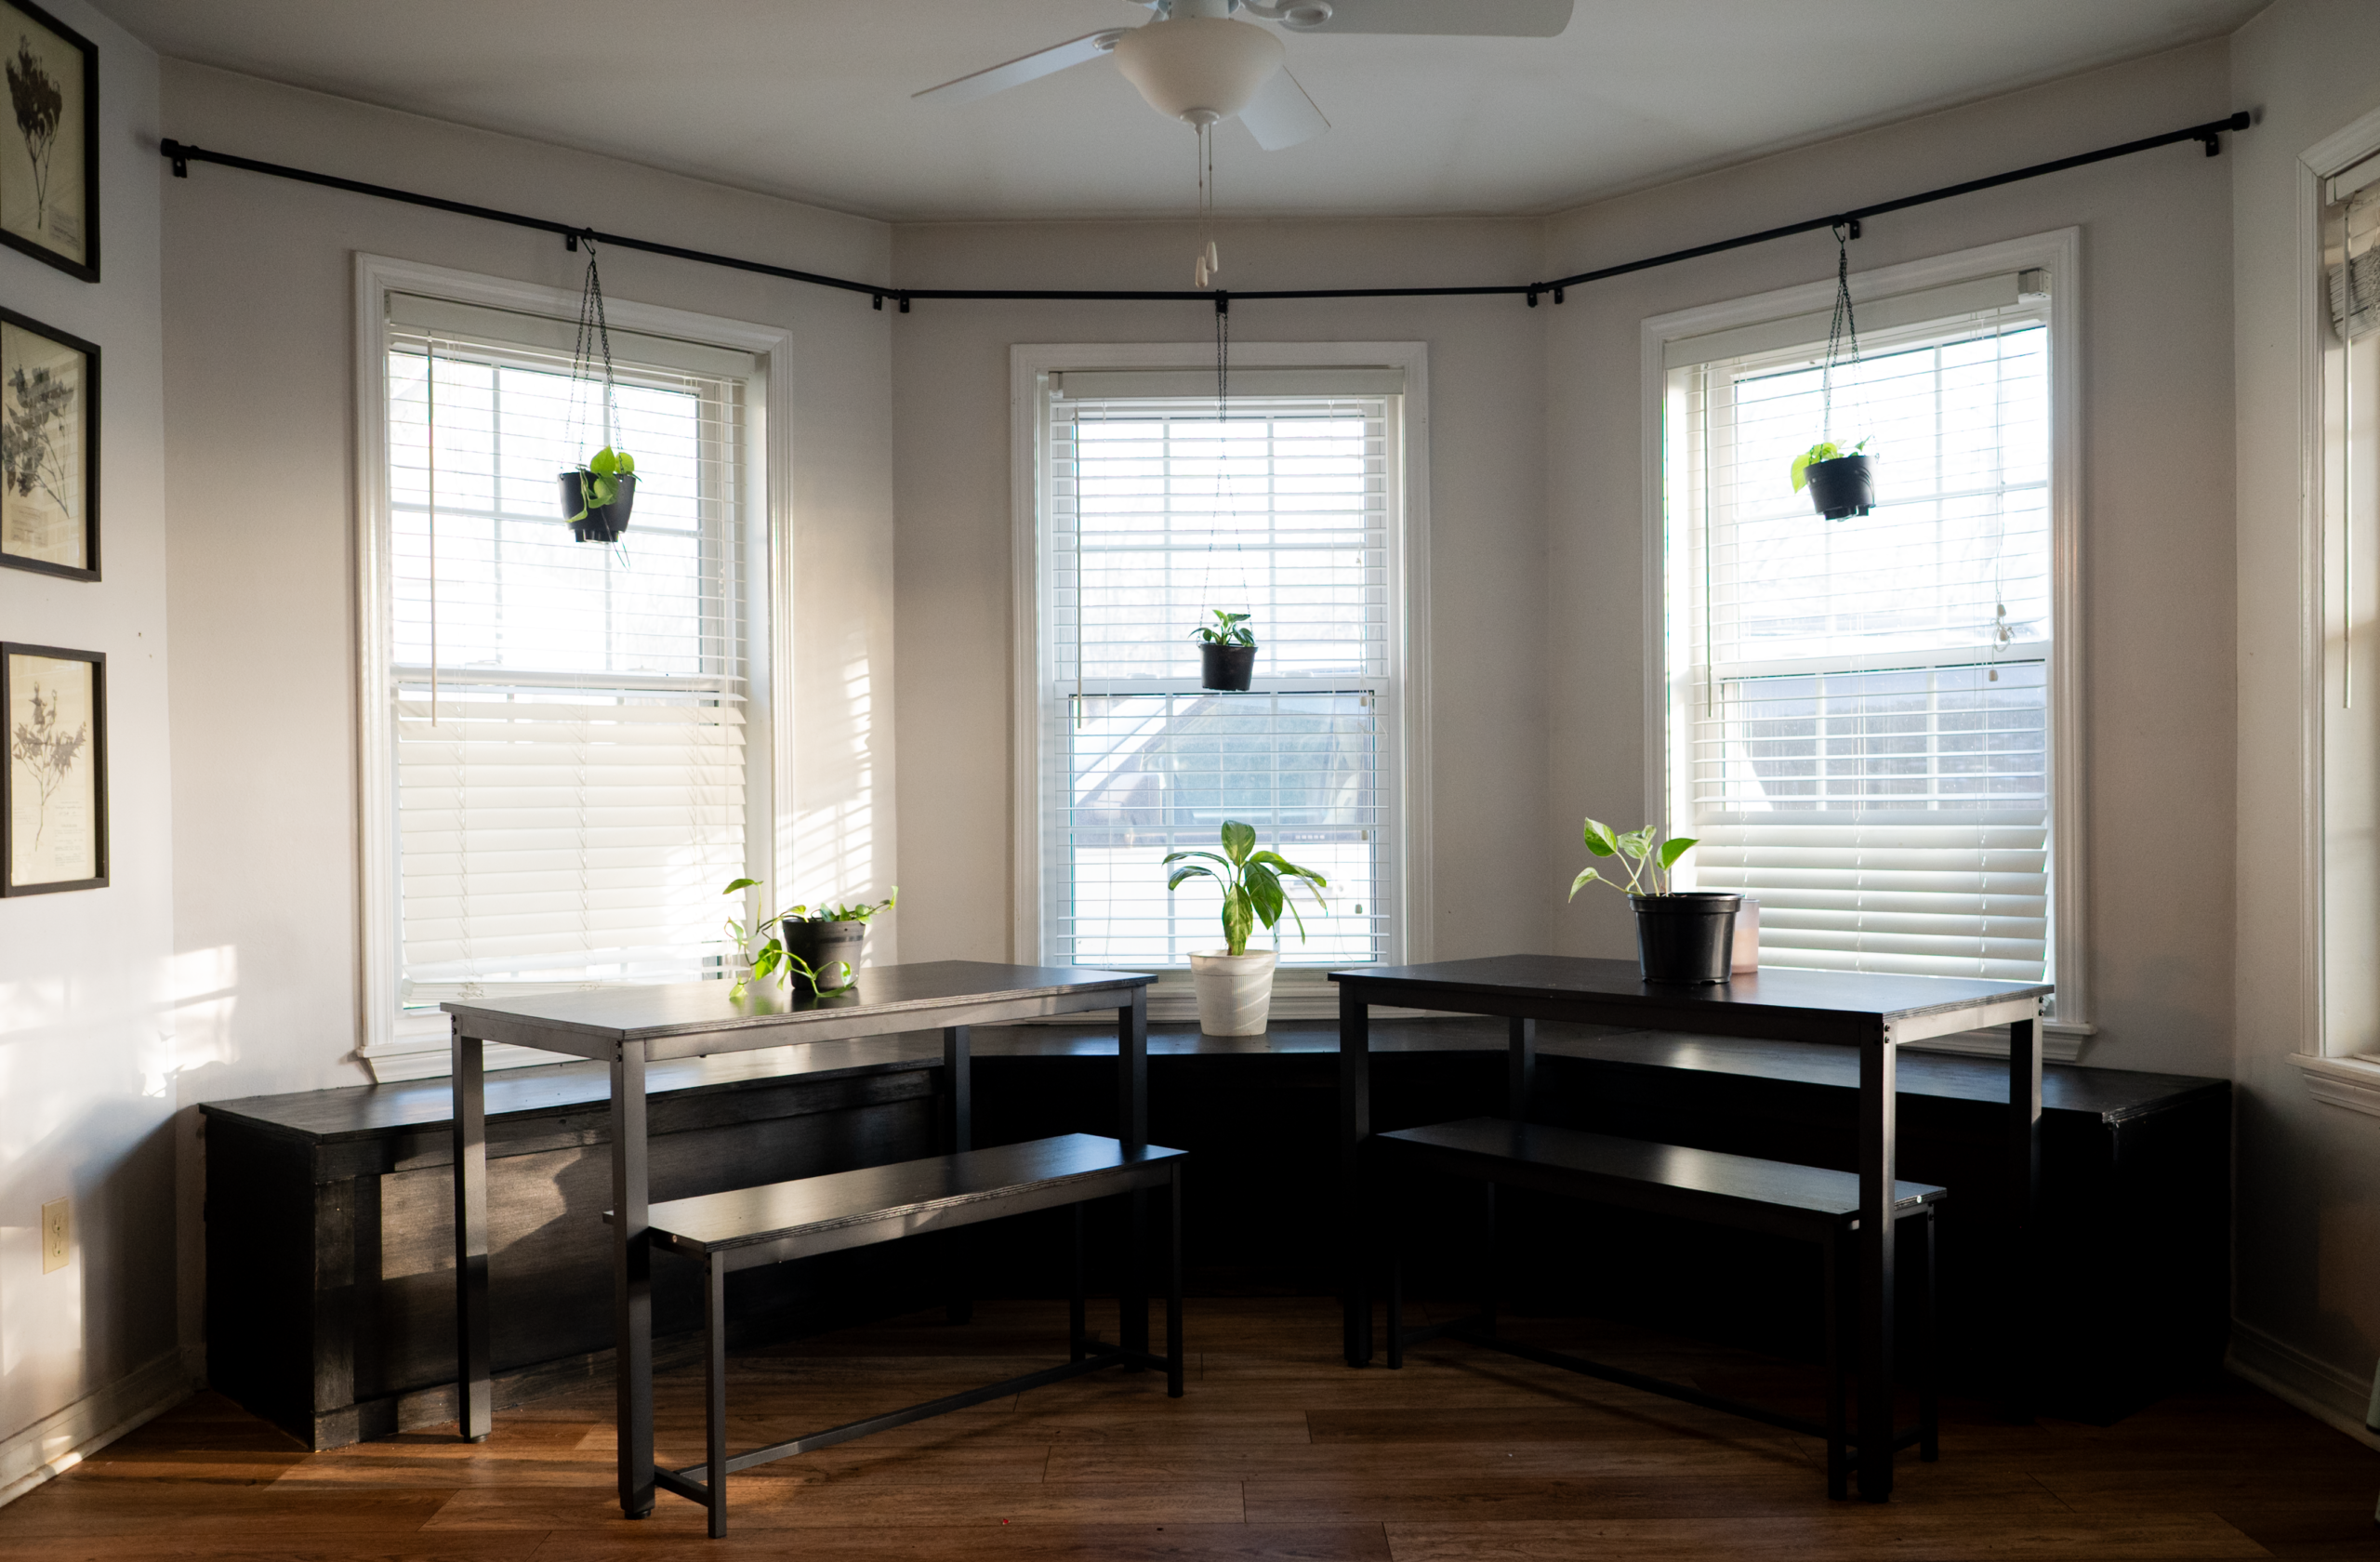
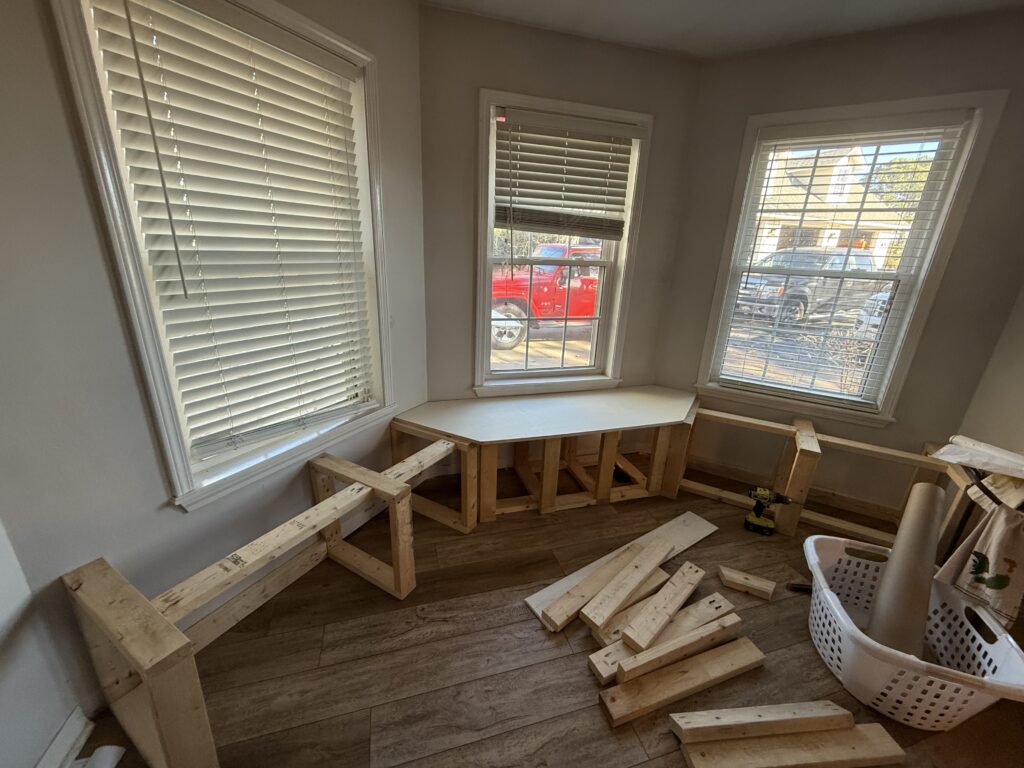
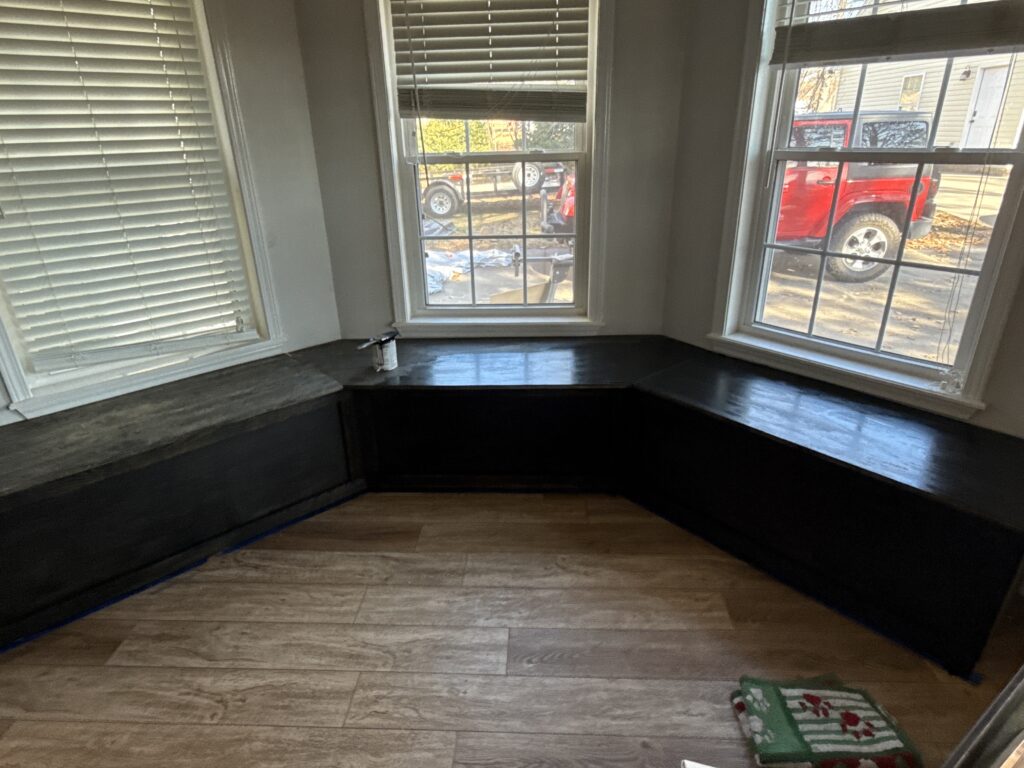
    I pulled the baseboards out of the nook.

    No going back now.


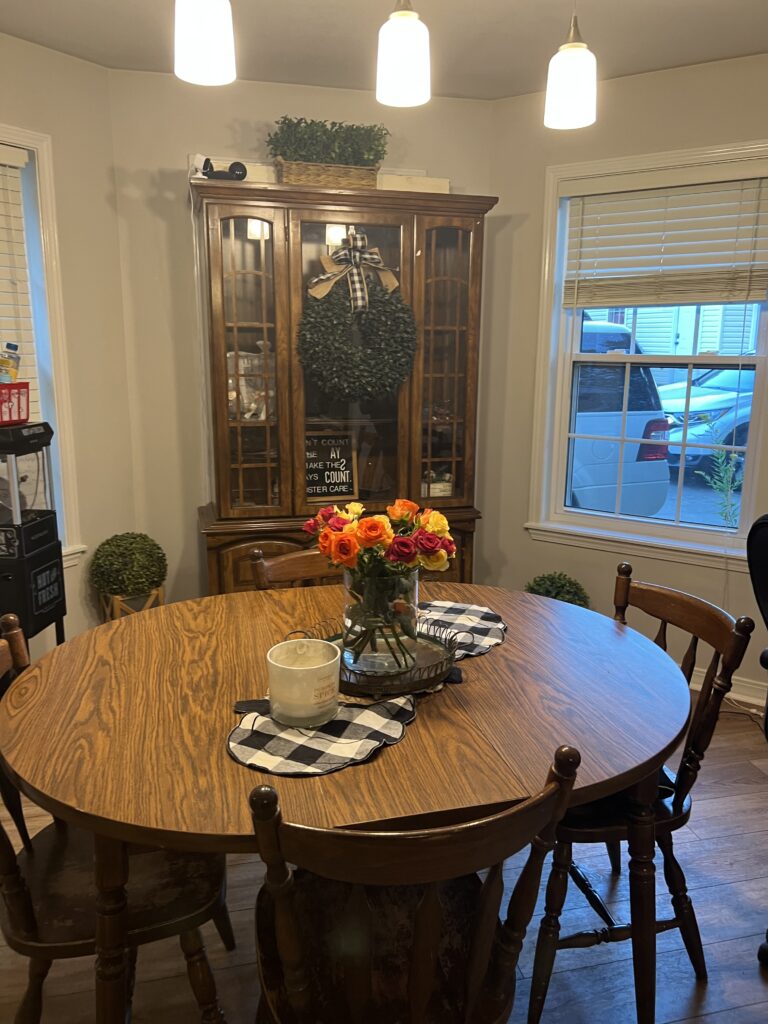
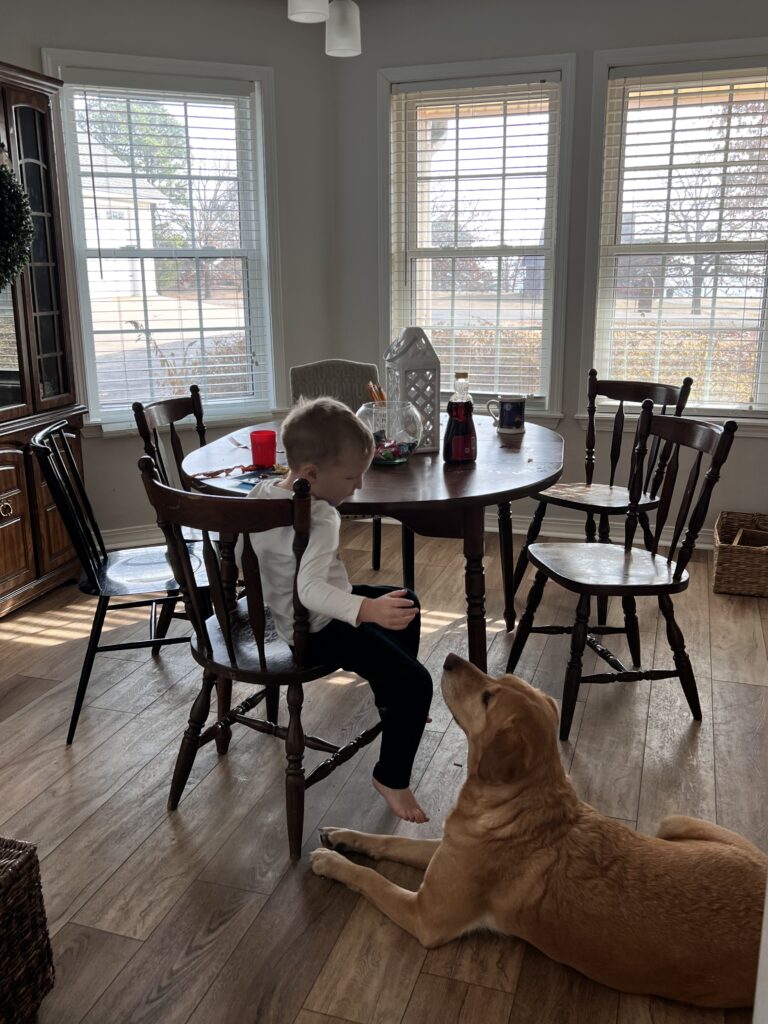
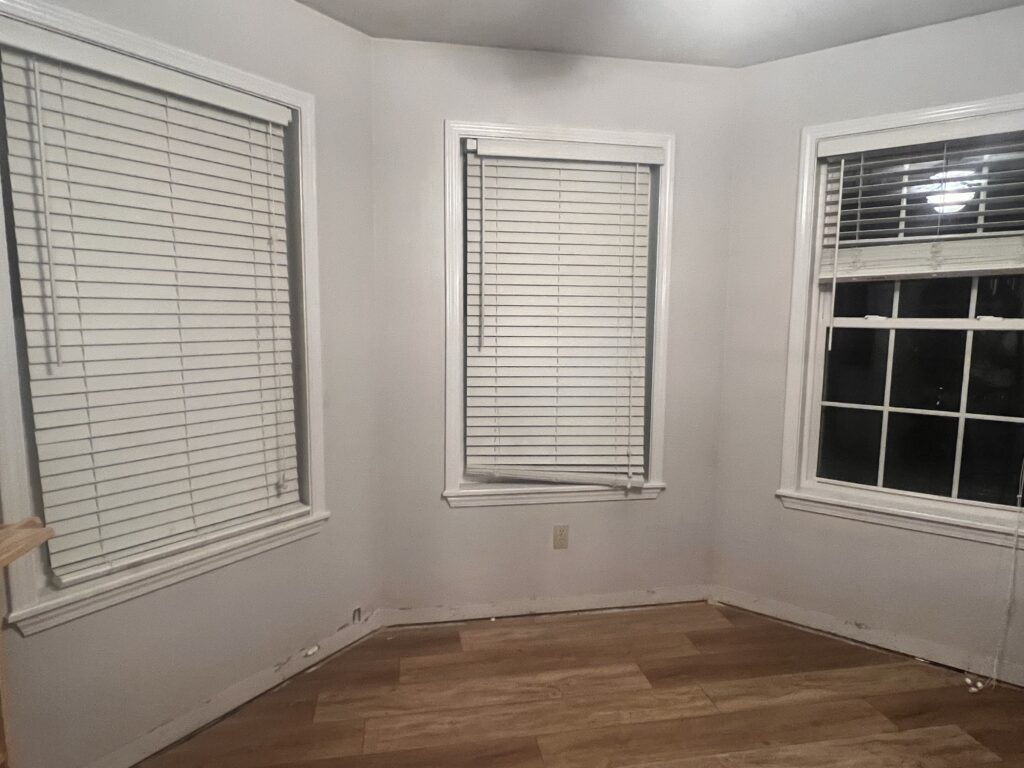
    The Before

    This is a different view of the book.

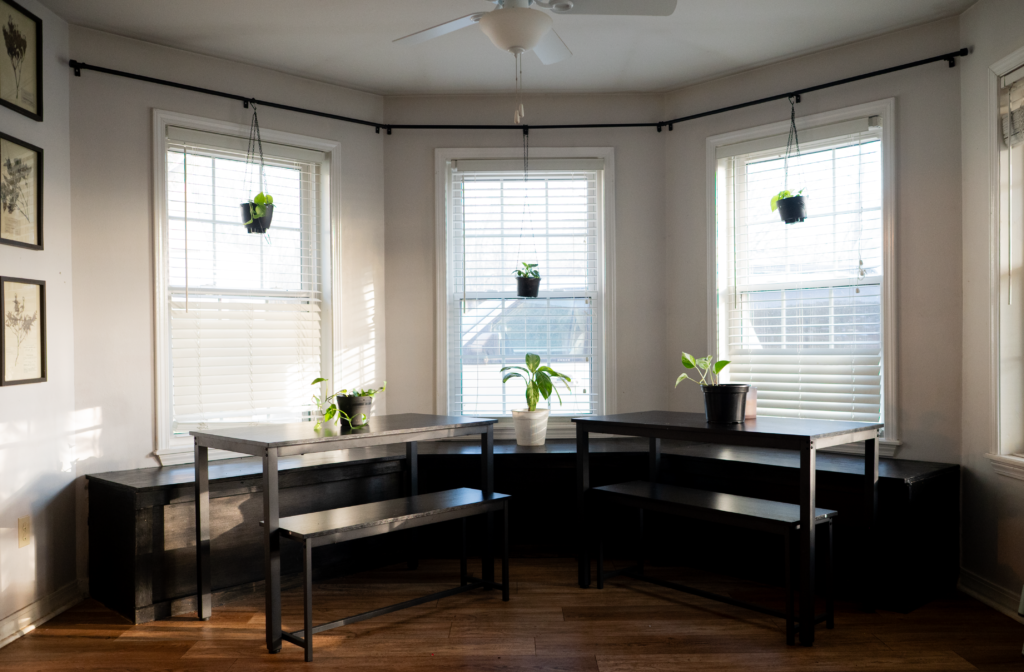
    This was our dining nook before. A round table, chairs everywhere, kids slowly migrating toward my big wooden dining table — the one I try to reserve for looks and guests.

    It worked.

    But it wasn’t working for us.


    Once the Baseboards Came Off

    Once the baseboards came off, the decision was official.

    I knew the real reason Robert didn’t want me to start this wasn’t the design — it was the labor. He didn’t want to get pulled in. So I decided I wouldn’t pull him in.

    I’d do it myself.

    I looked at inspiration photos, locked onto a vision, and decided on a built-in bench that wrapped the nook under three of the windows.


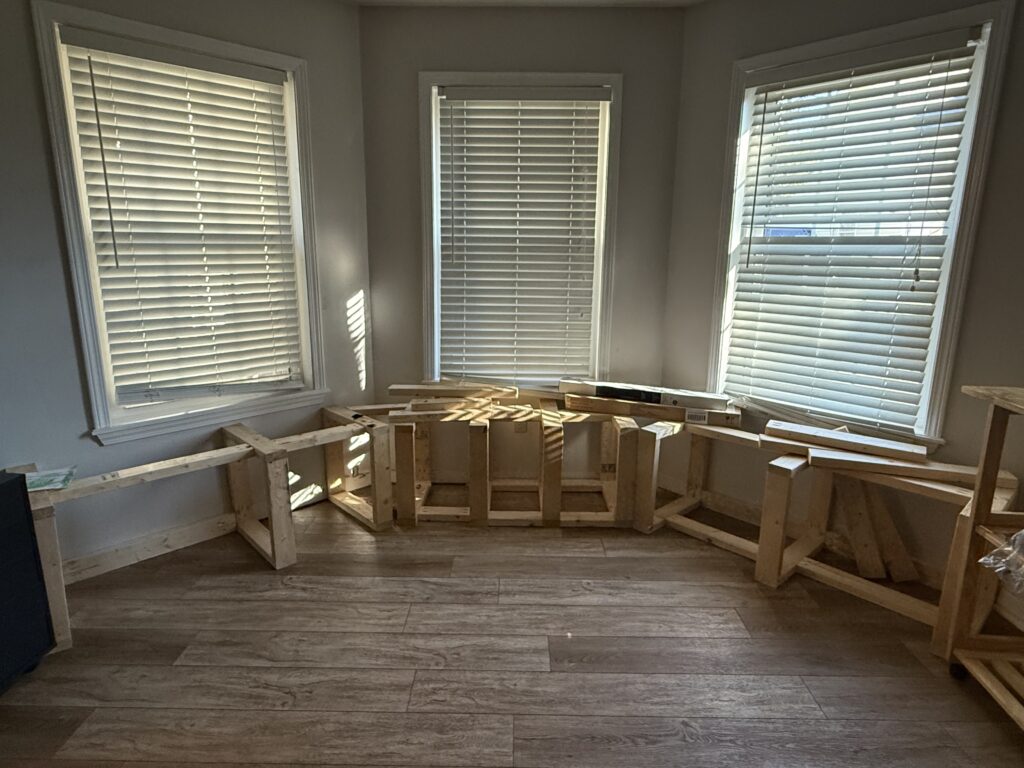
    Building the Frame

    I used my Kreg Foreman to make ten rectangles, each one:

    • 22 inches high
    • 19 inches wide

    That height was perfect for seating, and it tucked neatly right under our windows.

    I laid them out as the framework, added boards between each rectangle, and screwed everything directly into the wall studs.

    And then I did what I do best.

    I stopped.


    Life Happened

    This was April.

    Summer came. Kids. Schedules. Writing. Life.

    The nook sat there — framed and unfinished — quietly judging me.

    Then, as Christmas got closer, Robert asked if we wanted to just knock it out before family came.

    Yes. Yes, I did.


    Where Vision Met Planning

    This is where we finally met in the middle.

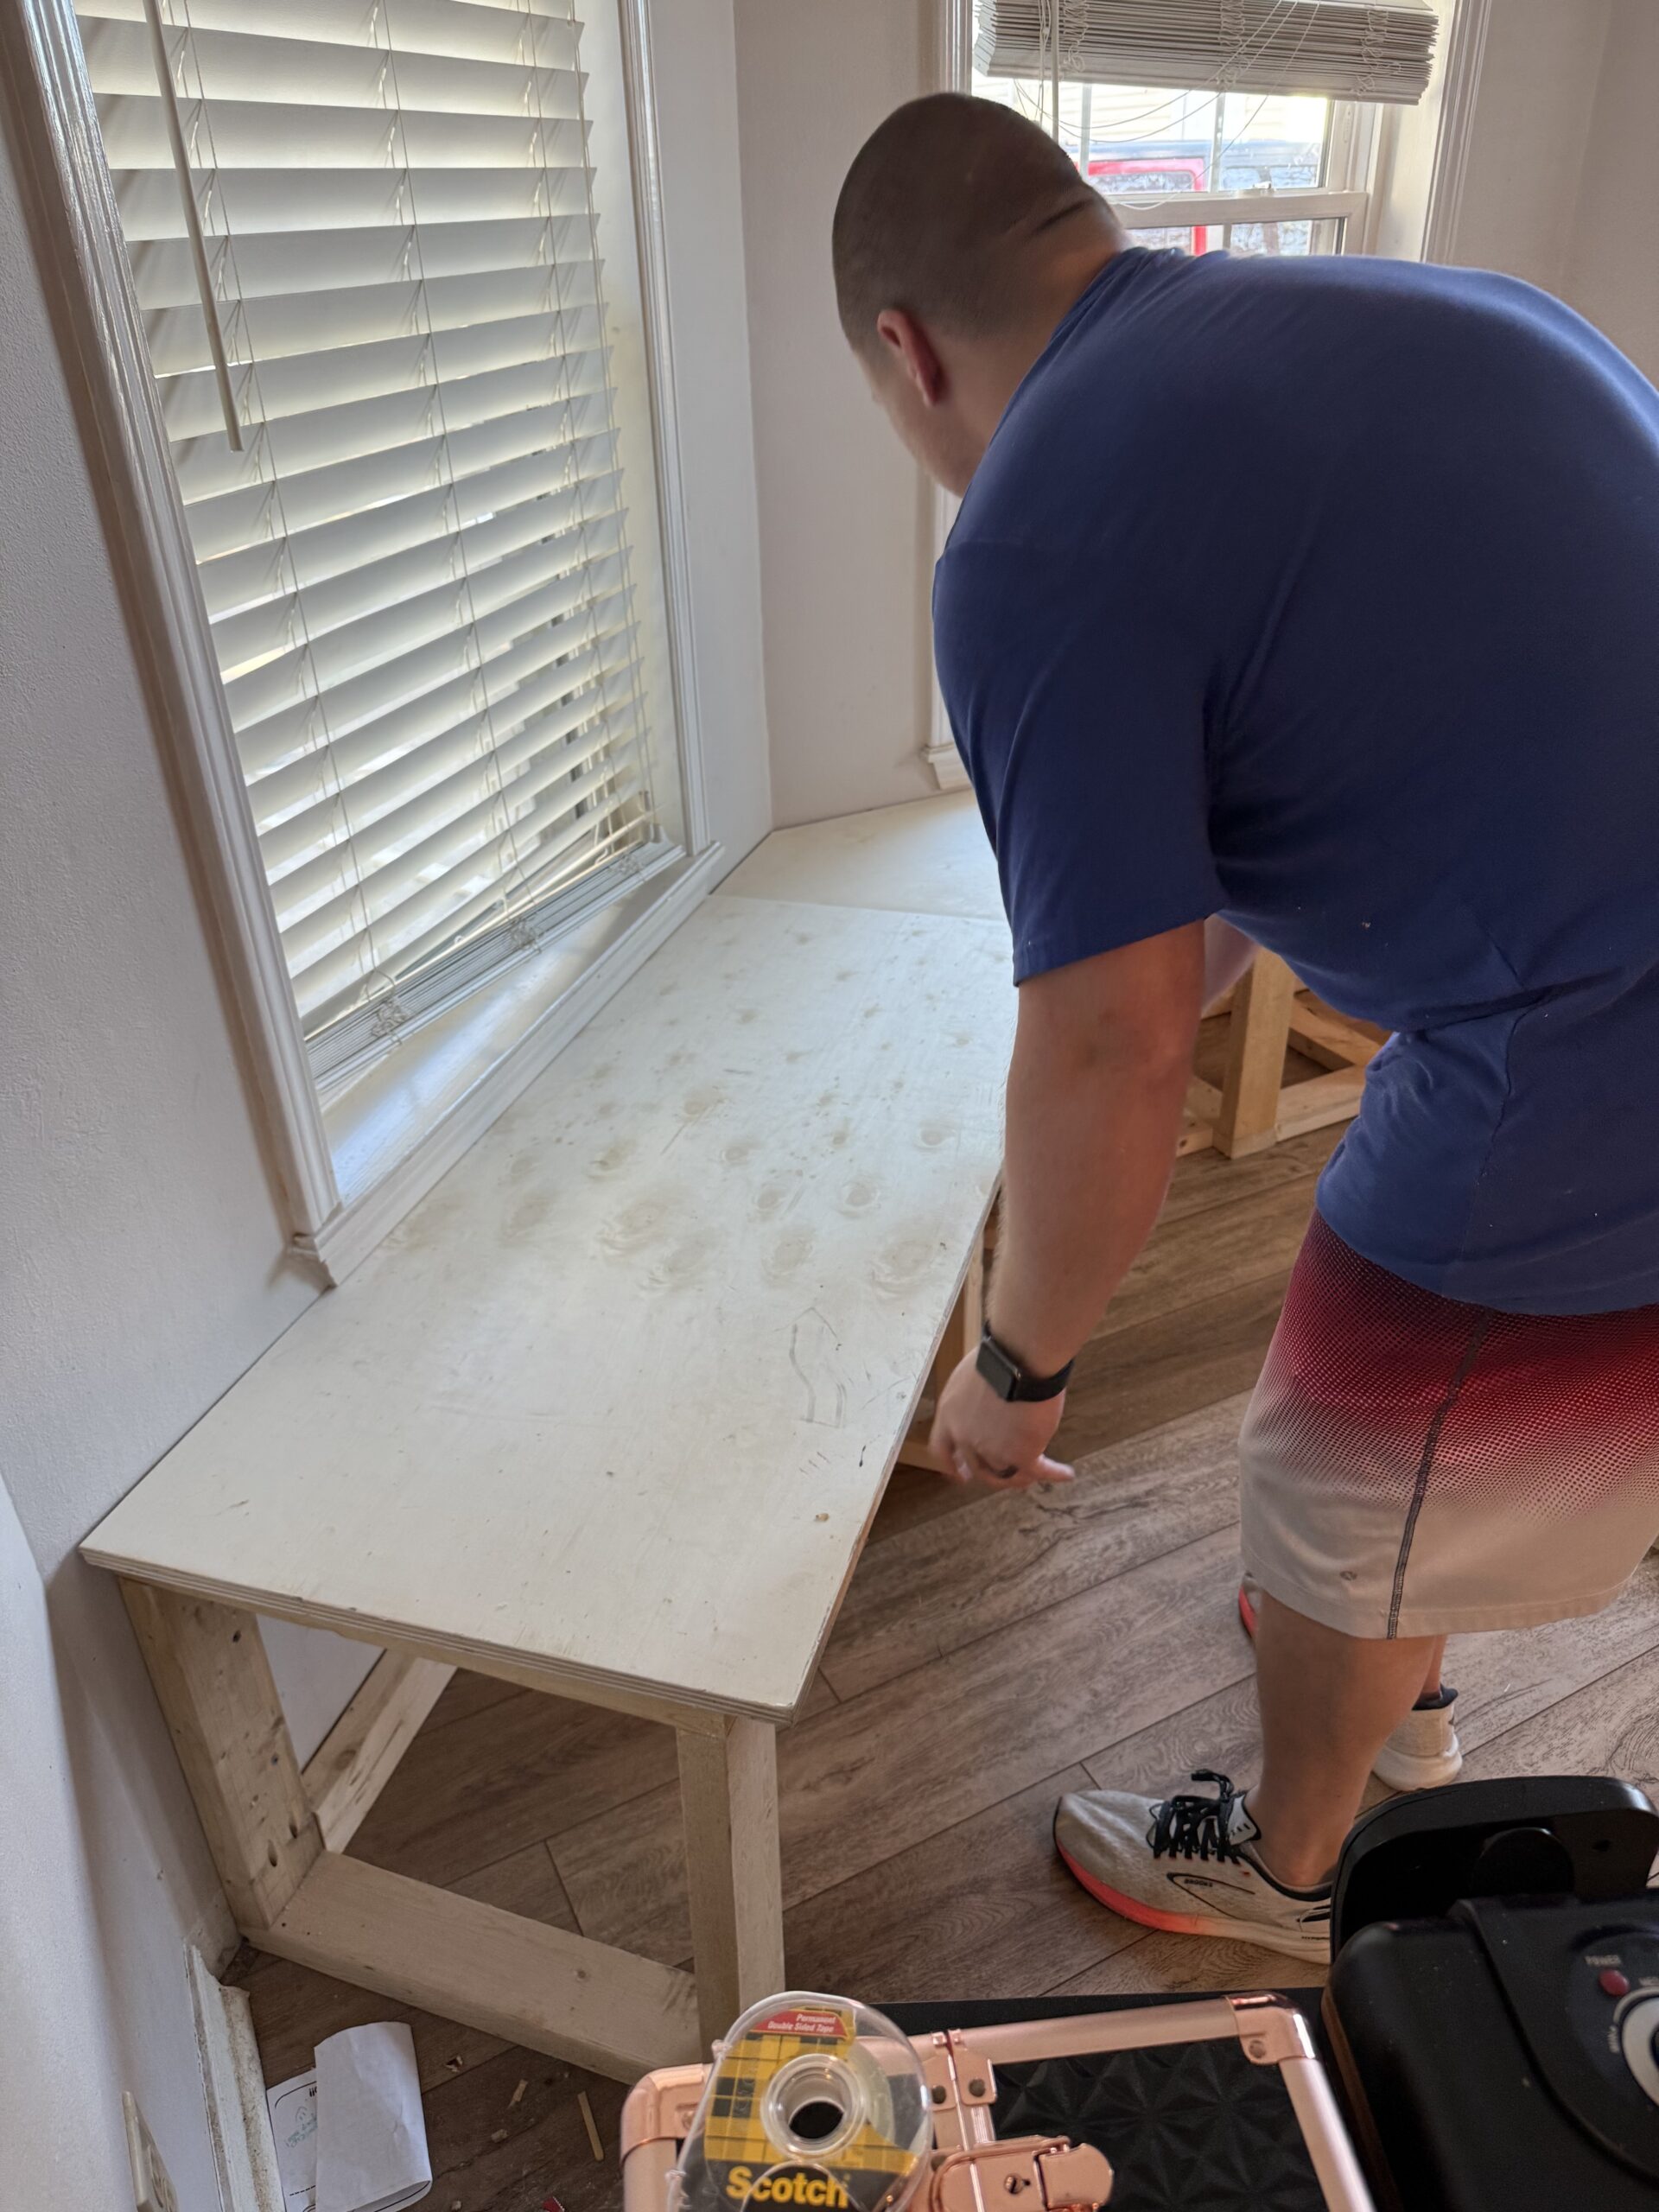
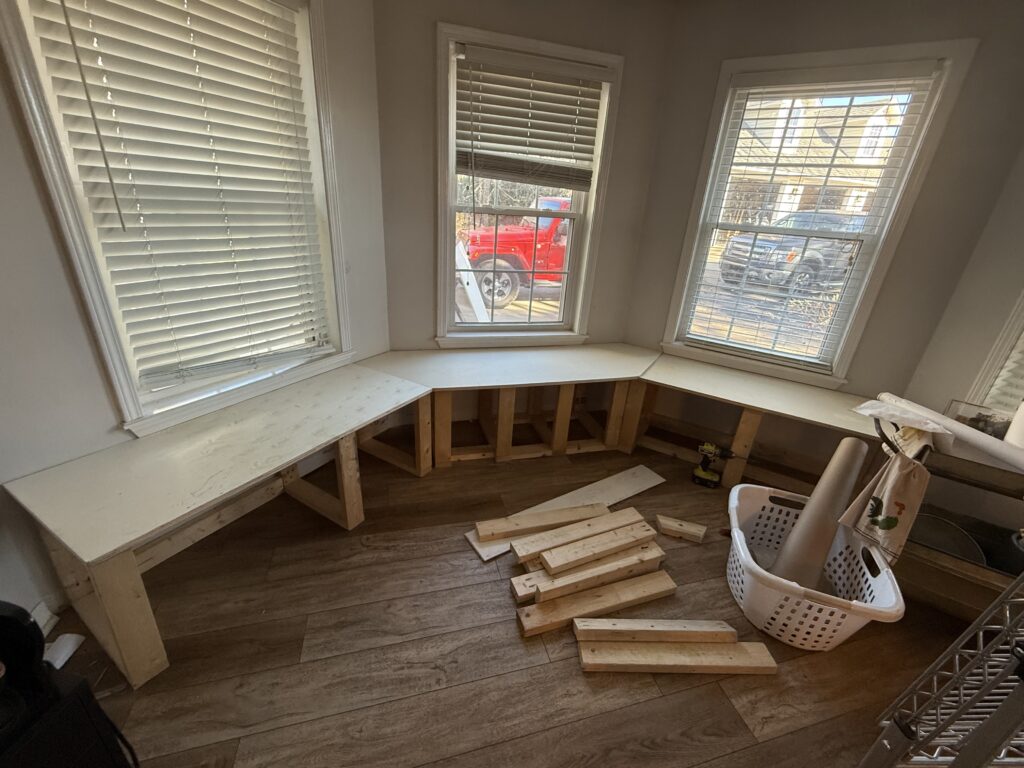
    I wanted the bench top to have one big center cut with tricky angles, but simple rectangular pieces on the left and right. That way, only one piece would be complicated.

    Robert likes logic. I like flow.

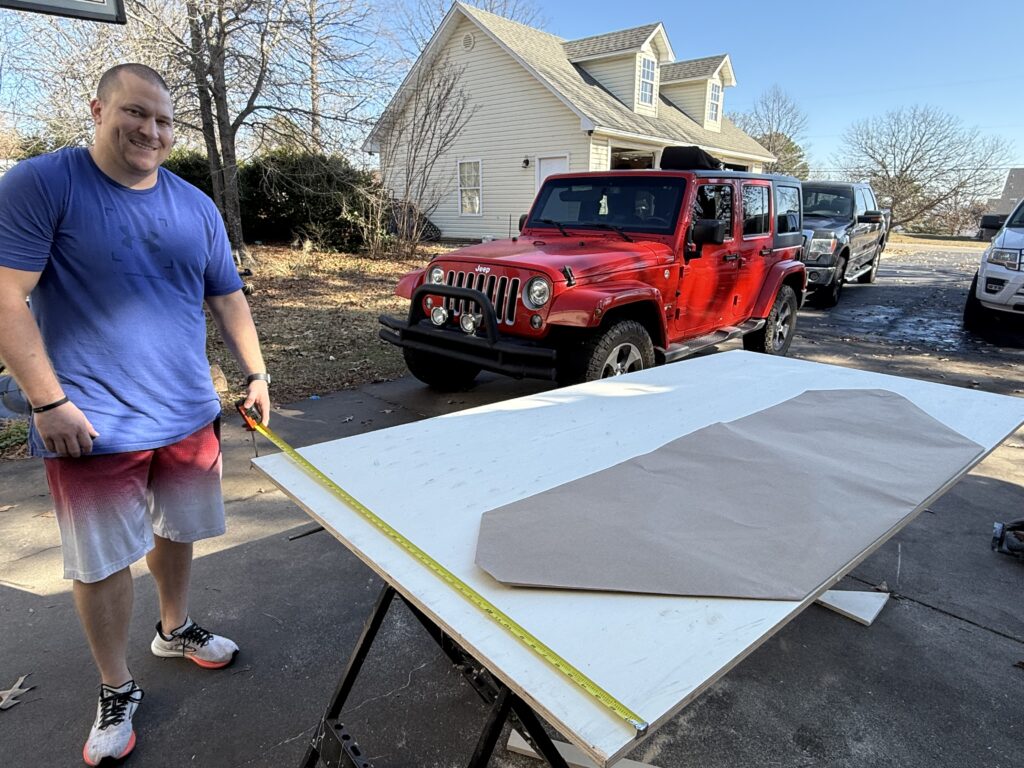
    So we grabbed butcher paper, folded it on the framing exactly how I envisioned the seat, traced it, and laid it out. Once he saw it, it clicked.

    We traced everything onto ¾-inch plywood and cut it with a circular saw.


    The Underlayment Debate

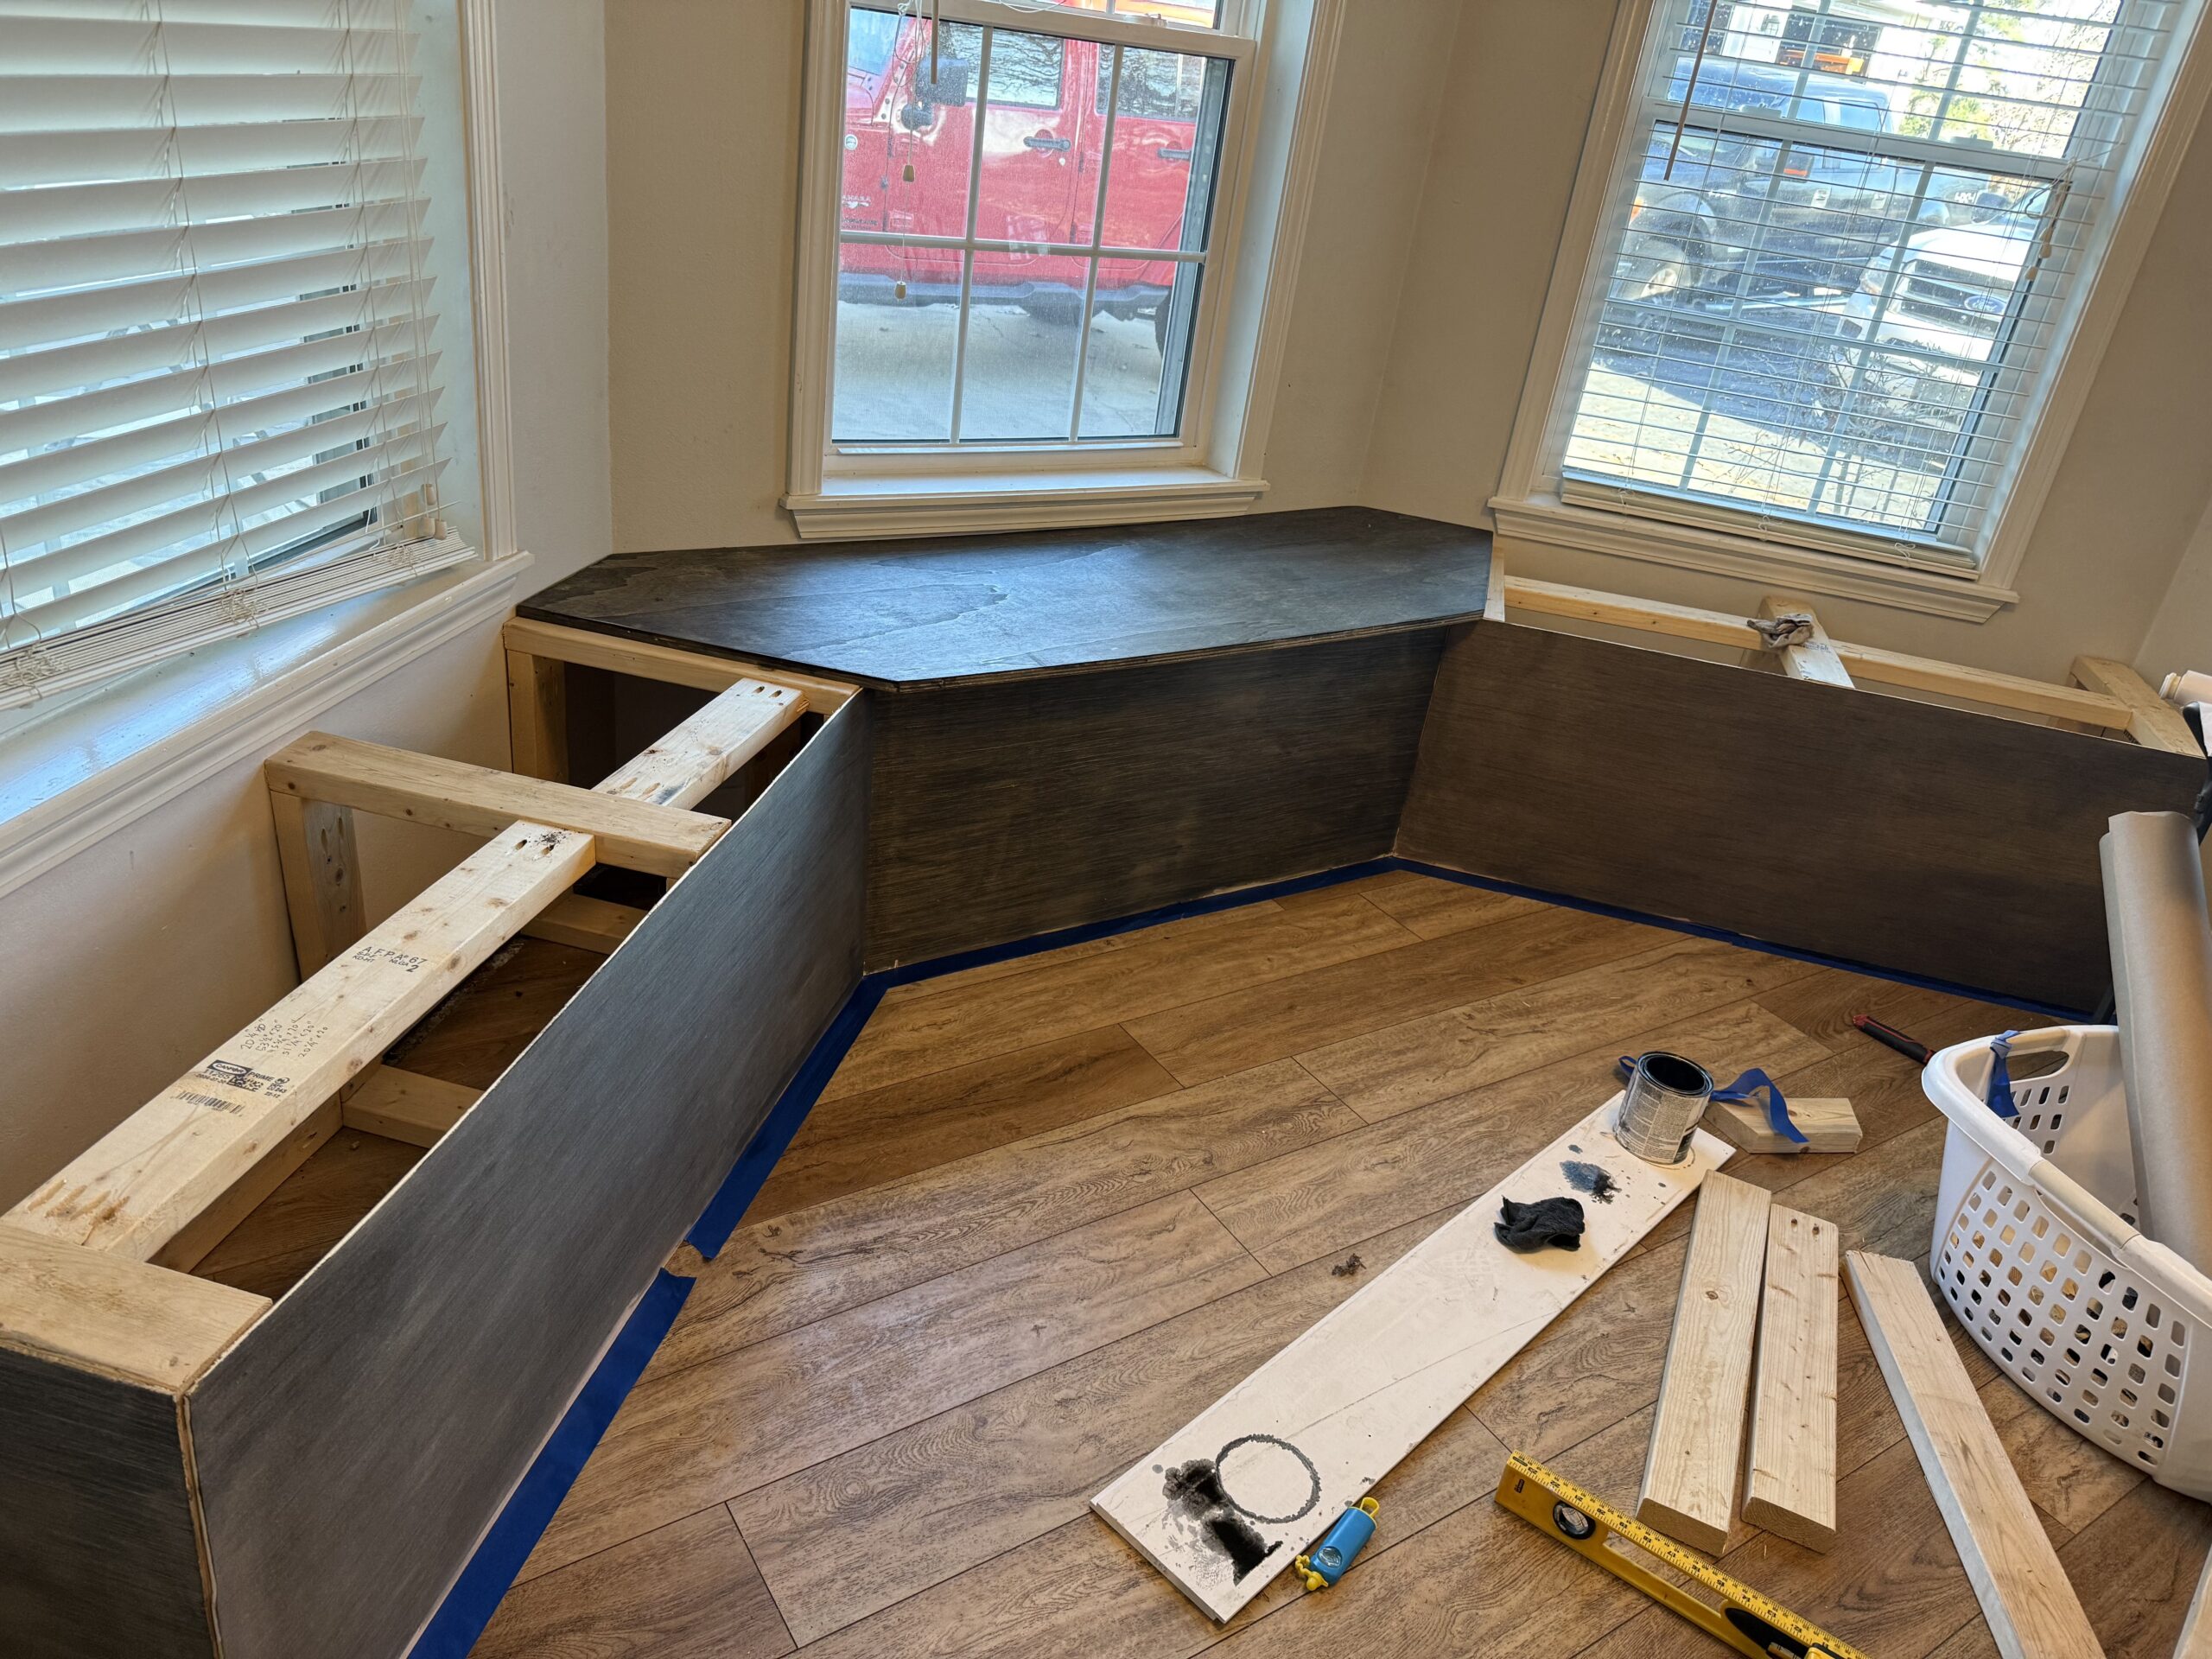
    I wanted to use underlayment for the front and sides of the bench.

    Robert was skeptical. Very skeptical.

    But I’ve done this before, and I knew it would work. Underlayment is strong, smooth, and perfect once finished.

    Honestly, I am obsessed with it!

    He agreed — and then he cut all the pieces for me.

    I won’t lie. Having his muscles involved was a gift.


    The Finish

    We sanded everything down and stained the bench black — clean, classic, and durable enough for real life.

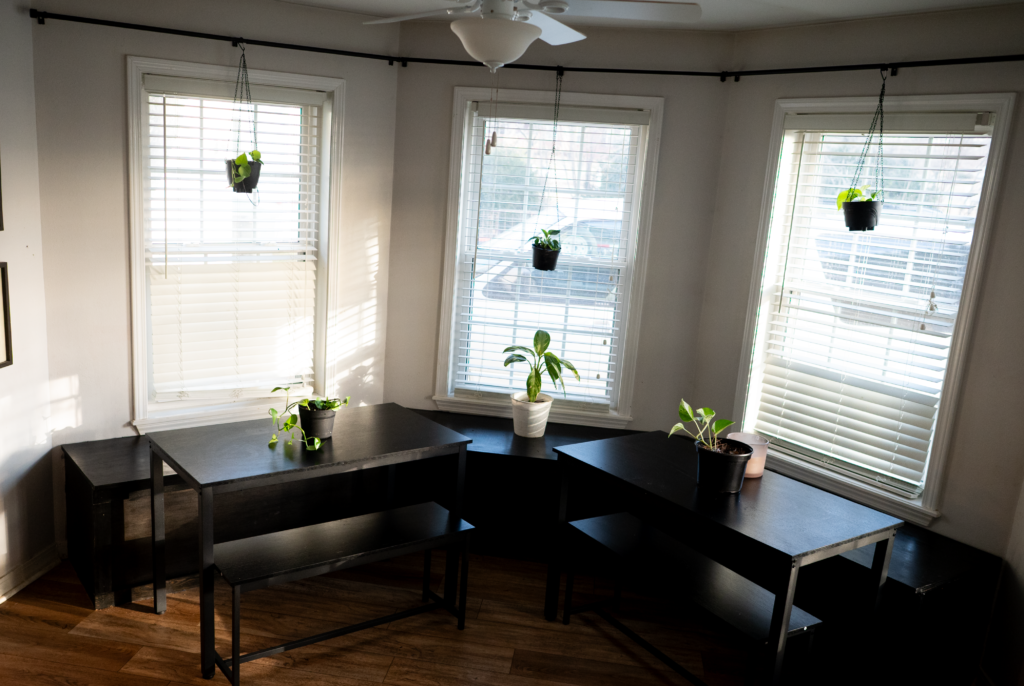
    For the table, we found a matching table and bench set from Walmart that fit the space perfectly.

    The kids finally had a casual place to eat in the mornings — and they stopped using my “nice” dining table.

    That alone made this project worth it.

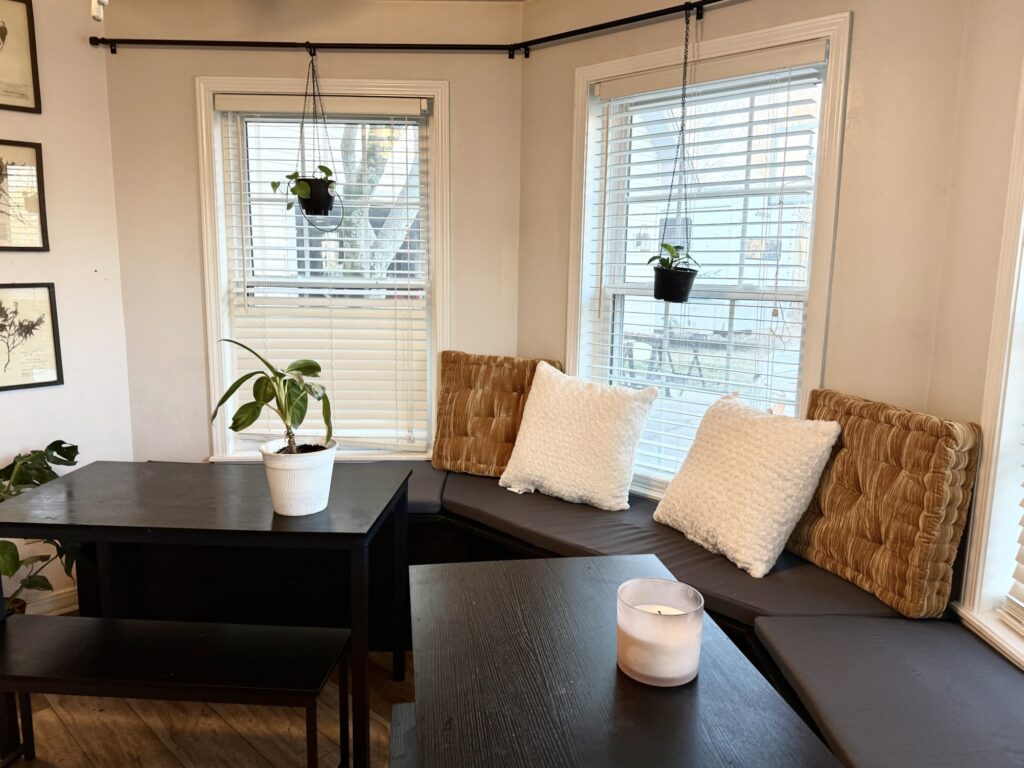
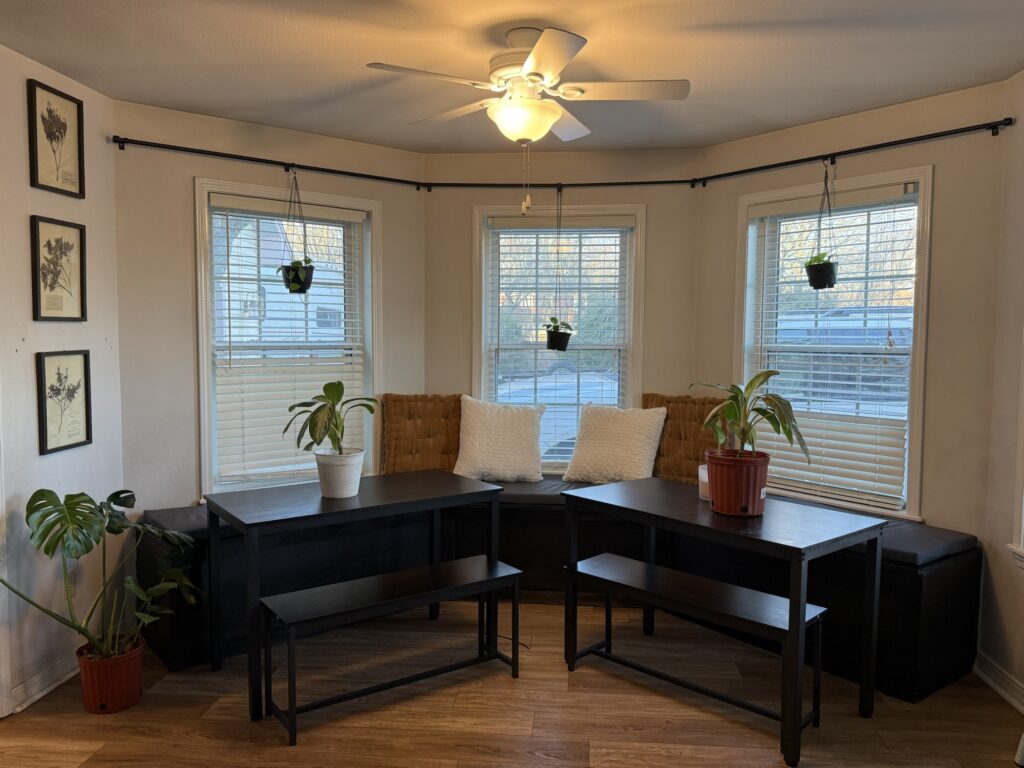
    The After

    The nook finally feels intentional.

    It feels lived-in.

    It feels like us.

    And Robert?

    He admits it was worth it.
    Just don’t tell him I knew that from the beginning.


    Yay! Our cushions came in today! Definitely my new reading spot.

    Materials & Tools Used

    I didn’t go into this with a hyper-detailed cut list or a rigid plan. This was a vision-first project, adjusted as we went. That said, here’s what we actually used to make it happen.

    Materials

    • 2×4 lumber (for bench framing)
    • ¾-inch plywood (for the bench seat tops)
    • Underlayment sheets (for the front and sides of the bench)
    • Wood screws (various lengths)
    • Pocket hole screws
    • Wood filler
    • Sandpaper (medium and fine grit)
    • Black wood stain
    • Clear protective finish (polyurethane or similar)

    Tools

    • Kreg Foreman (for pocket holes): click here.
    • Circular saw: click here
    • Drill / driver: click here
    • Stud finder (any will do).
    • Measuring tape
    • Level
    • Clamps (helpful but not mandatory)
    • Sander (or a lot of patience): Click here

    Helpful (But Optional)

    • Butcher paper (for mapping tricky cuts)
    • Pencil & marker for labeling pieces
    • A second person with muscles who looks delicious (highly recommended)

    This is absolutely a project you can do without fancy equipment, but having the right tools — especially for pocket holes and cutting plywood — makes it faster and cleaner.

  • Still Standing (and Still the Best Seat Outside of the House)

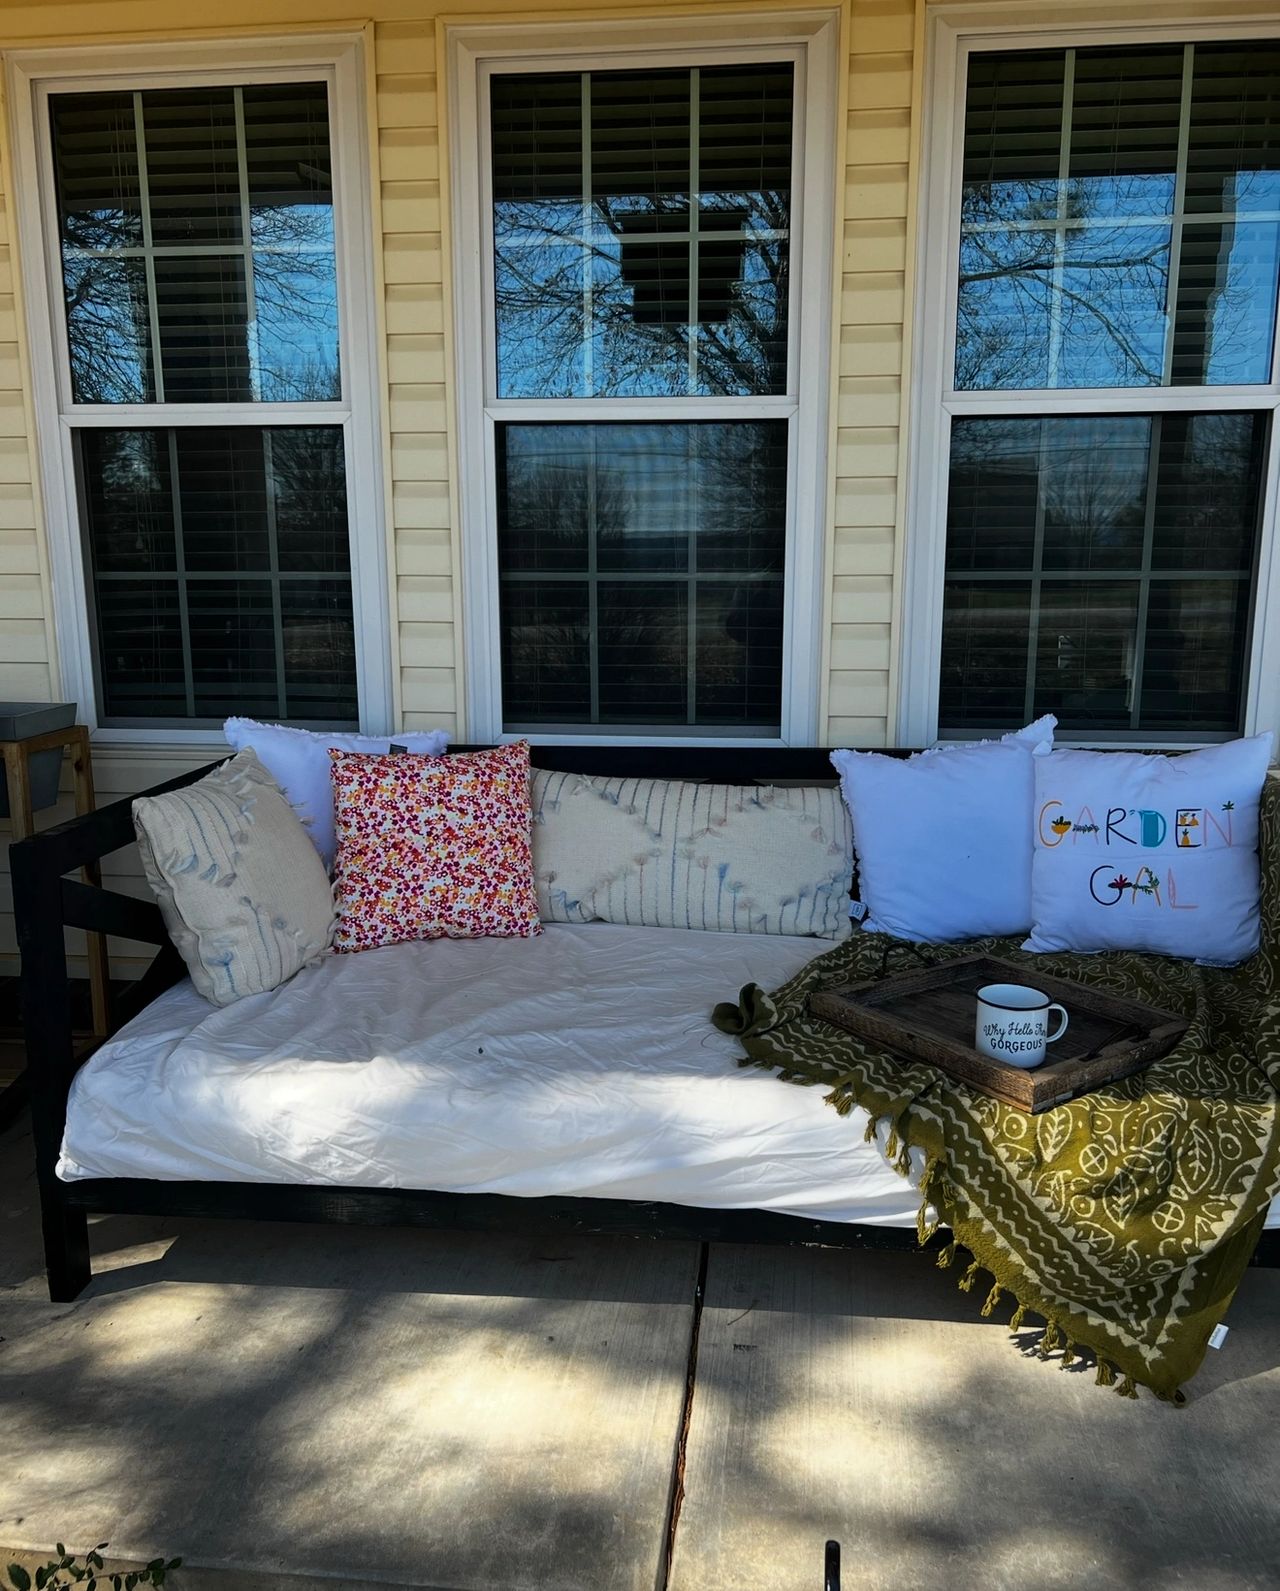
    This DIY outdoor wooden daybed bench cost under $50 to build—and two years later, it’s still my favorite spot to sit.

    June 20, 2025|Woodworking & DIY

    DIY Outdoor Wooden Daybed Bench

     How I built a $50 diy daybed: a cheap diy


    —Two Years Later, This DIY Daybed Hasn’t Moved an Inch—

    Two years ago,
    armed with 2x3s, grit, and a stubborn kind of joy,
    I built something that lasts.

    It started as a sketch—
    a nap-worthy daydream with sharp angles,
    cut corners, and a whole lot of screws.
    What it became?
    A resting place with backbone.
    A soft space with a story.

    I followed the tutorial from Lovely Etc.—simple, clean, and under $50 if you’ve got a stash of paint already whispering your name.

    Here’s what it took to make the thing that still holds me:

    🪵 Supplies:

    • (14) 2x3s @ 8 ft – framing lumber
    • (1) 2×4 @ 8 ft – framing lumber
    • (1) 2×2 @ 8 ft
    • 1/4″ plywood – cut to 36″ x 73″
    • 2.5″ Kreg screws and pocket hole plugs (or wood filler)
    • Nail gun (or hammer and finishing nails)
    • Exterior paint or stain + sealer (if outdoors)
    • Twin mattress

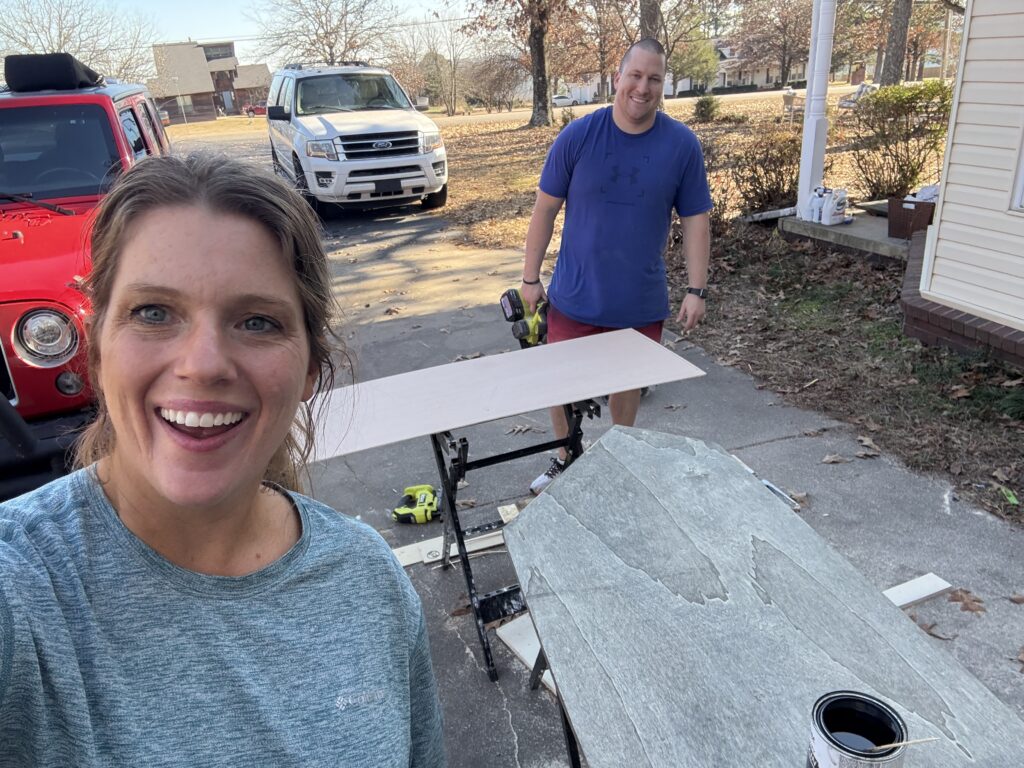
    🔧 Tools I used:

    • Miter saw (for angled cuts) Ryobi 
    • Kreg Jig (I used the smaller version—plenty strong) but I have since bought the larger and I love it.
    • Drill
    • Pencil + paintbrush
    • Optional: scrap wood slat supports (8.5″ tall = lifesavers)

    I built the frame in layers:
    two sides, a back, a platform.
    Cut clean lines. Sanded soft edges.
    I traced my confidence
    with each pull of the drill.

    Then came the moment—
    paint mixed from leftovers,
    applied with a brush that’s seen better days.
    But the result?
    Still beautiful.
    Still strong.

    Now, two years later,
    it’s more than furniture.
    It’s where I’ve sipped coffee,
    read too-late texts,
    and watched my kids climb up just to be near me.

    It hasn’t wobbled.
    Hasn’t chipped.
    Hasn’t let me down.

    So if you’re looking to build a place that holds more than just weight—
    build this.
    Even if you don’t think you know how.
    Especially then.

    Full tutorial and cut list:
    👉 How to Make a DIY Daybed for $50 – Lovely Etc.